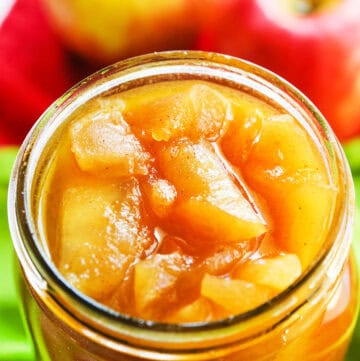
Instant Pot Apple Pie Filling
Make tender, cinnamon-spiced apple pie filling in your Instant Pot with fresh apples, apple cider, brown sugar and warm spices. One batch makes enough filling for an apple pie, or use it as a topping for pancakes, oatmeal, ice cream and other desserts.
Print
Pin
Servings: 8
Calories: 244kcal
Ingredients
- Juice of 1/2 lemon
- 6 medium apples peeled, cored and cut into 1/4-inch-thick slices (approximately 6 cups)
- 1 cup apple cider apple juice or water may be substituted
- 1/2 cup granulated sugar
- 1/2 cup light brown sugar
- 4 tbsp butter
- 1 tsp ground cinnamon
- 1/2 tsp ground nutmeg
- 1/2 tsp salt
Optional Thickener
- 2 tbsp cornstarch
- 2 tbsp cool water
Instructions
- Prepare the lemon water. Fill a large bowl halfway with cool water and squeeze in the juice from half a lemon.
- Prepare the apples. Peel, core and cut the apples into approximately 1/4-inch-thick slices. You should have approximately 6 cups. Place the apple slices in the lemon water as you work to prevent browning.
- Fill the Instant Pot. Drain the apples well and add them to the pot. Add the apple cider, granulated sugar, brown sugar, butter, cinnamon, nutmeg and salt. Stir gently to coat the apples and press them down into the pot.
- Pressure cook. Secure the lid and set the steam release valve to the sealing position. Cook on high pressure for 3 minutes. The Instant Pot will take approximately 17 minutes to build pressure before the cooking time begins.
- Release the pressure. When the cooking time is complete, carefully perform a quick release, keeping your face and hands away from the steam. Once the pressure has fully released, remove the lid.
- Thicken, if desired. For a thicker, more traditional apple pie filling, select the Sauté setting. Whisk together the cornstarch and cool water until completely smooth. Gently stir the slurry into the apples and simmer for 1 to 2 minutes, until the sauce thickens. Press Cancel. The filling will continue to thicken as it cools.
- Cool and use. Allow the filling to cool before adding it to a pie or another dessert. One batch makes enough filling for one apple pie, or 8 servings. Use it immediately, refrigerate it in an airtight container for up to 5 days or freeze it for up to 6 months.
Notes
- Choose a combination of apples. For the best balance of flavor and texture, use both sweet and tart apples. My favorite combination is 3 Honeycrisp and 3 Granny Smith apples.
- For thicker pie filling: The apples will be surrounded by a generous amount of buttery cider sauce after pressure cooking. Add the optional cornstarch slurry for a thicker, more traditional apple pie filling. The sauce will continue to thicken as it cools.
- Apple cider substitutes: Apple juice can be substituted in equal amounts. Water will also work, but the finished filling will have a milder apple flavor.
- Storage: Refrigerate the cooled filling in an airtight container for up to 5 days. To freeze, transfer it to a freezer-safe container or resealable bag and freeze for up to 6 months. Thaw overnight in the refrigerator.
- Yield: One batch makes enough filling for one apple pie, or approximately 8 servings.Use firm apples and perform the quick release as soon as the 3-minute cooking time ends. Softer varieties or additional time under pressure can cause the apples to become mushy.
Nutrition
Calories: 244kcal | Carbohydrates: 50g | Protein: 0.5g | Fat: 6g | Saturated Fat: 4g | Polyunsaturated Fat: 0.3g | Monounsaturated Fat: 1g | Trans Fat: 0.2g | Cholesterol: 15mg | Sodium: 197mg | Potassium: 198mg | Fiber: 4g | Sugar: 43g | Vitamin A: 250IU | Vitamin C: 7mg | Calcium: 27mg | Iron: 0.3mg
Did you make this recipe?If you loved this recipe, please rate the recipe and leave a comment below!