

Two of my favorite things in a single dessert: cookies & cream and fudge! This whipping cream fudge is super easy to make and a great treat to bring to holiday parties!
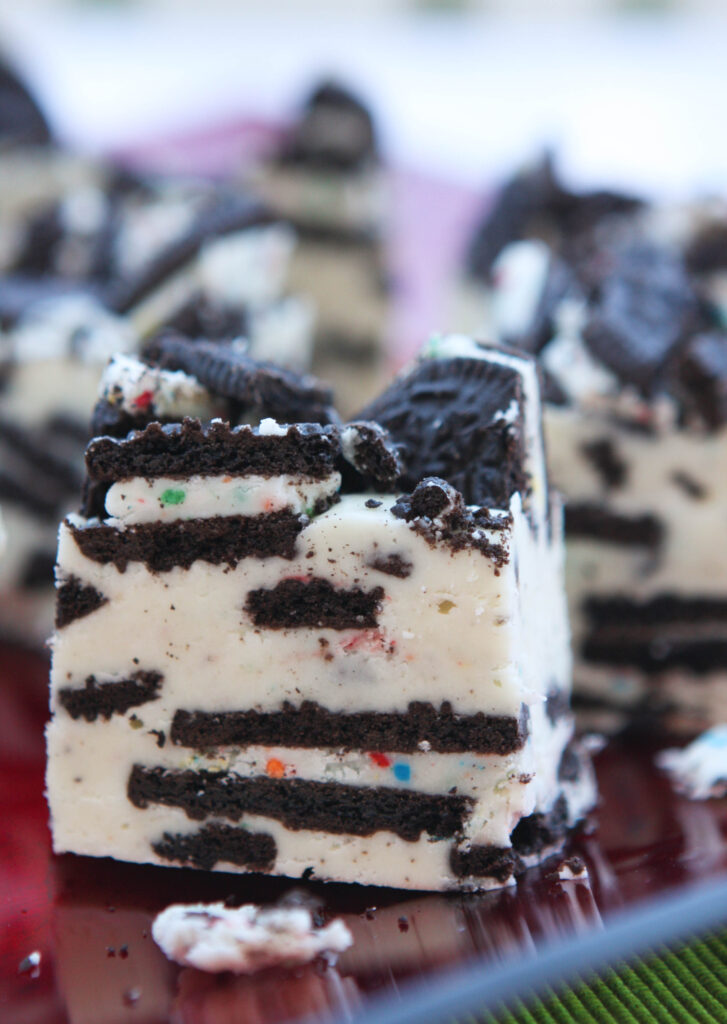
You now officially have the recipe for the BEST FUDGE EVER. Can sinful and heavenly be used in the same sentence? You absolutely when talking about whipping cream fudge and then throwing cookies and cream into the mix! You must put this recipe on your holiday baking list. Except, please don’t bake it and leave me a nasty comment because it turned into an inedible brick of sugar.
ONTO THE RECIPE!
How To Make Whipping Cream Fudge
Step 1
Line an 8×8-inch pan with aluminum foil, making sure there is overhang on at least two sides. Smooth out the wrinkles on the bottoms and sides with your hands. Coat the foil generously with PAM Cooking Spray. Set the pan aside.
One of the most enjoyable parts of making this recipe was choosing a festive package of Oreo cookies (15.25 oz.). Have you seen the plethora of filling options that are available these days? I chose the Birthday Cake variety and it was a solid choice. Any of them will work well, I am confident.
Step 2
Coarsely chop the entire package and set the irresistable pieces of cookie aside.
Step 3
In a medium saucepan, combine:
1 stick salted butter
2 cups granulated sugar
1 cup heavy whipping cream
Place the pan over medium-high heat and bring to a boil, stirring so the mixture is smooth and does not burn. Boil for 4 minutes, stirring constantly, and remove the pan from the heat.
Step 4
Add:
7-oz. container marshmallow creme
11-oz. bag white chocolate chips
1 teaspoon almond extract
Stir until the mixture is smooth.
Fold in 2/3 of the chopped cookies (you will need the other 1/3 in a bit, so don’t eat them!).
Step 5
Pour the mixture into the prepared pan and top with the remaining cookie pieces.
Place the pan in the refrigerator and chill for 4 to 6 hours, or until the fudge is completely set.
Step 6
Holding onto the foil, remove the block of fudge from the pan and place it onto a flat surface. The foil will easily peel off the fudge on the sides and bottom! I was able to immediately place the pan back into my cupboard, as there was not a bit of food on it!
Place the fudge onto a cutting board and cut into 1-inch squares. Store in a sealed container in the refrigerator.
See? BEST FUDGE EVER. You’re welcome!
Cookies and Cream Fudge
Ingredients
- 1 stick salted butter
- 2 cups granulated sugar
- 1 cup heavy whipping cream
- 11 oz white chocolate chips
- 7 oz marshmallow creme
- 1 tsp almond extract
- 15.25 oz Oreo cookies coarsely chopped
Instructions
- Line a square 8×8-inch pan with aluminum foil, making sure there is overhang on two sides. Smooth out the wrinkles on the bottoms and sides. Coat generously with PAM cooking spray and set aside. In a medium saucepan, combine the butter, sugar and heavy cream. Place over medium-high heat and bring to a boil, stirring so the mixture is smooth. Boil for 4 minutes, stirring constantly, and remove from the heat.
- Add the marshmallow crème and almond extract and stir until smooth. Add the almond extract and mix well. Fold in 2/3 of the chopped cookies. Pour the mixture into the prepared pan and top with the remaining cookies. Place the pan in the refrigerator for 4 to 6 hours, or until fudge is completely set.
- Holding onto the foil, remove the fudge from the pan and place onto a flat surface. Peel the foil from the fudge and place fudge onto a cutting board. Cut into 1-inch pieces. Store in an air-tight container in the refrigerator.
-https://twitter.com/tcarolinep/status/409565407582769152
For boiling milk, first stir in a pinch of baking soda. It will help keep the milk from curdling.
Another tip I find helpful is to always Rinse my plastic or glass measuring cups or spoons in Hot water before I pour any type of oil or syrup in them. This makes sure that all of it pours into your recipe and leaves the measuring cup clean.
It is very easy to make your own colored sugar or coconut for decorating cookies, cakes or other holiday treats. Simply put a small amount of sugar (or coconut) in several glass jars. Add a few drops of food coloring and shake until color is even. This tip makes baking cheaper, more fun, and ensures you will always have the ingredients on hand.
I always use a marble slab to pour my hot toffee onto. Helps it cool quickly.
I always use a marble slab when making English Toffee. Helps to cool the toffee.
My tip is If you run out of Brown Sugar, mix 1 cup granulated sugar to 1 Tablespoon of molasses. Another one I always use unsalted butter, to help with family members on a salt free diet, there usually is salt added to the recipe, but cutting a bit back by using the unsalted butter.
My best holiday baking tip is to make things ahead of time and freeze them.
Put the cookie dough in the fridge to let it cool down before cooking it
Put the cookie dough in the fridge to let it cool down before cooking it
My favourite my cooking tip is to have a couple of tins of water in the oven when baking a cheesecake. It stops it from cracking!
Tweeted
https://twitter.com/mummytotwoboys1/status/408694722757017600
My short cut is making cookies in advance and then freezing them, I also tend to do that with scones, fruit pies and pound cakes as well! I also admit sometimes when I am short on time to using ready made frosting.
tweet. https://twitter.com/1amypugmire/status/408386353122922497
clean up and put ingredients away as you go. I can't tell you how many times I have forgotten if I have added something already or not… also if you wait to clean up to the end it gets pretty overwhelming so i like to clean up as I go.
I almost always wait for my grandson so we have quality time together while we bake. He is always so proud of what we have made.
Oh man, I don't even know. I guess my favorite is using floss to cut cake. I've seriously mangled a bunch of cakes before I found out about this.
Peeled vegetables will last a few days in the fridge, so you don't have to use them immediately.
tweet
https://twitter.com/MeandBells/status/408264938759544832
my tip is to get your husbandat to help, OR your kids, and if you can't do that- split it out into two different days it helps!