

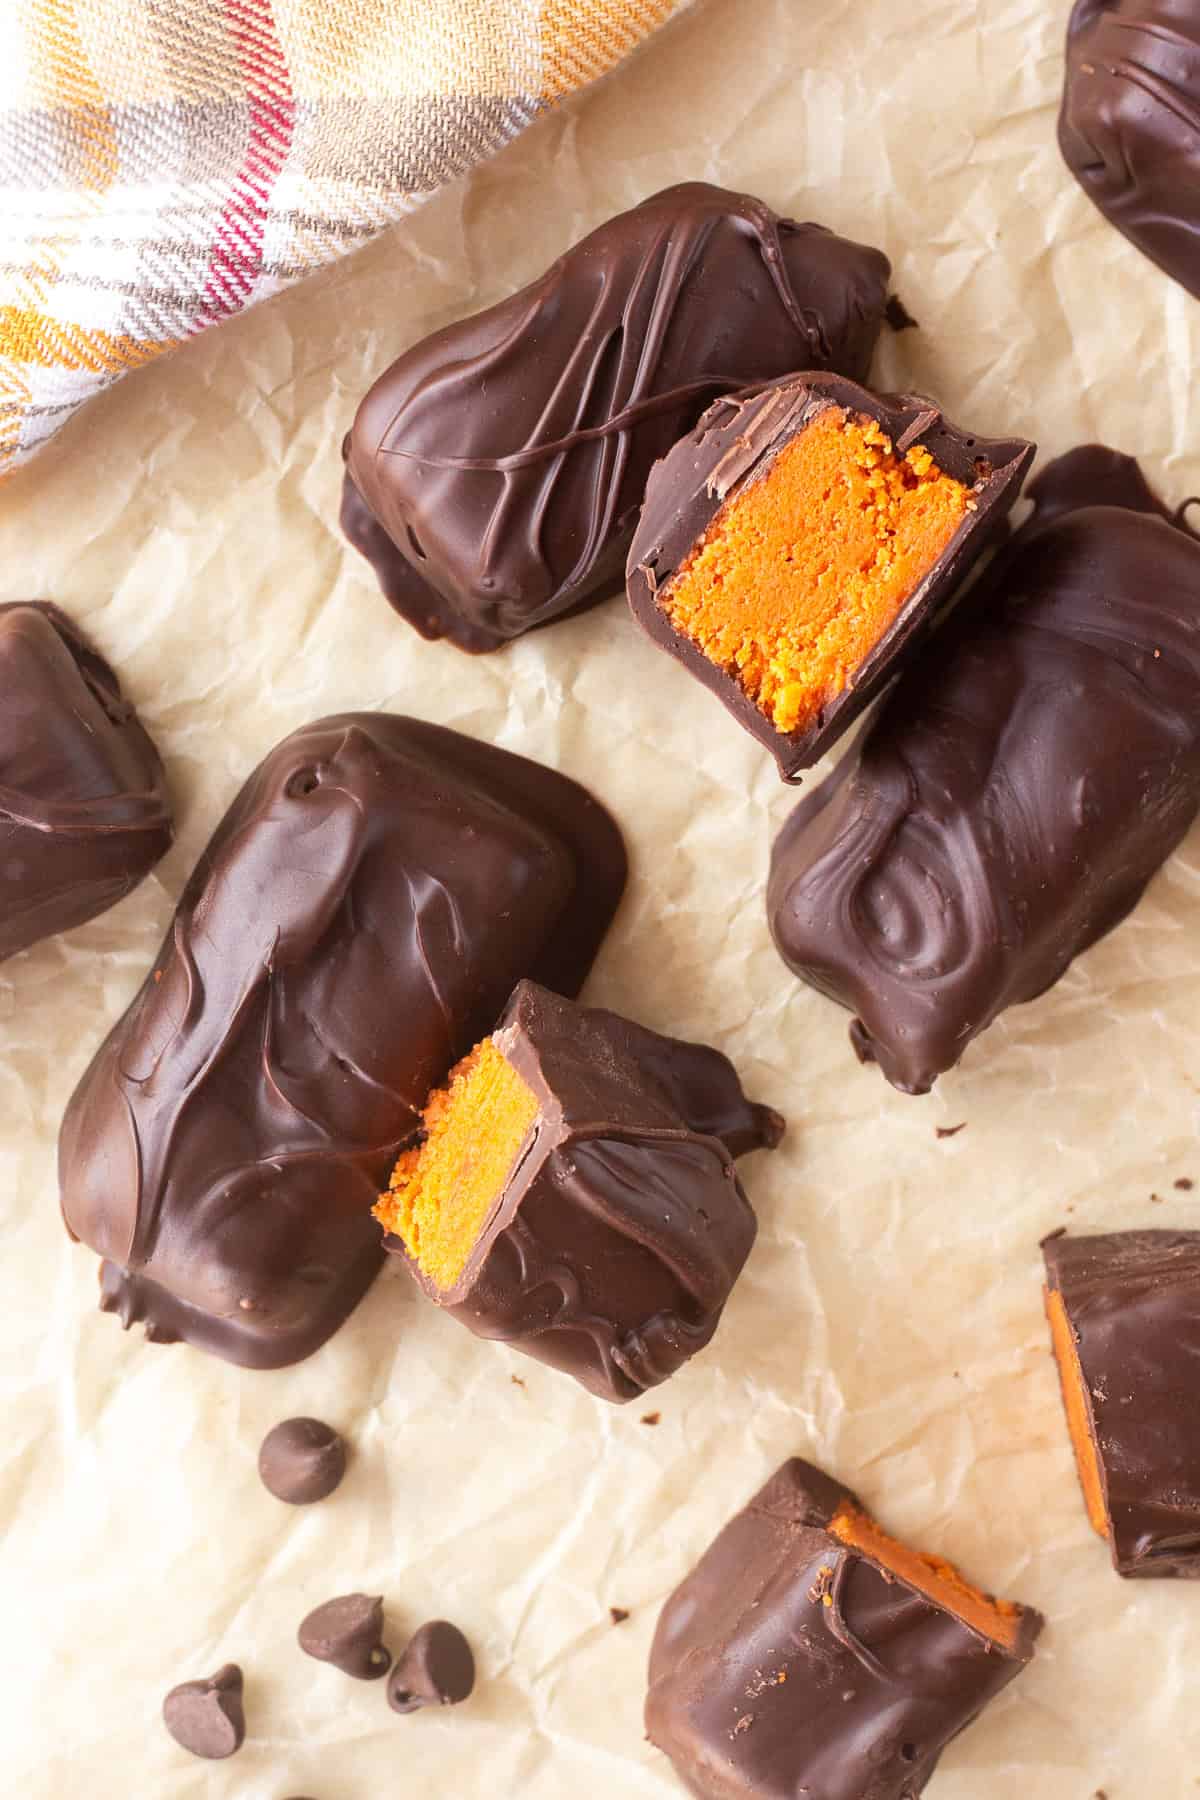
These Homemade Butterfingers are made with just three ingredients: candy corn, creamy peanut butter and milk chocolate. This easy copycat recipe delivers that familiar chocolate-peanut butter flavor without a candy thermometer or complicated candy-making steps.
As a lifelong Halloween and candy fanatic, I consider myself something of a Butterfinger expert. They’ve always been one of my favorite candy bars, so if I was going to make a homemade version, I knew I had to get it right!
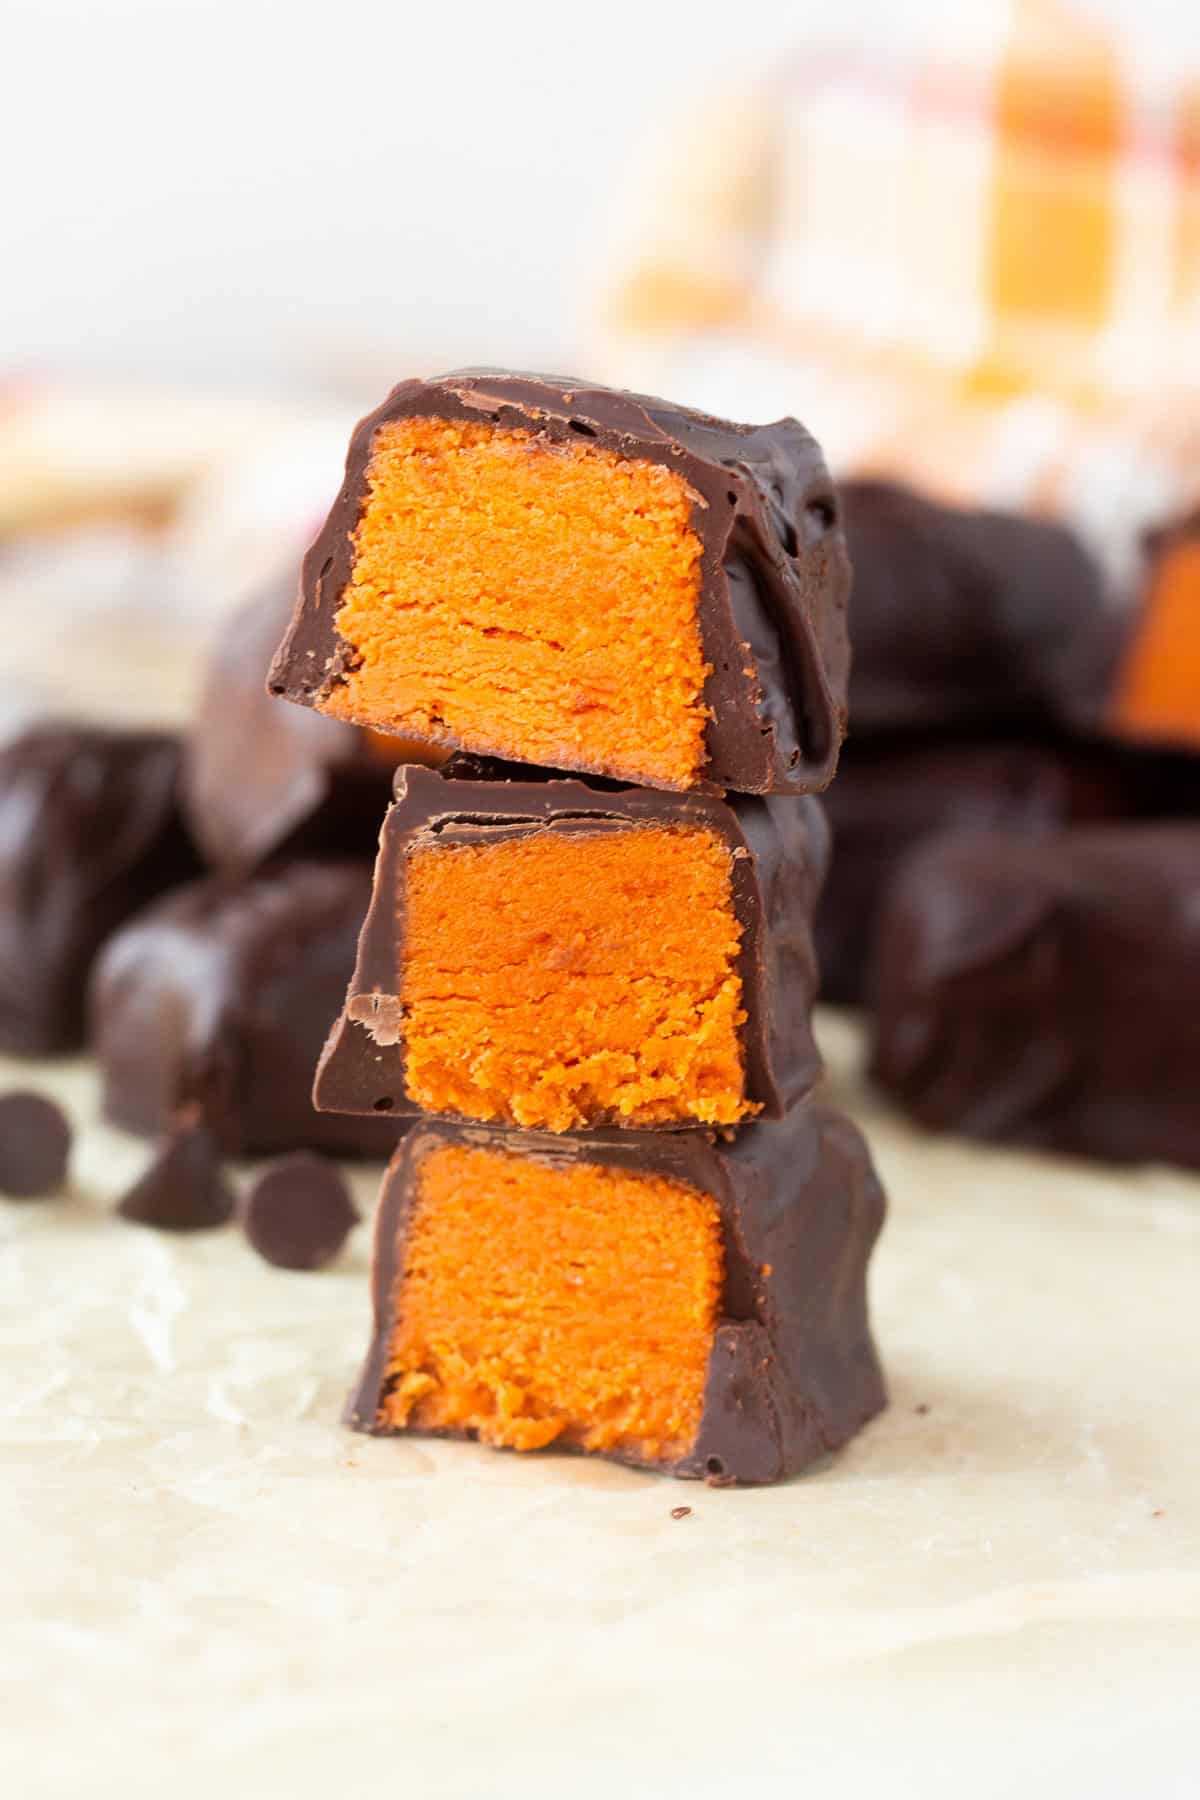
Candy corn is the surprising secret to the center. It melts together with peanut butter to create a dense, crisp-chewy filling that tastes remarkably similar to a classic Butterfinger, although it isn’t quite as light and flaky.
Dip the pieces in melted chocolate for an easy homemade candy that’s perfect for Halloween or using up leftover candy corn.
Why This Recipe Works
I’ve always been a serious candy lover. Rolos, Starburst, Dots, Twix and Butterfingers have all taken turns at the top of my list. I claim it’s in my genes because my dad loves candy even more than I do!
These homemade Butterfinger bars are one of my favorite candy experiments because such a short ingredient list creates a surprisingly familiar flavor.
- Only three ingredients. Candy corn, creamy peanut butter and milk chocolate are all you need.
- No candy thermometer required. The filling comes together in the microwave using simple, beginner-friendly steps.
- Minimal hands-on time. The candy needs time to cool and set, but the actual prep is quick.
- Perfect for candy corn season. Make a batch for Halloween or use up extra candy corn afterward. Serve them alongside my Halloween Snack Mix for an easy party spread.
- Easy to customize. Cut the filling into snack-size bars, bite-size candies or fun Halloween shapes.
- A fun homemade version of a favorite candy bar. The filling is denser and slightly chewier than a store-bought Butterfinger, but it delivers the chocolate and peanut butter flavor you’re craving.
Ingredients for Homemade Butterfingers
You need only three simple ingredients to make homemade Butterfinger bars. Candy corn may sound surprising, but when melted with peanut butter, it creates the sweet, crisp-chewy center.
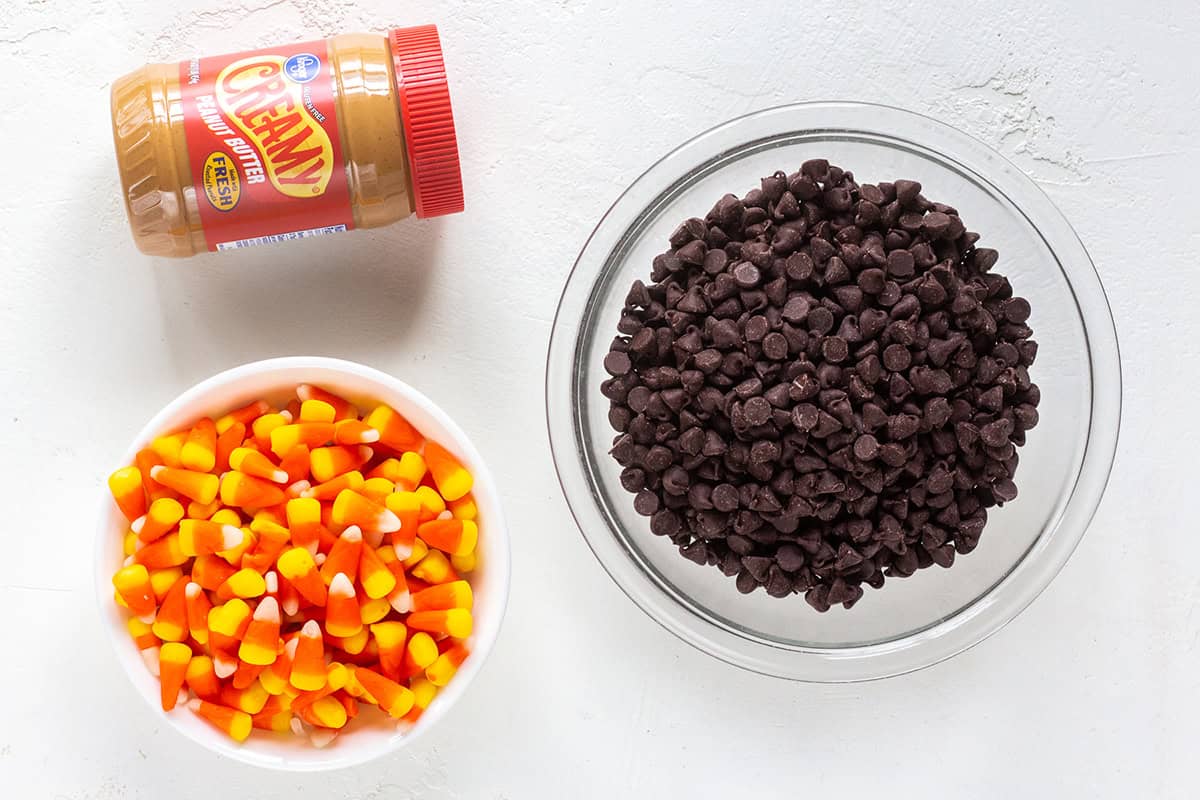
- Candy corn – Use fresh, soft candy corn for the best texture. Candy corn that is old or dried out may create a harder filling. This is a great way to use up leftover Halloween candy!
If you have more to use up, try my Candy Corn Cake next! - Peanut butter – Use conventional creamy peanut butter, such as Jif or Skippy, for the smoothest, most reliable filling. Natural peanut butter can separate and may change the texture.
- Chocolate – Milk chocolate creates the flavor most similar to a classic Butterfinger. Semisweet or dark chocolate will also work if you prefer a less-sweet coating. Chocolate melting wafers or almond bark are good options for especially easy dipping.
What Is in a Butterfinger?
A traditional Butterfinger candy bar has a crisp, layered peanut butter center made primarily with corn syrup, sugar and roasted peanuts, surrounded by a chocolatey coating.
These homemade Butterfingers are a simplified copycat made with candy corn, creamy peanut butter and milk chocolate. They deliver a similar chocolate-peanut butter flavor, but the center is denser and chewier rather than light and flaky.
How To Make Homemade Butterfingers
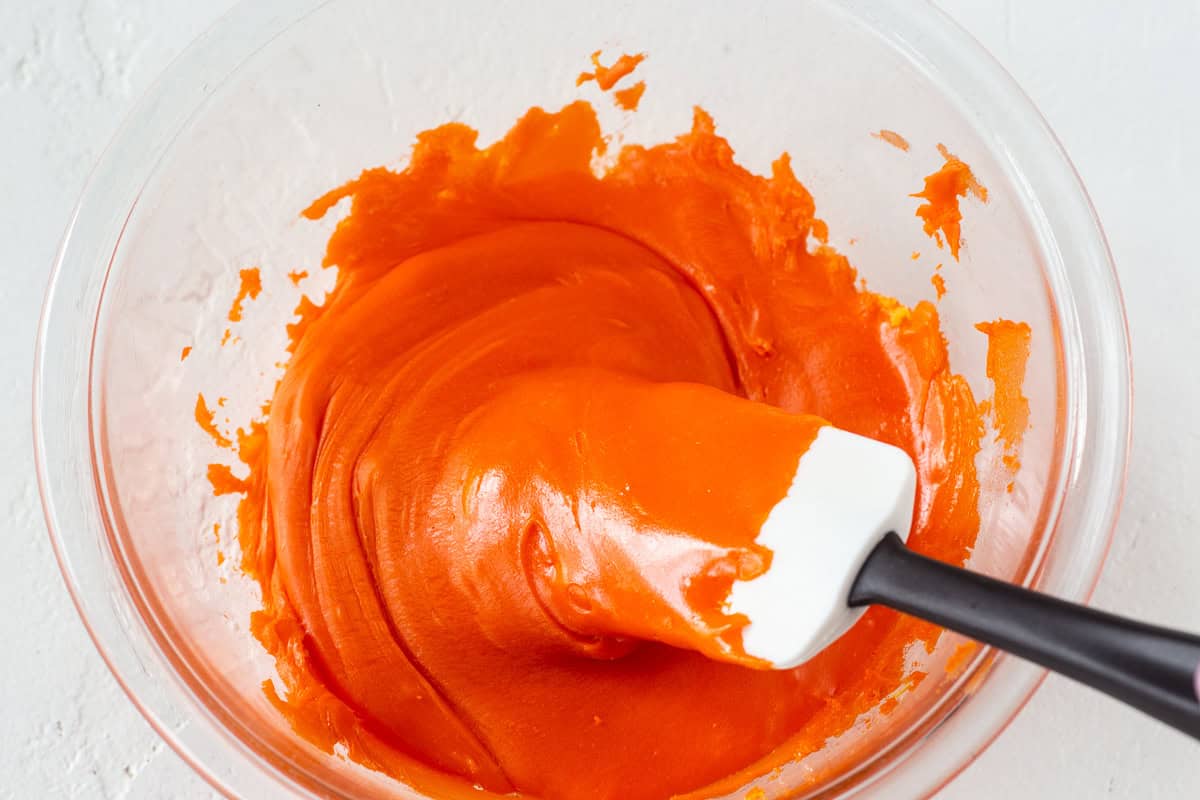
- Melt the candy corn. Place the candy corn in a microwave-safe bowl. Microwave for 45 seconds, stir well, then continue heating in 15- to 20-second intervals until it can be stirred smooth. Avoid overheating, which can make the finished centers too hard.
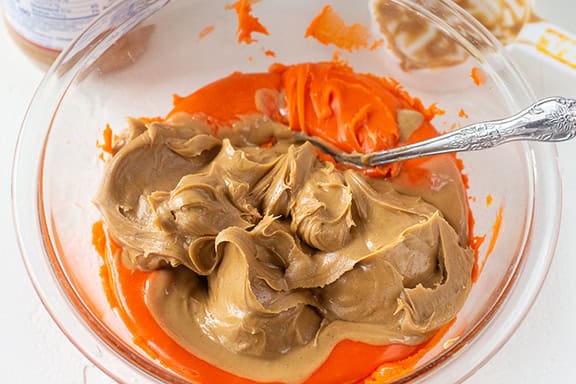
- Add the peanut butter. Immediately stir the creamy peanut butter into the hot candy corn until fully combined. If needed, microwave the mixture for another 10 to 15 seconds to make it easier to stir.
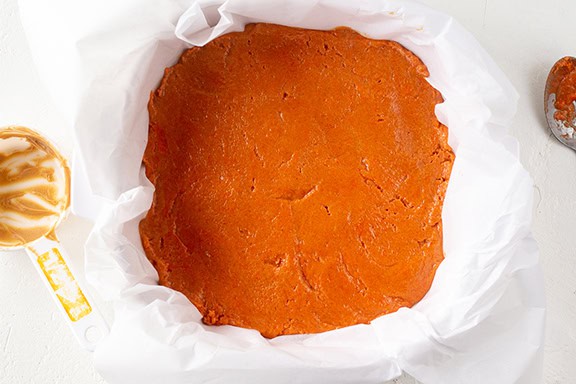
- Let the filling set. Spread the mixture evenly in a parchment-lined 8×8-inch baking dish. Let it cool completely at room temperature, about 1 1/2 hours.
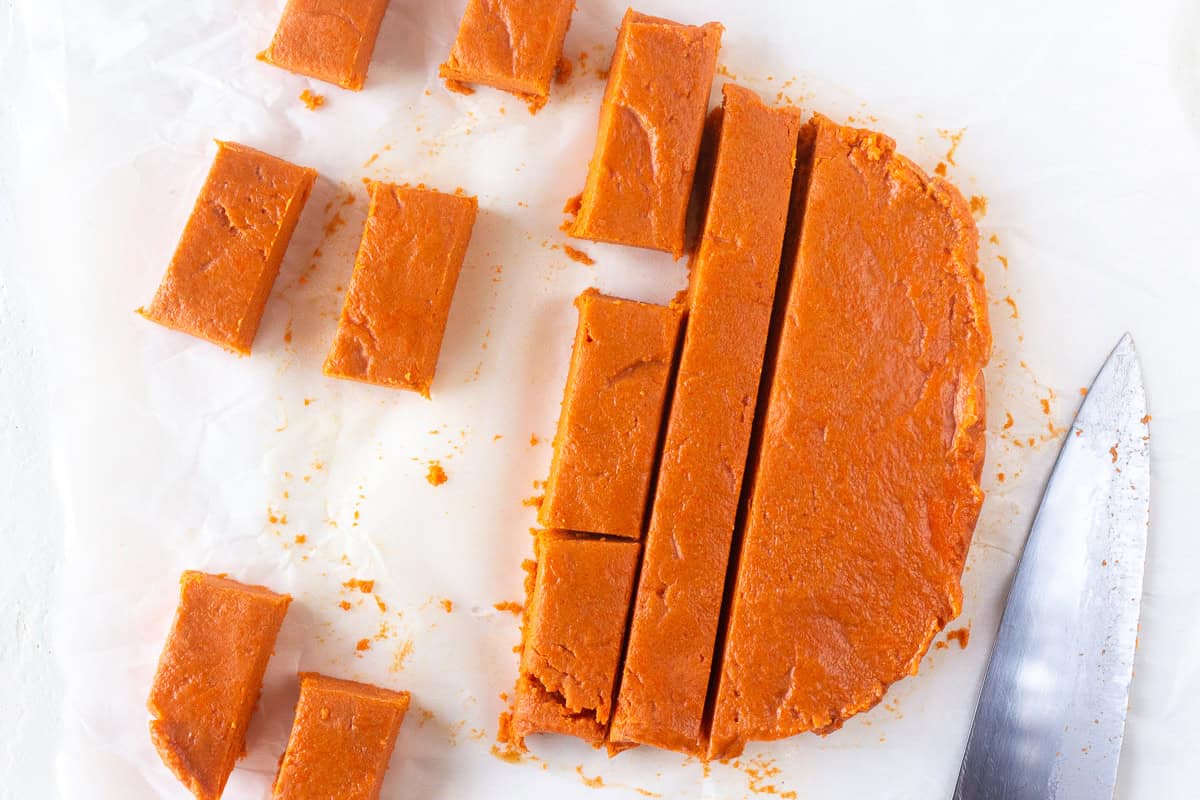
- Cut into bars. Lift the filling from the pan using the parchment paper. With a sharp knife, cut it into approximately 2×1-inch bars. Gently brush away loose crumbs so the chocolate coating goes on smoothly.
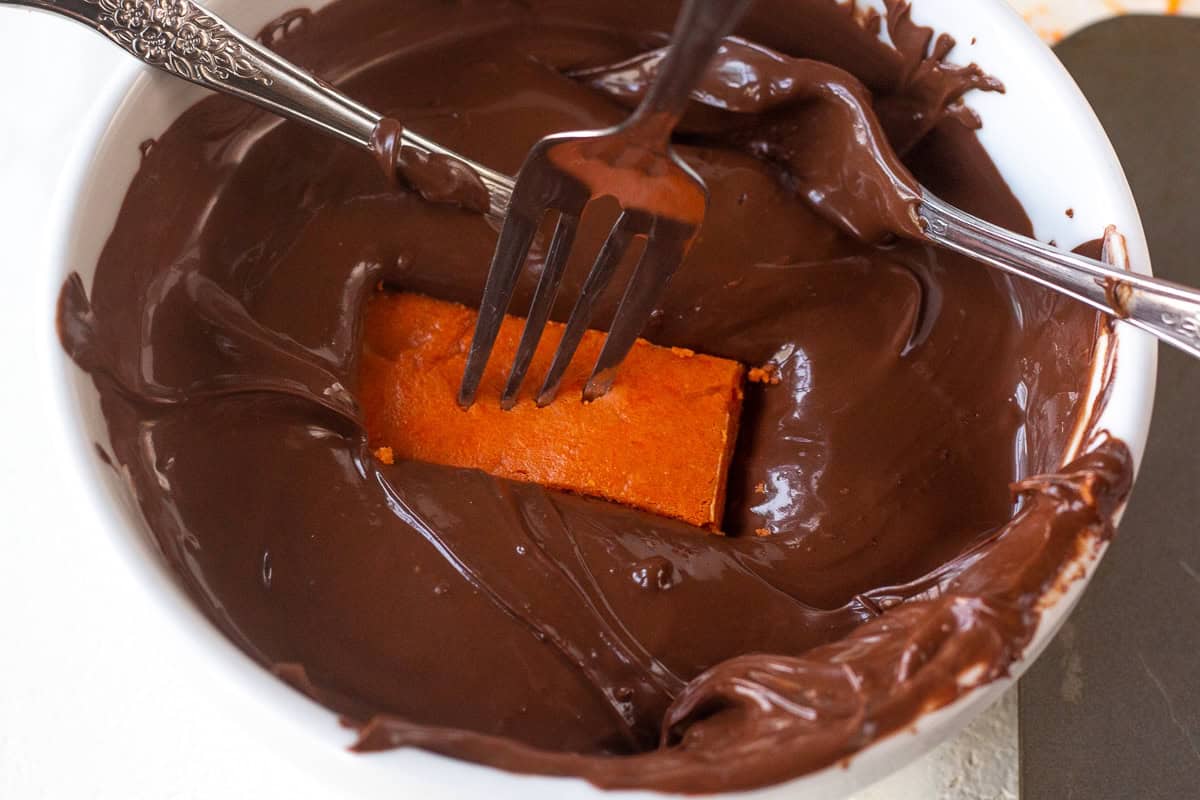
- Melt the chocolate. Place the chocolate in a microwave-safe bowl. Microwave for 30 seconds, stir, then continue heating in 15- to 20-second intervals until completely smooth.
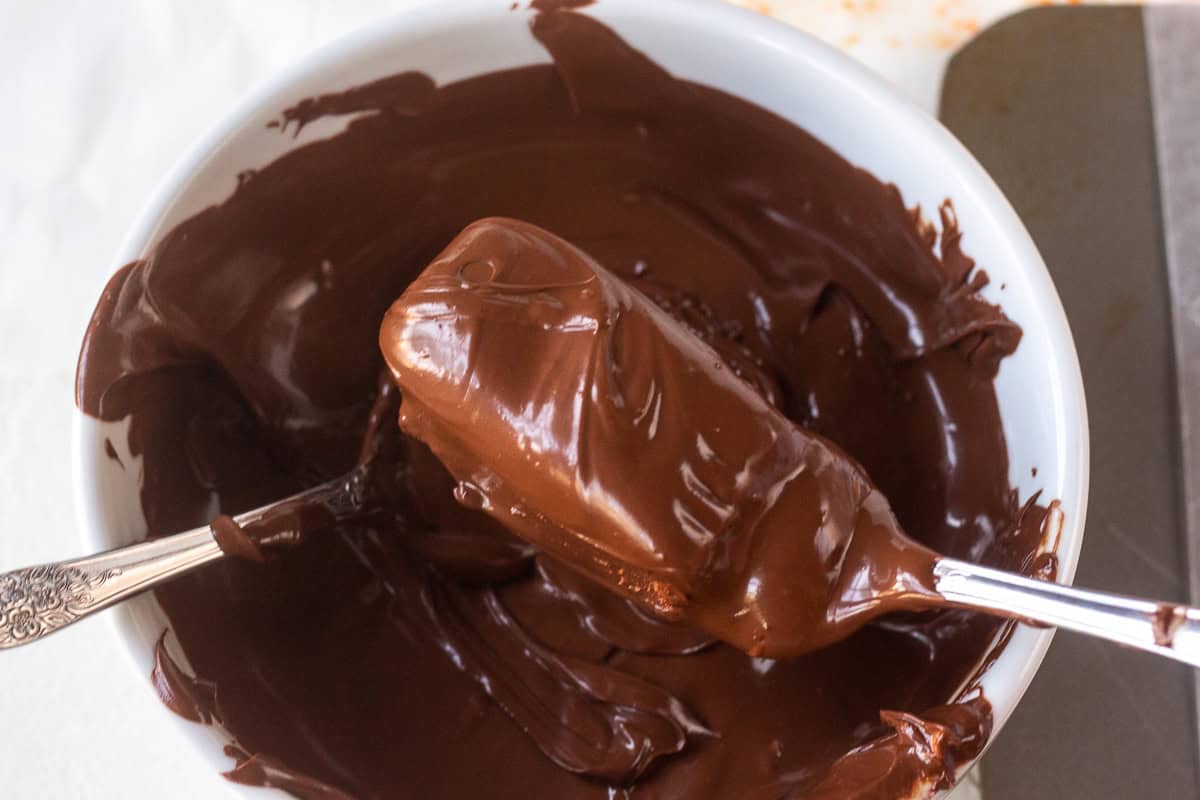
- Dip the Butterfingers. Use a fork to lower each piece into the melted chocolate, turning it to coat all sides. Allow the excess chocolate to drip back into the bowl, then transfer the candy to a parchment-lined baking sheet.
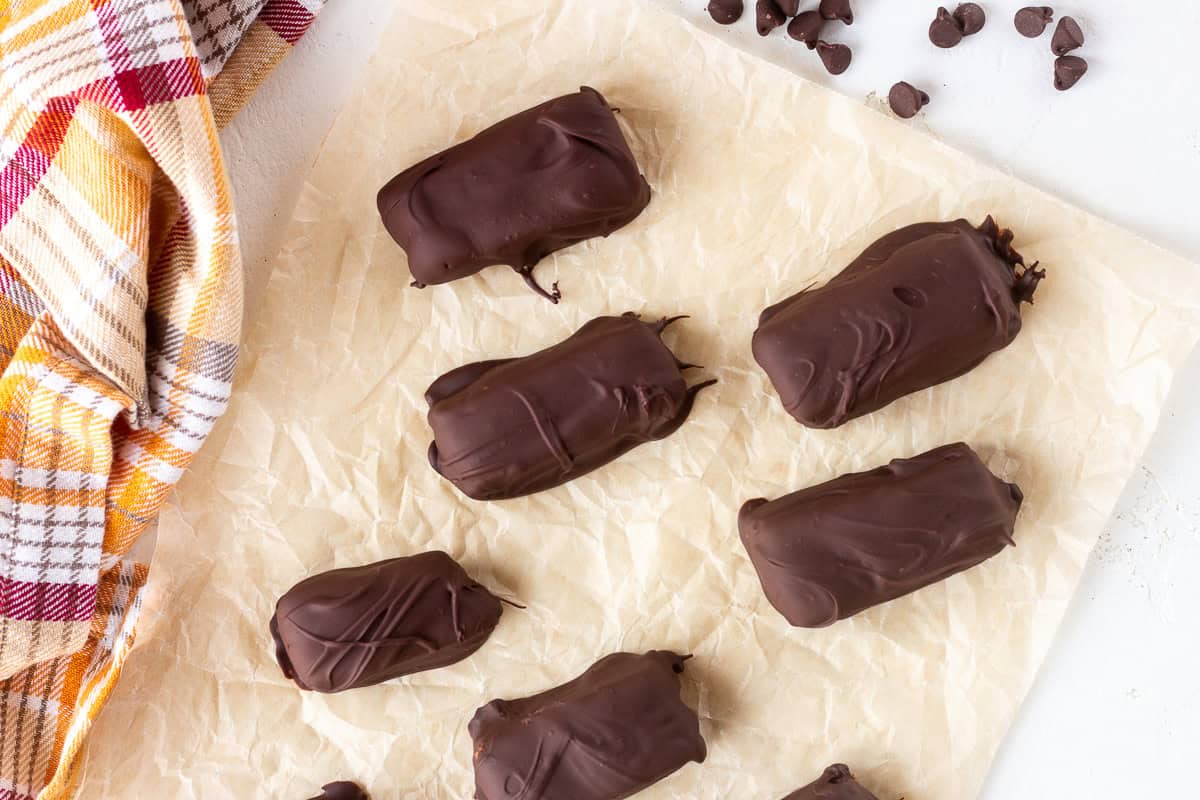
- Chill until set. Refrigerate the homemade Butterfingers for at least 30 minutes, or until the chocolate coating is firm.
How To Keep Homemade Butterfingers From Getting Too Hard
The key to a crisp-chewy center is melting the candy corn gently. Microwave it in short intervals, stirring thoroughly each time, and stop heating as soon as it can be stirred smooth. Overheated candy corn can produce Butterfingers that are extremely hard or difficult to bite.
After making these dozens of times, I’ve found that using fresh candy corn and heating it gently make the biggest difference in the finished texture.
For the best texture:
- Use fresh, soft candy corn rather than an older or dried-out bag.
- Stir the peanut butter into the melted candy corn immediately.
- Let the filling set at room temperature rather than refrigerating it before cutting.
- Cut the filling as soon as it has cooled and become firm enough to handle.
- Let refrigerated Butterfingers sit at room temperature for a few minutes before eating.
Recipe Notes
- Make dipping easier. Corn-on-the-cob skewers or sturdy toothpicks work well for holding the candy pieces while dipping them in chocolate. A fork also works, especially if the centers begin to crack.
- Add extra crunch. Stir 1/2 cup of lightly crushed cornflakes or crispy rice cereal into the warm filling before spreading it in the pan. This creates a crunchier center, although the texture will be less like a classic Butterfinger.
- Try crunchy peanut butter. Replace the creamy peanut butter with conventional crunchy peanut butter for additional peanut pieces and texture.
- Choose your preferred size. Cut the filling into approximately 2×1-inch bars for a fun-size treat or into 1-inch squares for bite-size candies. Smaller pieces are generally easier to dip in chocolate.
Can You Make Homemade Butterfingers Without Candy Corn?
Candy corn is essential to this specific three-ingredient homemade Butterfinger recipe. It provides the sugar structure needed to create the firm, crisp-chewy peanut butter center.
I have not tested a candy corn substitute that produces the same reliable result, so I don’t recommend replacing it with maple syrup or honey. For the intended flavor and texture, use fresh, soft candy corn.
How To Store Homemade Butterfingers
Store homemade Butterfingers in an airtight container at room temperature for up to 5 days. Place parchment paper between layers to prevent the chocolate-coated bars from sticking together.
For a firmer, harder center, refrigerate the candy in an airtight container. Let chilled Butterfingers sit at room temperature for a few minutes before eating if you prefer a slightly softer, chewier texture.
Frequently Asked Questions
Why are my homemade Butterfingers so hard?
The candy corn was likely overheated or already somewhat dry. Use fresh candy corn, heat it only until smooth and avoid refrigerating the filling before cutting it. Chilled Butterfingers also become firmer, so let them sit briefly at room temperature before eating.
Do homemade Butterfingers taste like the original?
These homemade Butterfingers have the familiar combination of peanut butter, chocolate and crisp candy-bar sweetness. The center is denser and chewier than the light, flaky layers inside a store-bought Butterfinger, so they are similar but not identical.
Can I use natural peanut butter?
Conventional creamy peanut butter, such as Jif or Skippy, produces the most reliable filling. Natural peanut butter can separate and may make the center oily or affect how firmly it sets.
Can I use candy melts instead of chocolate chips?
Yes. Chocolate melting wafers or almond bark create a smooth coating that sets quickly and makes dipping especially easy. Milk chocolate chips will produce a flavor that is closer to the original candy bar.
Why is my chocolate coating too thick?
Chocolate can become thick if it is overheated or comes into contact with water. Microwave it in short intervals, stirring frequently. If necessary, stir in a very small amount of refined coconut oil or shortening until it reaches a smoother dipping consistency.
Can homemade Butterfingers be frozen?
Yes, homemade Butterfingers freeze well. Place them in an airtight freezer-safe container with parchment paper between the layers and freeze for up to 3 months. Thaw them in the refrigerator or at room temperature before serving.
More Halloween Candy Recipes
If you have leftover candy corn or simply love making over-the-top Halloween treats, try one of these next:
Find more spooky, sweet ideas in my collection of Halloween recipes.
Will you help add value to Pip and Ebby?
If you make this recipe and love it, stop back and give it a 5-star rating ⭐️⭐️⭐️⭐️⭐️ and leave a comment. THANK YOU!
Homemade Butterfingers
Ingredients
- 2 1/2 cups candy corn
- 1 1/2 cups creamy peanut butter such as Jif or Skippy
- 24 oz milk chocolate chips
Instructions
- Line an 8×8-inch baking dish with parchment paper, leaving enough overhang to lift the filling from the pan later.
- Place the candy corn in a large microwave-safe bowl. Microwave on high for 1 minute, then stir thoroughly. Continue microwaving in 15- to 20-second intervals, stirring after each one, just until the candy corn can be stirred smooth. Avoid overheating.
- Immediately add the peanut butter to the melted candy corn. Stir until completely combined and smooth. If the mixture becomes too stiff to stir, microwave it for an additional 10 to 15 seconds.
- Transfer the filling to the prepared baking dish and spread it into an even layer. Let it cool and set at room temperature for approximately 1 1/2 hours.
- Use the parchment paper to lift the filling from the pan. Cut it into approximately 2×1-inch bars with a sharp knife. Gently brush away any loose crumbs.
- Place the chocolate chips in a microwave-safe bowl. Microwave for 30 seconds and stir. Continue heating in 15- to 20-second intervals, stirring after each one, until the chocolate is smooth.
- Using a fork, skewer or sturdy toothpick, lower each piece into the melted chocolate and turn to coat completely. Allow the excess chocolate to drip back into the bowl.
- Transfer the coated candies to a parchment-lined baking sheet. Refrigerate for at least 30 minutes, or until the chocolate is completely set.
- Store in an airtight container at room temperature for up to 5 days, or freeze for up to 3 months.
Notes
- Avoid overly hard centers. Use fresh, soft candy corn and stop microwaving as soon as it can be stirred smooth. Overheating the candy corn can produce extremely hard or difficult-to-bite centers.
- Use conventional peanut butter. A creamy peanut butter such as Jif or Skippy creates the most reliable filling. Natural peanut butter can separate and alter the texture.
- Make dipping easier. Corn-on-the-cob skewers or sturdy toothpicks work well for holding the candy pieces. A fork may work better if the filling begins to crack.
- Add extra crunch. Stir 1/2 cup lightly crushed cornflakes or crispy rice cereal into the warm filling before spreading it in the pan. The result will be crunchier but less similar to a classic Butterfinger.
- Try crunchy peanut butter. Conventional crunchy peanut butter may be substituted for creamy peanut butter for additional texture.
- Change the size. Cut the filling into approximately 2×1-inch bars or 1-inch squares. Smaller pieces are generally easier to coat.
- Storage: Keep the candies in an airtight container at room temperature for up to 5 days, with parchment between the layers. Refrigeration creates a firmer center; let chilled candies sit at room temperature briefly before eating.
- Freezing: Freeze in an airtight freezer-safe container with parchment between the layers for up to 3 months. Thaw in the refrigerator or at room temperature.Avoid overly hard centers. Use fresh, soft candy corn and heat it only until it can be stirred smooth. Overheating the candy corn can make the centers extremely hard and difficult to bite.
Nutrition

Megan Porta is a comfort food recipe creator who specializes in easy family meals and Instant Pot desserts, and the founder of Pip and Ebby. She has been cooking for three decades and developing recipes for over fifteen years, helping home cooks make reliable, cozy recipes for real life.
I do not think these taste identical to butterfingers, but they are very good and very close. I am not a big candy corn fan, at least I wasn’t until now. These made me a believer. Now I will stock up at Thanksgiving time and make these for family at Xmas. Thanks for a very easy and delicious.
Thank you for your feedback, Lynda. So glad you enjoyed them!
I’ve heard a lot of people say that it is too hard to bite sometimes. Do you know what might happen if you whipped it before pouring onto parchment paper? Butterfingers seem to have little air layers in them. They’re crunchy but make little slivers like when broken off, like they were aerated.
I’ve made these several times and they do harden but I don’t think it’d be possible to whip them, but I’ve never tried. So if you do that, please let me know how it turned out! I didn’t feel they were too hard to bite into and my kids didn’t either, probably the peanut butter helping them to stay softer.
I made this and it came out really hard. What did I do wrong
Hi Barbara! You could have possibly microwaved the candy corn for too long? This could definitely be a culprit. I hope you’ll try again! Microwave in 15-second intervals next time, making sure to stir after each, and stopping when creamy. I hope this helps!
Megan
I just made these and they are so tough you can’t get your teeth into them! Did anyone else have this happen to them? They are so difficult to chew you could definitely pull out a filling!! I didn’t end up covering them in chocolate once I realized the filling was too difficult to chew. ?
Oh no, Fran! I’ve never had this problem! Were your candy corn fresh? If you had hard candy corn, I can see where these might get a bit tough. So sorry they didn’t turn out….but definitely try again because they are so worth it!
Megan
When I try to melt the candy corn it hardens on the sides and sticks to the bowl. If feel like I leave a lot in the bowl. Does anyone else have issues melting the candy corn?
Hi Mary! Did you melt the candy corn in short increments? If your increments are too long I can see where they might stick. Try 20 seconds at a time. I hope this helps!
Megan
Why can’t I print off the recipe? Would love to try them.
Hi Jimmie! I’m so sorry about this. This has been one of my major hiccups after updating my website. I’m working to get it fixed! In the meantime, if you’d like for me to email you any recipe, I will definitely do that. Send me an email at pipandebby AT gmail DOT com and let me know which ones you’d like! Sorry for the inconvenience.
That sounds delicious, Jason! Let me know if you give it a try!
Megan
Im curious if since the "butterfinger" flavor is almost a sauce consistency if you could swirl it through a brownie batter and make Butterfinger Brownies. you would get the flavor but if you added candies they could get soggy. maybe this could work?
Has anyone tried these? Do they taste like the real deal?!
I made them last night and yes they taste like the real deal! I used ghirardelli 60% chocolate chips but I must admit they are hard to stay out of! 🙂
Thwopped bark certainly wouldn't be butterfinger bars , but the flavor is definitely there! The coconut worked perfectly. The recipe I have is actually called "Butterfinger Bark". But it has the same ingredients as this recipe . I just fiddled with it until I found the one ingredient that makes the crunch of a butterfinger. They are yummy and taste like the real thing, no matter what shape they are in. I just put them on a serving dish and let people nibble at their will. Never a complaint they just ask for more! =0). Hope your recipe turns out awesome! =0)
The trick to getting the bit of chewy crunch of real butterfingers is to not worry about getting a creamy texture when you still the peanut butter in. The candy corn made tiny shards that didnt seem to get creamy–and those must have become crunchy chewy bits. No need to fool around with extra ingredients! These do not flake and drop pieces into your lap the way an official butterfinger does, but the taste and the COLOR is amazingly close! Creepy, actually! My dipping was not very neat so I may try the bottom/top layer someone suggested. I suspect if one scored the chocolate into squares while it is still melty they could be cut more easily later. Thwopped bark just wouldnt be butterfinger bars!
Hi Jean. I don't have the recipe on hand at the moment, but If I remember correctly, I used 1 1/2 bags of choc chips per layer and spread it in a 13×9 pan. (covered in wax paper, sprayed with pam) and about 5-6 cups of candy corn and a jar of pnut butter and the 2 cups of toasted coconut. I melted the candy corn in a microwave safe bowl, stirring it about every 30 seconds or so, until completely melted, then I added the pnut butter, mixing it well, and then the coconut also mixing it well, and immediately spread it on the cold hard chocolate layer, make sure to spread it evenly, if it comes out too thick, it will be hard to break evenly and end up separating the chocolate from the pnut butter center.(I know, that's what happened my first attempt at this) =0) Then, once that has hardened, do the next layer of chocolate, spread evenly, and chill for at least 30 to 45 minutes, and when you're ready, "thwop" it on the counter for your butterfinger bark! And to the author of this post, please don't be upset that I posted a different way to do this on here. I love the look and neatness of your candy. I am not trying to change your recipe or anything, just offering suggestions for other ways to try it. =0) Thanks for posting and Good luck Jean! Hope it turns out for you!!=0)
Thank you SO much, Dawn! I made it by hardening the PB center first, then cutting in squares and dipping. That way is ok, but I much prefer to do it the way you described. Could you e-mail me and give the the exact quantity of chocolate to melt for each layer? I like the sound of the "slamming" part too! Just kidding!!!!! 🙂 My e-mail is [email protected]. Thank you SO much!
The candy is delicious, except that I mixed some semi-sweet chocolate in with the milk to give it some more hardness, but I don't like the taste of the semi-sweet with the pb center. I won't do that again! It's delicious, though, and my kitchen smelled exactly like butterfingers for quite a while after I made it! I'll definitely be making it at Christmas time and it will be Butterfinger Bark!!! Thanks Dawn and Megan!!!
Hi Jean. Thanks for the comment! =0) First off let me say that, the butterfinger candy would be too hot to form into squares to dip, unless you either freeze it or cool it in the fridge first. My recipe says to melt and spread the chocolate in the bottom of a wax paper lined, greased pan, refrigerate to cool , back to it's original hard stage. While it's cooling, it says to melt the candy corn in the microwave, stirring every minute or so, until melted, then add the pnut butter and my addition of coconut and mix well. after the chocolate has hardened to where if you spread the pnut butter center on it and it won't move or mix in with it. Then place it back in the fridge to, once again, harden the pnut butter center while you melt more chocolate for the top layer. After the candy is hard, I slam it on the counter and Voila! I have ButterFinger Bark!! =0) but, you can always do it the other way, it may be more attractive to harden the pnut butter center, then cut it into squares and dip them in melted chocolate one at a time. It's messy and more time consuming. =0) Also, don't let the pnut butter/ candy corn get hard before you can spread it. Spread it as soon as you take it out. So be sure that your chocolate is already been in the fridge for a bit so it will be hard already, it only takes about a total of 6 minutes to do the filling. Good luck! If you want my recipe on how I do it, verbatim, email me and I will email it to you. Hope it comes out ok!! =0)