

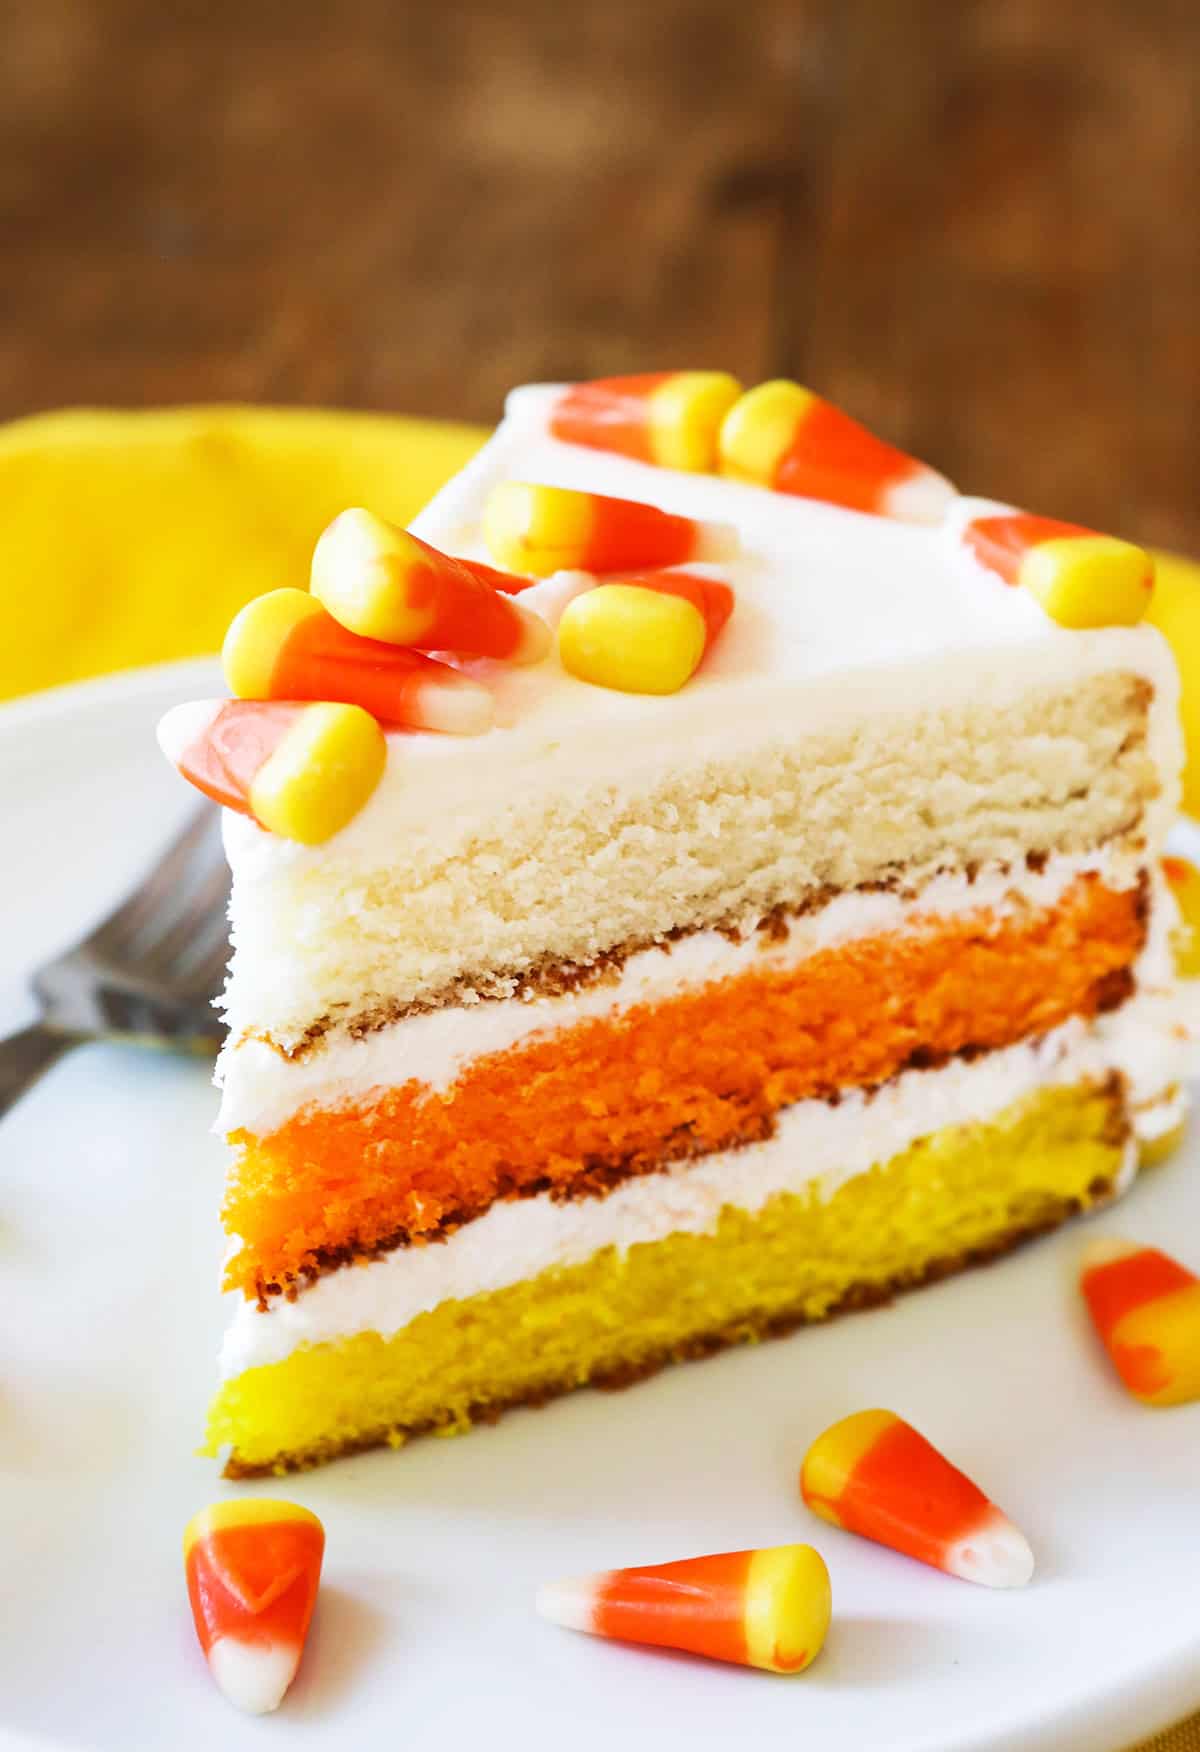
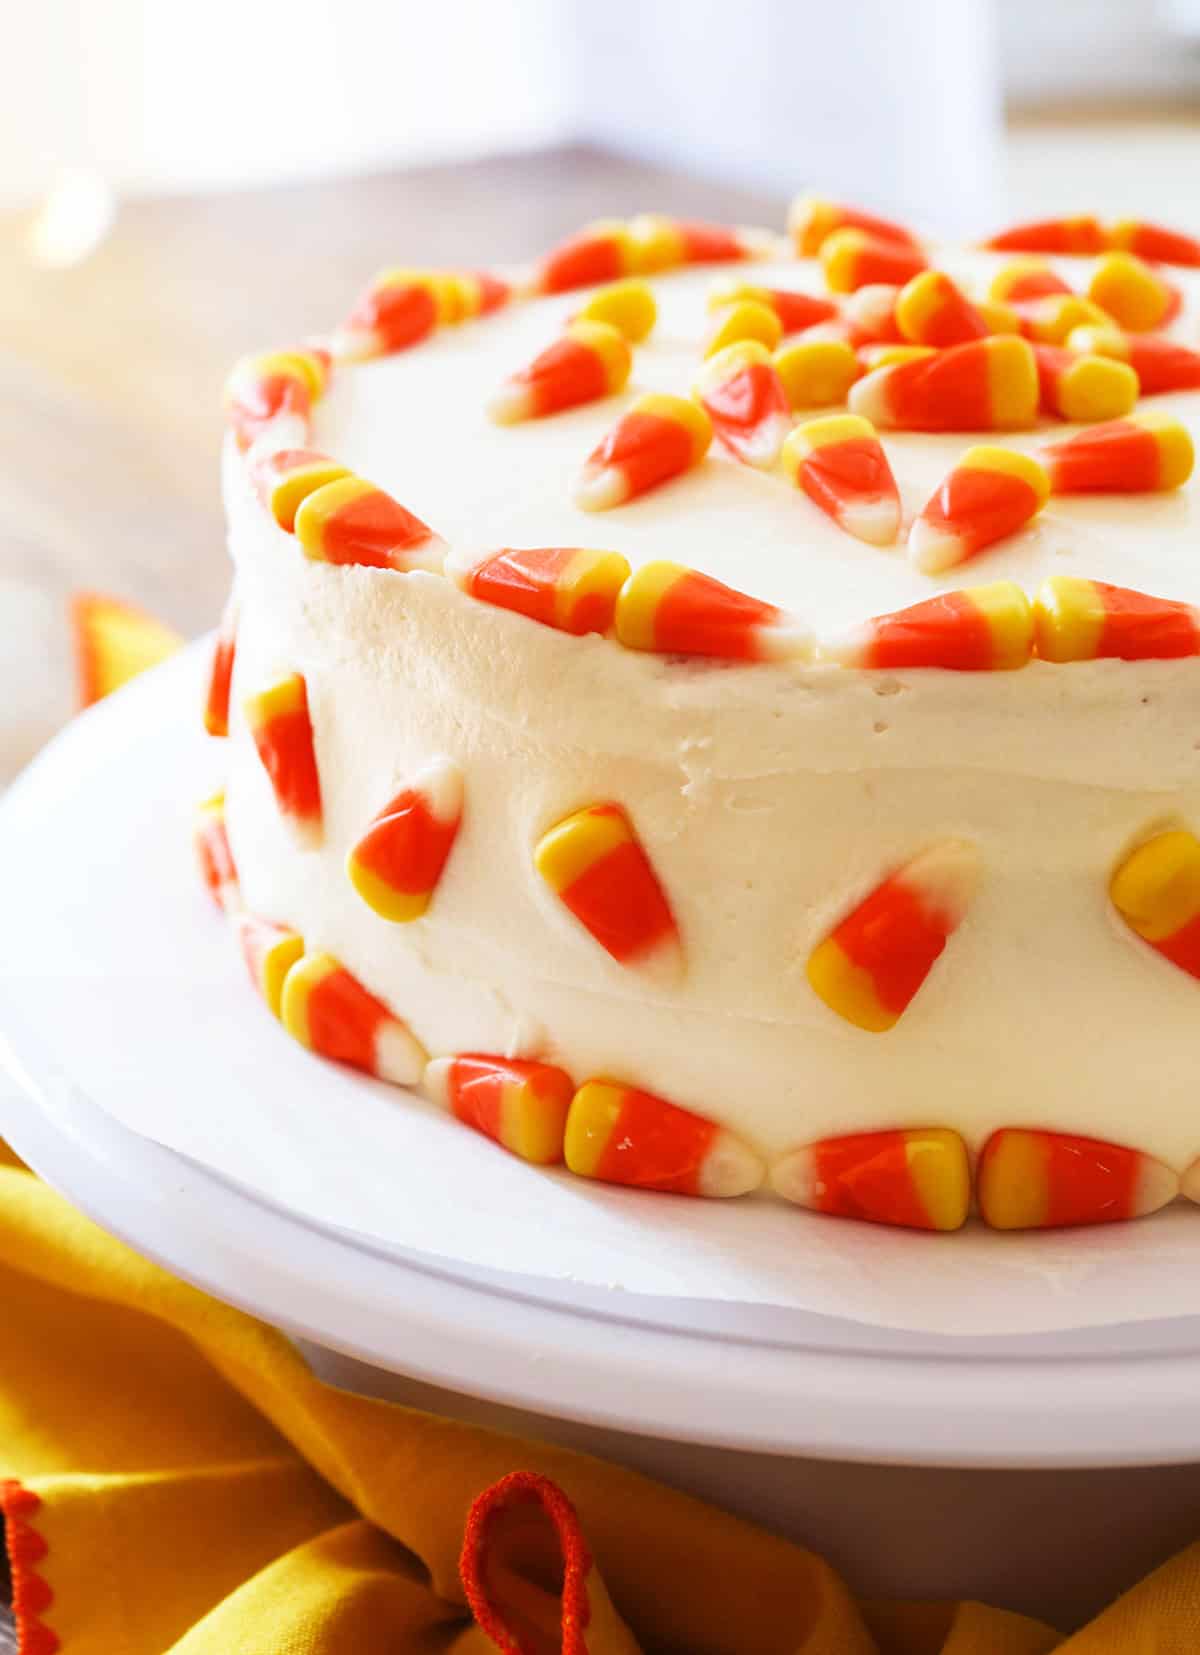
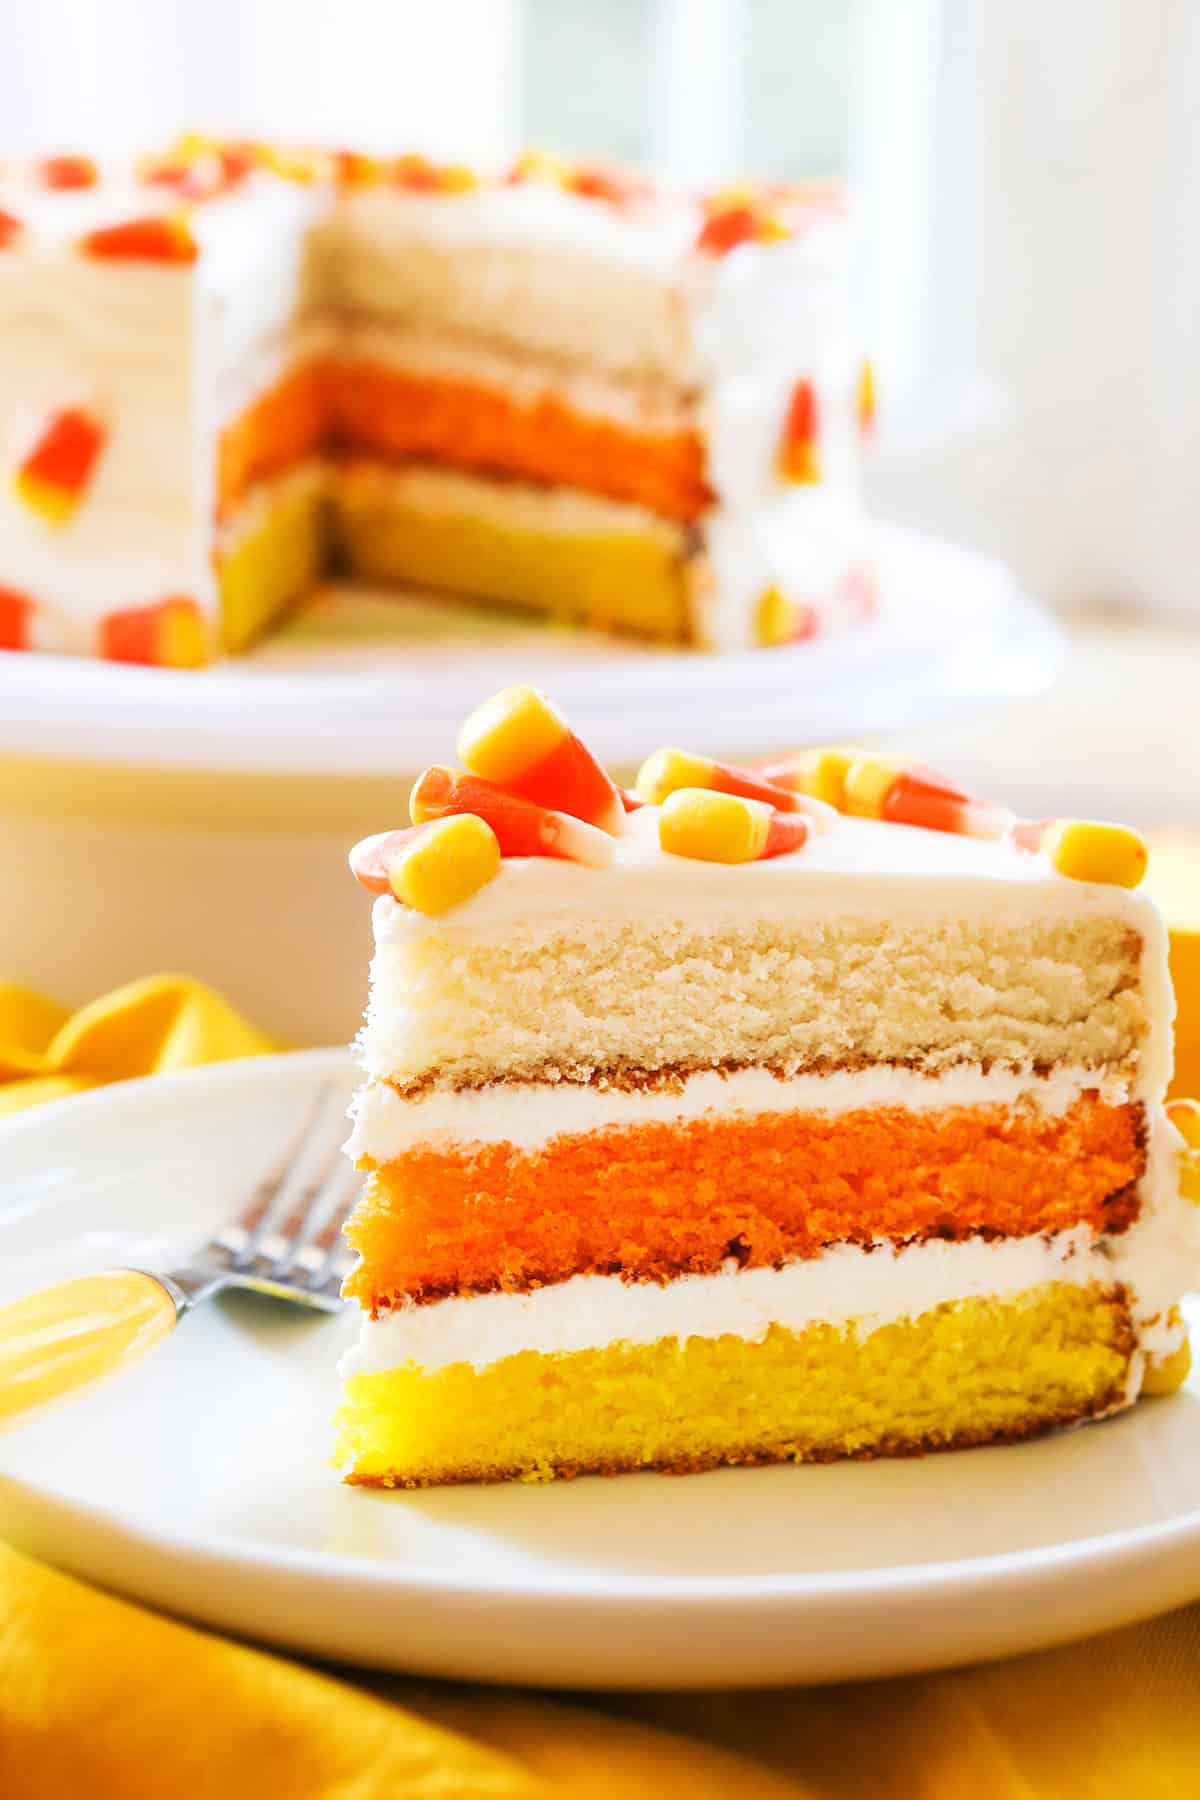
This candy corn cake hides three colorful layers beneath a blanket of almond buttercream. Slice into it to reveal the familiar yellow, orange and white stripes of candy corn, making it an especially fun centerpiece for a Halloween party or fall birthday.
This was the cake that changed my mind about layer cakes. For years, I told anyone who would listen that I would never bake or decorate them. Words of doom, people, because eventually I couldn’t resist playing with all those beautiful layers!
I divided a simple white cake batter into three bowls, colored two of them and stacked them in candy corn order. The result looks impressive when sliced but does not require elaborate decorating skills.
Halloween has held a special kind of magic for me since childhood. Some of my happiest memories with my mom are tied to that season, before life became more complicated and parts of her were lost to me.
Building the colors and layers of this cake felt like capturing a little of that childhood magic, which is why it still holds such a dear place in my heart.
If candy corn is part of the magic of Halloween for you, too, use the rest of the bag to make my Halloween snack mix with candy corn or surprisingly easy homemade Butterfinger bars.
Why This Recipe Works
- The surprise is on the inside. From the outside, it looks like a classic white layer cake. Cutting the first slice reveals three bright layers inspired by the colors of candy corn.
- No advanced cake-decorating skills are required. The colorful cake layers do most of the work, so simple white frosting and candy corn decorations are enough to create a festive Halloween cake.
- One batter creates all three layers. Make a single batch of white almond cake batter, divide it among three bowls and tint two portions yellow and orange. There is no need to prepare three separate batters.
- The almond flavor makes it more than a novelty cake. Almond extract is added to both the cake and buttercream, giving every bite a sweet bakery-style flavor. To set expectations clearly, this is a candy corn-themed cake rather than a cake that tastes like candy corn.
- It can double as a candy corn birthday cake. The colorful layers work just as well for an October birthday as they do for a Halloween party. Add candles, sprinkles or extra candy corn to make it feel celebratory.
Ingredient Notes
Candy corn – Use classic candy corn to decorate the finished cake or add pieces from an Autumn Mix for variety. For the freshest appearance, add the candy shortly before serving. Candy corn can soften or transfer color when it sits against frosting for an extended period.
Milk – Whole milk or 2% milk will give the cake the best texture. Let it sit at room temperature for about 30 minutes before mixing. Room-temperature milk blends more evenly with the butter and other ingredients, helping the cake bake up light and tender.
Salted butter – I use salted butter because the hint of salt balances the sweetness of both the cake and buttercream. Unsalted butter will also work.. just use the salt already included in the cake recipe.
Egg whites – Using only the whites keeps the uncolored cake layer as white as possible and allows the yellow and orange layers to remain bright. Separate the eggs while they are cold, then let the whites come to room temperature before mixing them into the batter.
Almond extract – Almond extract gives the cake and frosting a sweet, bakery-style flavor with a subtle cherry-like note. If you do not enjoy almond flavor, replace it with an equal amount of vanilla extract.
Food coloring – Gel food coloring creates vibrant yellow and orange cake layers without thinning the batter. I recommend yellow and neon orange, but regular liquid food coloring can also be used. Add a little at a time until the colors resemble candy corn.
Equipment Used
- Three 8- or 9-inch round cake pans – Use three matching pans so the layers bake evenly and stack neatly.
- Stand mixer or hand mixer – Either works for preparing the cake batter and almond buttercream.
- Three mixing bowls – You’ll need separate bowls for the white, yellow and orange portions of batter.
- Offset spatula – This makes it easier to spread buttercream between the layers and frost the top and sides.
How To Make a Candy Corn Cake
Make the Cake Layers
- Prepare the pans. Preheat the oven to 350°F. Generously coat three same-size 8- or 9-inch round cake pans with cooking spray. Line the bottoms with parchment paper and spray again for easier removal.
- Cream the butter and sugar. Using a stand mixer fitted with the paddle attachment or a large bowl and hand mixer, beat the softened butter and sugar on medium speed for 2 to 3 minutes, or until light and creamy.
- Add the egg whites. Add the room-temperature egg whites in three additions, mixing until incorporated after each addition. Mix in the almond extract and scrape down the sides of the bowl.
- Finish the batter. In a separate bowl, whisk together the flour, baking powder and salt. Add the dry ingredients to the butter mixture in three additions, alternating with the room-temperature milk in two additions. Begin and end with the dry ingredients, mixing on low speed just until combined after each addition. Avoid overmixing.
- Create the candy corn colors. Divide the batter evenly among three bowls, using a kitchen scale if possible. Leave one portion white, tint one yellow and tint the third neon orange. Add the food coloring a little at a time until the colors resemble candy corn.
- Bake the layers. Transfer each color of batter to a prepared cake pan and spread it into an even layer. Bake for 20 to 25 minutes, or until a toothpick inserted into the center comes out clean. Begin checking 9-inch layers at 20 minutes.
- Cool and level the cakes. Let the cakes cool in their pans for 5 minutes, then turn them onto wire racks to cool completely. Once cool, use a serrated knife to trim any rounded tops so the layers will stack evenly.
Make the Almond Buttercream
- Beat the butter. Using a stand mixer fitted with the paddle attachment or a large bowl and hand mixer, beat the softened butter until creamy.
- Add the sugar and flavoring. Add half of the powdered sugar and mix on low speed until incorporated. Add the almond extract and 3 tablespoons of milk, followed by the remaining powdered sugar.
- Adjust the consistency. Add more milk 1 tablespoon at a time until the frosting is smooth and spreadable. Increase to medium speed and beat for 3 minutes, scraping down the bowl as needed.
Assemble and Decorate the Cake
- Stack the layers. Place the yellow cake layer on a cake stand or serving plate. Spread an even layer of frosting over the top. Add the orange cake layer, spread it with frosting and finish with the white cake layer.
- Apply an optional crumb coat. If desired, spread a thin layer of buttercream over the top and sides of the cake to trap loose crumbs. Refrigerate for 20 to 30 minutes, or until firm.
- Frost the cake. Spread the remaining buttercream over the top and sides of the cake using an offset spatula. Smooth the frosting or create your preferred finish.
- Decorate and serve. Decorate the top with candy corn and serve.
Tips for the Best Candy Corn Cake
- Use three matching cake pans. This helps the layers bake at the same rate and gives the finished cake a neat, even appearance.
- Keep the traditional candy corn order. Stack the yellow layer on the bottom, orange in the middle and white on top to mimic a piece of candy corn. You can change the order, but the classic arrangement makes the theme instantly recognizable when the cake is sliced.
- Apply a crumb coat. Spread a thin layer of frosting over the entire cake to trap loose crumbs, then refrigerate it for 20 to 30 minutes. Apply the remaining buttercream once the crumb coat feels firm.
- Use an offset spatula. This inexpensive tool makes it much easier to spread frosting between the layers and create a smooth finish on the top and sides.
- Change the frosting color if desired. White buttercream gives the cake a classic candy corn appearance, but you can tint it orange or yellow for a bolder Halloween cake.
- Adjust the frosting consistency. If the buttercream is too thick to spread, mix in additional milk 1 tablespoon at a time. If it becomes too thin, add powdered sugar a few tablespoons at a time until it holds its shape.
Candy Corn Cake FAQs
Does candy corn cake taste like candy corn?
No. This is a candy corn-themed cake rather than a candy corn-flavored cake. The yellow, orange and white layers resemble the classic Halloween candy, while the cake and buttercream have a sweet almond flavor.
Why should the egg whites be at room temperature?
Room-temperature egg whites blend more evenly with the softened butter and other cake ingredients. This helps create a smooth batter and a lighter, more uniform cake texture. Separate the eggs while cold, then let the whites sit at room temperature for approximately 30 minutes.
Can I make this cake ahead of time?
Yes. Bake the cake layers up to two days in advance. Once completely cool, wrap each layer tightly in plastic wrap and store at room temperature. Assemble and frost the cake the day before serving, but wait to add the candy corn until shortly before serving.
How should candy corn cake be stored?
Cover the cake and store it at room temperature for up to two days or in the refrigerator for up to five days. If refrigerated, let it sit at room temperature for approximately 30 minutes before serving so the cake and buttercream can soften.
Can the cake layers be frozen?
Yes. Wrap each completely cooled layer tightly in plastic wrap, followed by aluminum foil, and freeze for up to three months. Thaw the wrapped layers in the refrigerator overnight before assembling the cake.
Can I use vanilla extract instead of almond extract?
Yes. Replace the almond extract with the same amount of vanilla extract for a more traditional vanilla cake and buttercream.
More Halloween Treats and Fall Desserts
Continue the Halloween fun with one of these festive recipes:
Salted caramel apple cheesecake combines creamy cheesecake, seasonal apples and salted caramel in one decadent fall dessert.
Pumpkin bars are moist, warmly spiced and easy to make for a fall party or Halloween gathering.
Roasted pumpkin seeds turn the seeds from your carved pumpkins into a crisp, savory snack.
For another colorful Halloween treat kids will love, try these easy Minion cupcakes made with Twinkies, candy eyes and frosting. No fondant required!
Will you help add value to Pip and Ebby?
If you make this recipe and love it, stop back and give it a 5-star rating ⭐️⭐️⭐️⭐️⭐️ and leave a comment. THANK YOU!
Candy Corn Cake
Ingredients
Cake
- 1 cup salted butter (2 sticks), softened
- 1 1/2 cups granulated sugar
- 6 large egg whites room temperature
- 2 tsp almond extract
- 3 cups all-purpose flour
- 3 tsp baking powder
- 1 tsp salt
- 1 cup milk whole or 2%, room temperature
- Yellow and neon orange food coloring as needed
- 1 11-oz bag candy corn for decorating, as desired
Almond Buttercream
- 1 cup salted butter (2 sticks), softened
- 6 cups powdered sugar
- 2 tsp almond extract
- 3-6 tbsp milk whole or 2%, as needed
Instructions
Make the Cake Layers
- Prepare the pans. Preheat the oven to 350°F. Generously coat three same-size 8- or 9-inch round cake pans with cooking spray. Line the bottoms with parchment paper and spray again for easier removal.
- Cream the butter and sugar. Using a stand mixer fitted with the paddle attachment or a large bowl and hand mixer, beat the softened butter and sugar on medium speed for 2 to 3 minutes, or until light and creamy.
- Add the egg whites. Add the room-temperature egg whites in three additions, mixing until incorporated after each addition. Mix in the almond extract and scrape down the sides of the bowl.
- Finish the batter. In a separate bowl, whisk together the flour, baking powder and salt. Add the dry ingredients to the butter mixture in three additions, alternating with the room-temperature milk in two additions. Begin and end with the dry ingredients, mixing on low speed just until combined after each addition. Avoid overmixing.
- Create the candy corn colors. Divide the batter evenly among three bowls, using a kitchen scale if possible. Leave one portion white, tint one yellow and tint the third neon orange. Add the food coloring a little at a time until the colors resemble candy corn.
- Bake the layers. Transfer each color of batter to a prepared cake pan and spread it into an even layer. Bake for 20 to 25 minutes, or until a toothpick inserted into the center comes out clean. Begin checking 9-inch layers at 20 minutes.
- Cool and level the cakes. Let the cakes cool in their pans for 5 minutes, then turn them onto wire racks to cool completely. Once cool, use a serrated knife to trim any rounded tops so the layers will stack evenly.
Make the Almond Buttercream
- Beat the butter. Using a stand mixer fitted with the paddle attachment or a large bowl and hand mixer, beat the softened butter until creamy.
- Add the sugar and flavoring. Add half of the powdered sugar and mix on low speed until incorporated. Add the almond extract and 3 tablespoons of milk, followed by the remaining powdered sugar.
- Adjust the consistency. Add more milk 1 tablespoon at a time until the frosting is smooth and spreadable. Increase to medium speed and beat for 3 minutes, scraping down the bowl as needed.
Assemble the Cake
- Stack the layers. Place the yellow cake layer on a cake stand or serving plate. Spread an even layer of buttercream over the top. Add the orange layer and another layer of buttercream, then finish with the white cake layer.
- Apply an optional crumb coat. If desired, spread a thin layer of buttercream over the top and sides of the cake to trap loose crumbs. Refrigerate for 20 to 30 minutes, or until the crumb coat is firm. Skip this step if you prefer to frost the cake immediately.
- Finish the cake. Spread the remaining buttercream over the top and sides, smoothing it with an offset spatula. Decorate with candy corn shortly before serving.
Notes
- Use room-temperature ingredients. Room-temperature butter, egg whites and milk blend more evenly and help create a consistent cake texture.
- Use matching pans. Three same-size cake pans help the layers bake evenly. Begin checking 9-inch layers around 20 minutes because they may bake more quickly than 8-inch layers.
- Adjust the buttercream. If the frosting is too thick, mix in additional milk 1 tablespoon at a time. If it becomes too thin, add powdered sugar a few tablespoons at a time.
- Substitute vanilla if desired. Replace the almond extract with an equal amount of vanilla extract for a traditional vanilla flavor.
- Using unsalted butter: Unsalted butter will work in both the cake and frosting. Use the salt already included in the cake recipe; no additional salt is needed.
- Make it ahead. The cake layers can be baked up to two days in advance. Cool completely, wrap tightly and store at room temperature. Wait to add the candy corn until shortly before serving because it can soften or transfer color to the frosting.Divide the batter as evenly as possible and stack the finished layers yellow, orange and white from bottom to top. This creates the recognizable candy corn pattern when the cake is sliced.
Nutrition

Megan Porta is a comfort food recipe creator who specializes in easy family meals and Instant Pot desserts, and the founder of Pip and Ebby. She has been cooking for three decades and developing recipes for over fifteen years, helping home cooks make reliable, cozy recipes for real life.
Awesome, delicious, cake!
Thank you for saying so, Izzy! I appreciate it.
Does using salted butter give the cake or frosting too salty of a taste? I typically have used unsalted for vanilla cake and buttercream. Making this next weekend for my mom who loves candy corn! Thank you for the recipe!
Hi Caitlin, Good question! If a recipe calls for salted butter, it’s because it’s using the salt from the butter and not adding any additional sources of salt. So if you only have salted butter and you saw salt being added, you could have the amount of salt you are adding. However, in this recipe, I was intentional about using salted butter. The salted butter can help cut the sugar taste with some desserts. If you prefer to switch it up, it’ll still be a delicious recipe.
Thank you so much for getting back to me. I’m going to follow your recipe exactly. Looks amazing!
Yay! Let me know how it turns out – it’s such a fun, festive cake, everyone loves it even if they aren’t huge candy corn lovers. 🙂
I absolutely love how this cake looks! It’s guaranteed to be a hit at any get together. What a great recipe, Megan 🙂
Thank you!
Such a fun and festive cake!
Beautiful cake! Lovely for Fall.
I don’t know if I could love this cake any more!!! It’s so happy and looks/sounds delicious. 🙂