
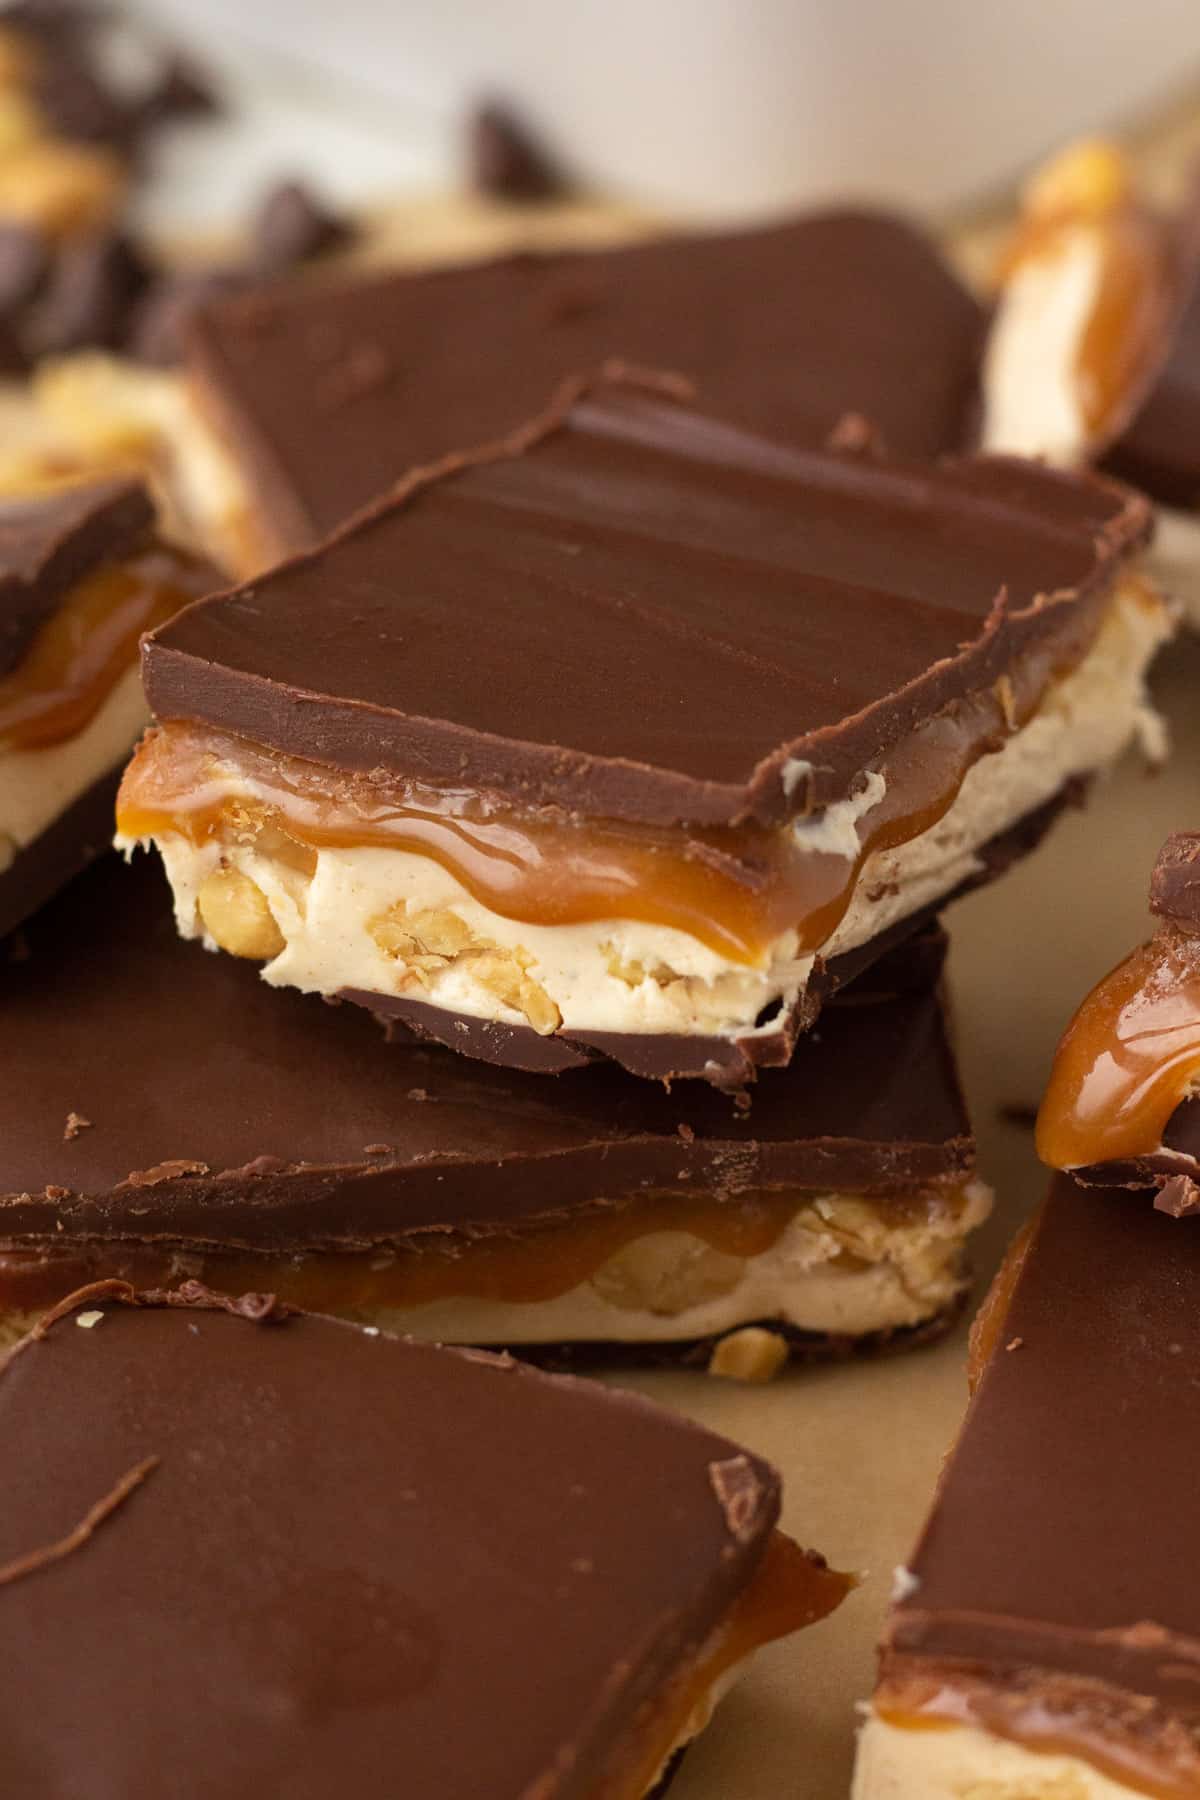
Skip the candy aisle and make a giant pan of America’s favorite candy bar – fudge style! This homemade Snickers Fudge tastes even better than the original! I have made this recipe hundreds of times and it never fails! Fair warning though: once you start eating this decadent dessert, you won’t be able to stop.
Original recipe: December 2012 | Updated: November 2021 and September 2024
Why This Recipe Works
Once upon a time I wanted fudge, but I also wanted a Snickers bar. Then it hit me: I’m a food creator! That’s kind of like a wizard in fairy tales, right? So I created these amazing Snickers Fudge bars with just a little kitchen magic.
This sweet and salty delight is the most delicious marriage imaginable. It’s better than fudge. Better than a Snickers bar. But fair warning: this may be the most dangerous recipe I have ever made and comes with a test of will.
Once you pick it up, you can’t put it down. You will need to dig very deep inside of yourself. It is so addicting that I put every batch I make in the freezer to slow myself down a little.
If you love this classic American candy bar as much as I do, you are going to want to make a batch of this satisfying Snickers Fudge pronto. It is a great sweet treat for holiday gatherings and also acts as the perfect, and delicious, homemade gift.
- Better than Snickers candy bars, better than regular fudge recipes.
- It’s the most delicious marriage you could ever imagine.
- Perhaps the most dangerous recipe I could possibly have in my house. SO irresistible.
- I’ve made this fudge a hundred times and it never ever fails.
- Great for holiday season baking trays, parties, or literally any time of year.
Ingredients for Snickers Candy Bar Fudge
This easy recipe uses simple ingredients to create a deliriously delicious dessert no one can resist.
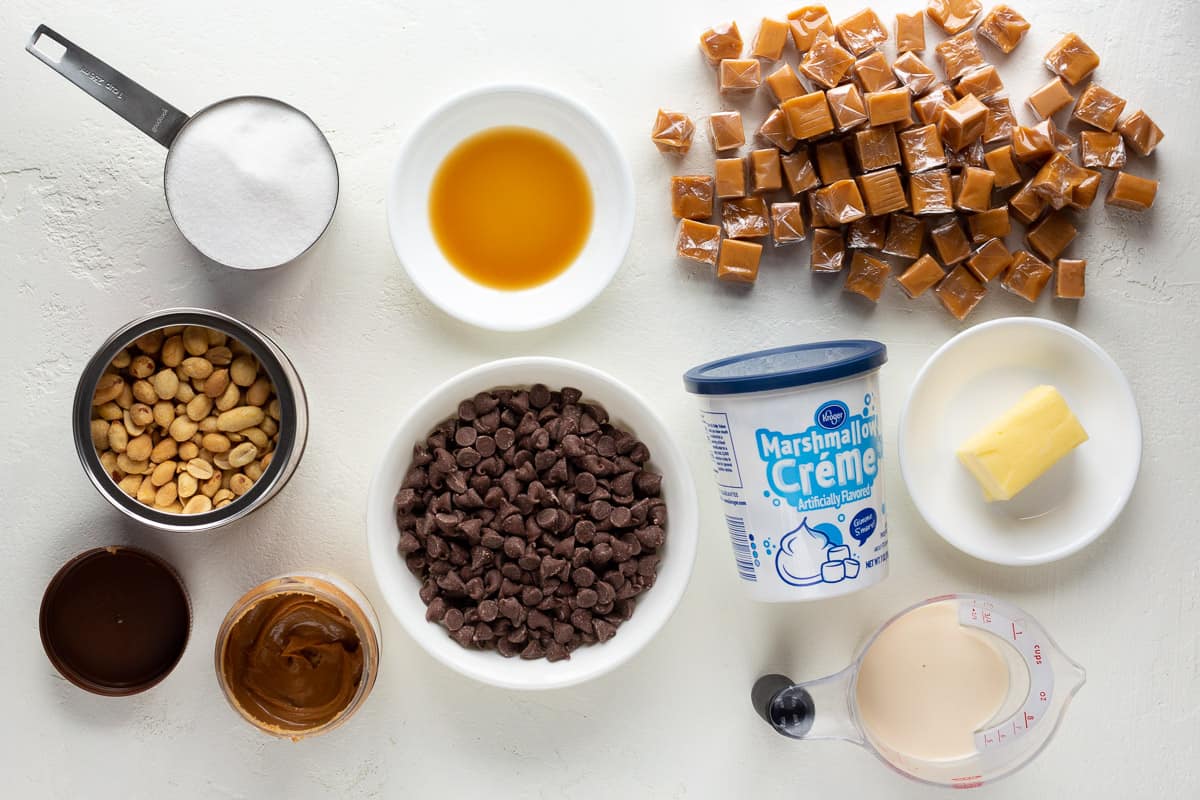
Chocolate chips – Milk chocolate chips melt well and taste like a Snickers bar. Dark chocolate or semi-sweet chocolate chips work great, too.
Peanut butter – Use creamy peanut butter or omit the peanuts and use chunky peanut butter.
Butter – Salted or unsalted butter works.
Granulated sugar
Evaporated milk – See the section below for storing leftover evaporated milk.
Vanilla extract – Make sure your extracts are fresh and in-date for the best flavors.
Salted peanuts – Lightly salted will also work.
Marshmallow creme – Make your own marshmallow creme by cooking 2 cups of mini marshmallows, 2 tbsp of butter and 2 tbsp of light corn syrup in a medium saucepan over medium-low heat. Cook and stir until free of lumps.
Caramels – Save time by purchasing caramel bits instead of individually-wrapped caramels.
How to Make Homemade Snickers Fudge
This may look like a lot of instructions, but layered recipes usually do. This snickers fudge recipe actually comes together simply and in surprisingly little time. The hardest part is waiting for the final product to set completely before eating.
Step 1
Coat a 9×13 baking pan with cooking spray and set aside.
First Layer
Step 1
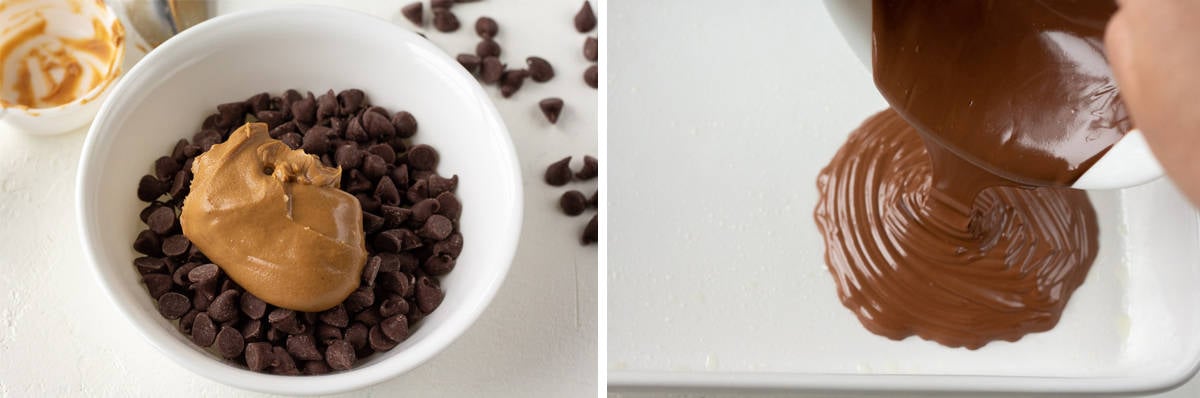
In a small, microwave safe bowl, combine the chocolate chips and peanut butter. Heat in the microwave in two 30-second intervals, stirring after each interval.
Step 2
Stir until creamy and pour the chocolate mixture in an even layer into the bottom of the prepared pan.
Step 3
Place the pan in the freezer to set.
Second Layer
Step 1
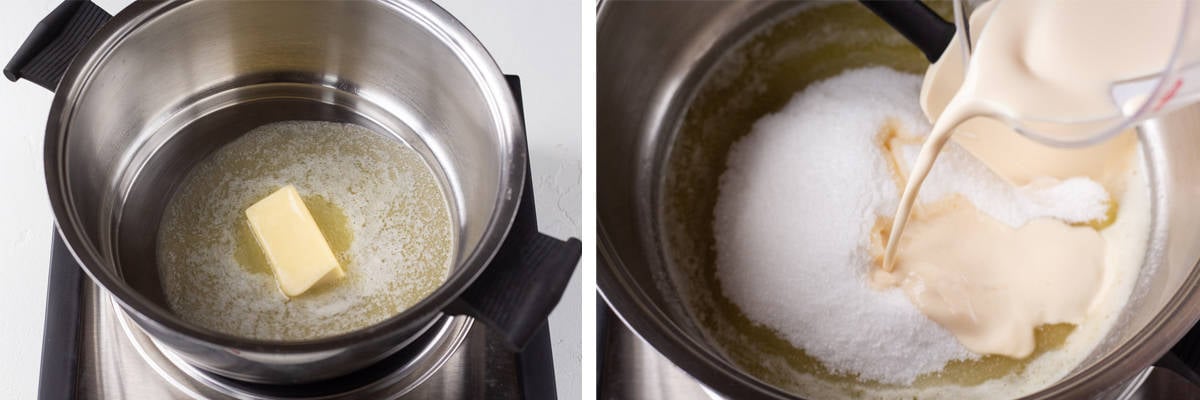
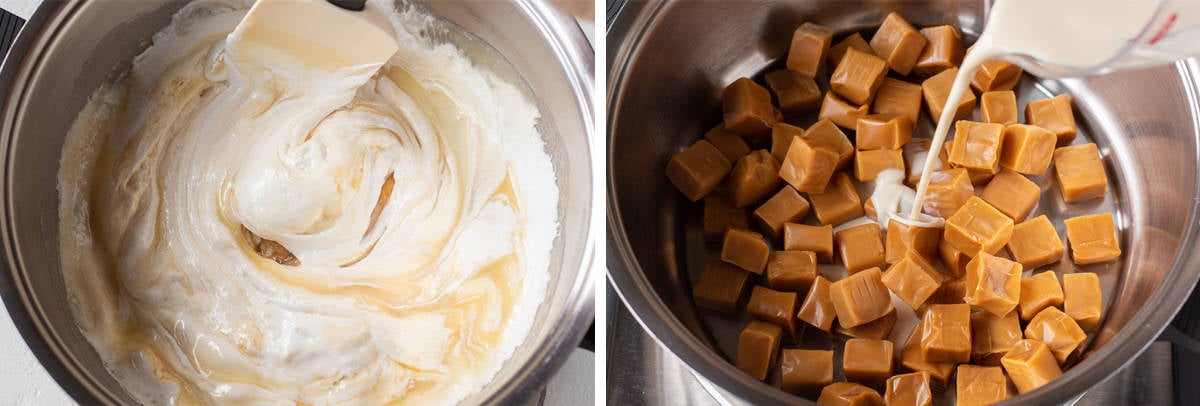
In a medium saucepan, melt the butter over medium heat.
Step 2
Stir in the sugar and evaporated milk and bring to a boil. Cook, stirring constantly, for 3 minutes.
Step 3
Remove from heat and immediately stir in marshmallow crème, peanut butter and vanilla. Add peanuts and stir until incorporated.
Step 4
Pour mixture over the chocolate layer from the freezer and spread evenly. Place back in the freezer.
Stir and bring to a boil. Boil for 3 minutes, stirring constantly. Remove from the heat and add:
- Marshmallow creme
- 1/4 cup creamy peanut butter
- Vanilla extract
Stir until combined. Add the salted peanuts.
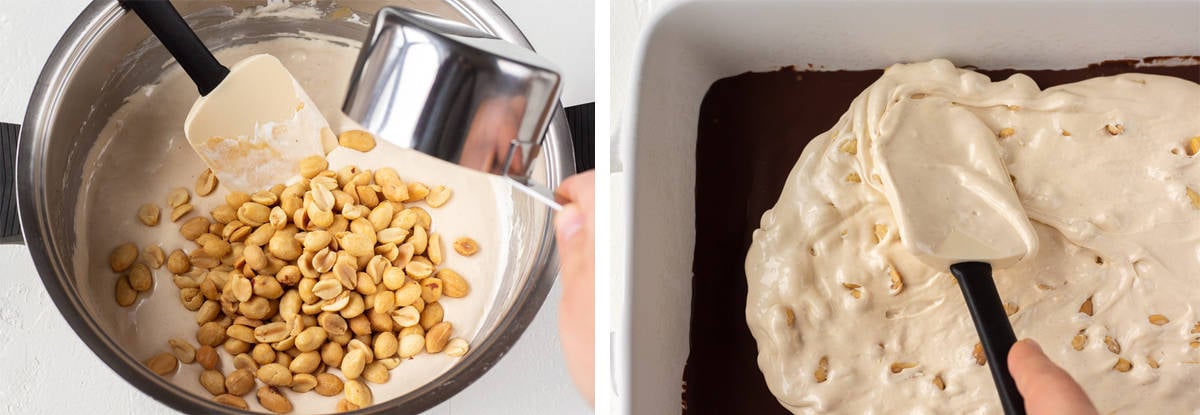
Stir until combined. Remove the pan from the freezer and pour the mixture in an even layer over the chocolate layer. Place back in the freezer.
Third Layer
Step 1
Add the caramels and evaporated milk to a small saucepan.
Step 2
Cook over medium-low heat, stirring constantly, until caramel is melted and smooth.
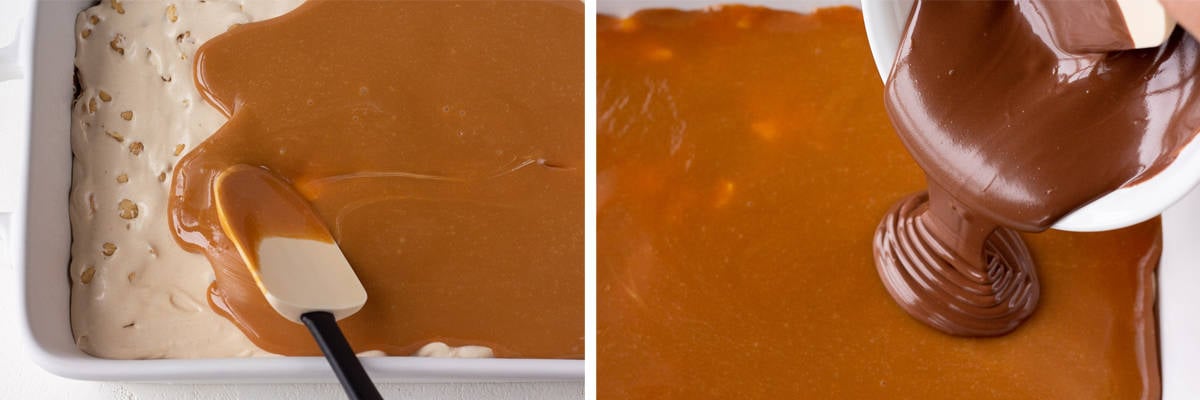
Step 3
Remove your pan from the freezer and pour the caramel layer over the second layer. Place the pan back in the freezer.
Fourth Layer
*This final layer is a repeat of the first layer.
Step 1
In a small bowl, combine chocolate chips and the remainder of the peanut butter.
Step 2
Heat in the microwave in two 30-second intervals, stirring after each interval.
Stir until creamy and pour in an even layer onto the top.
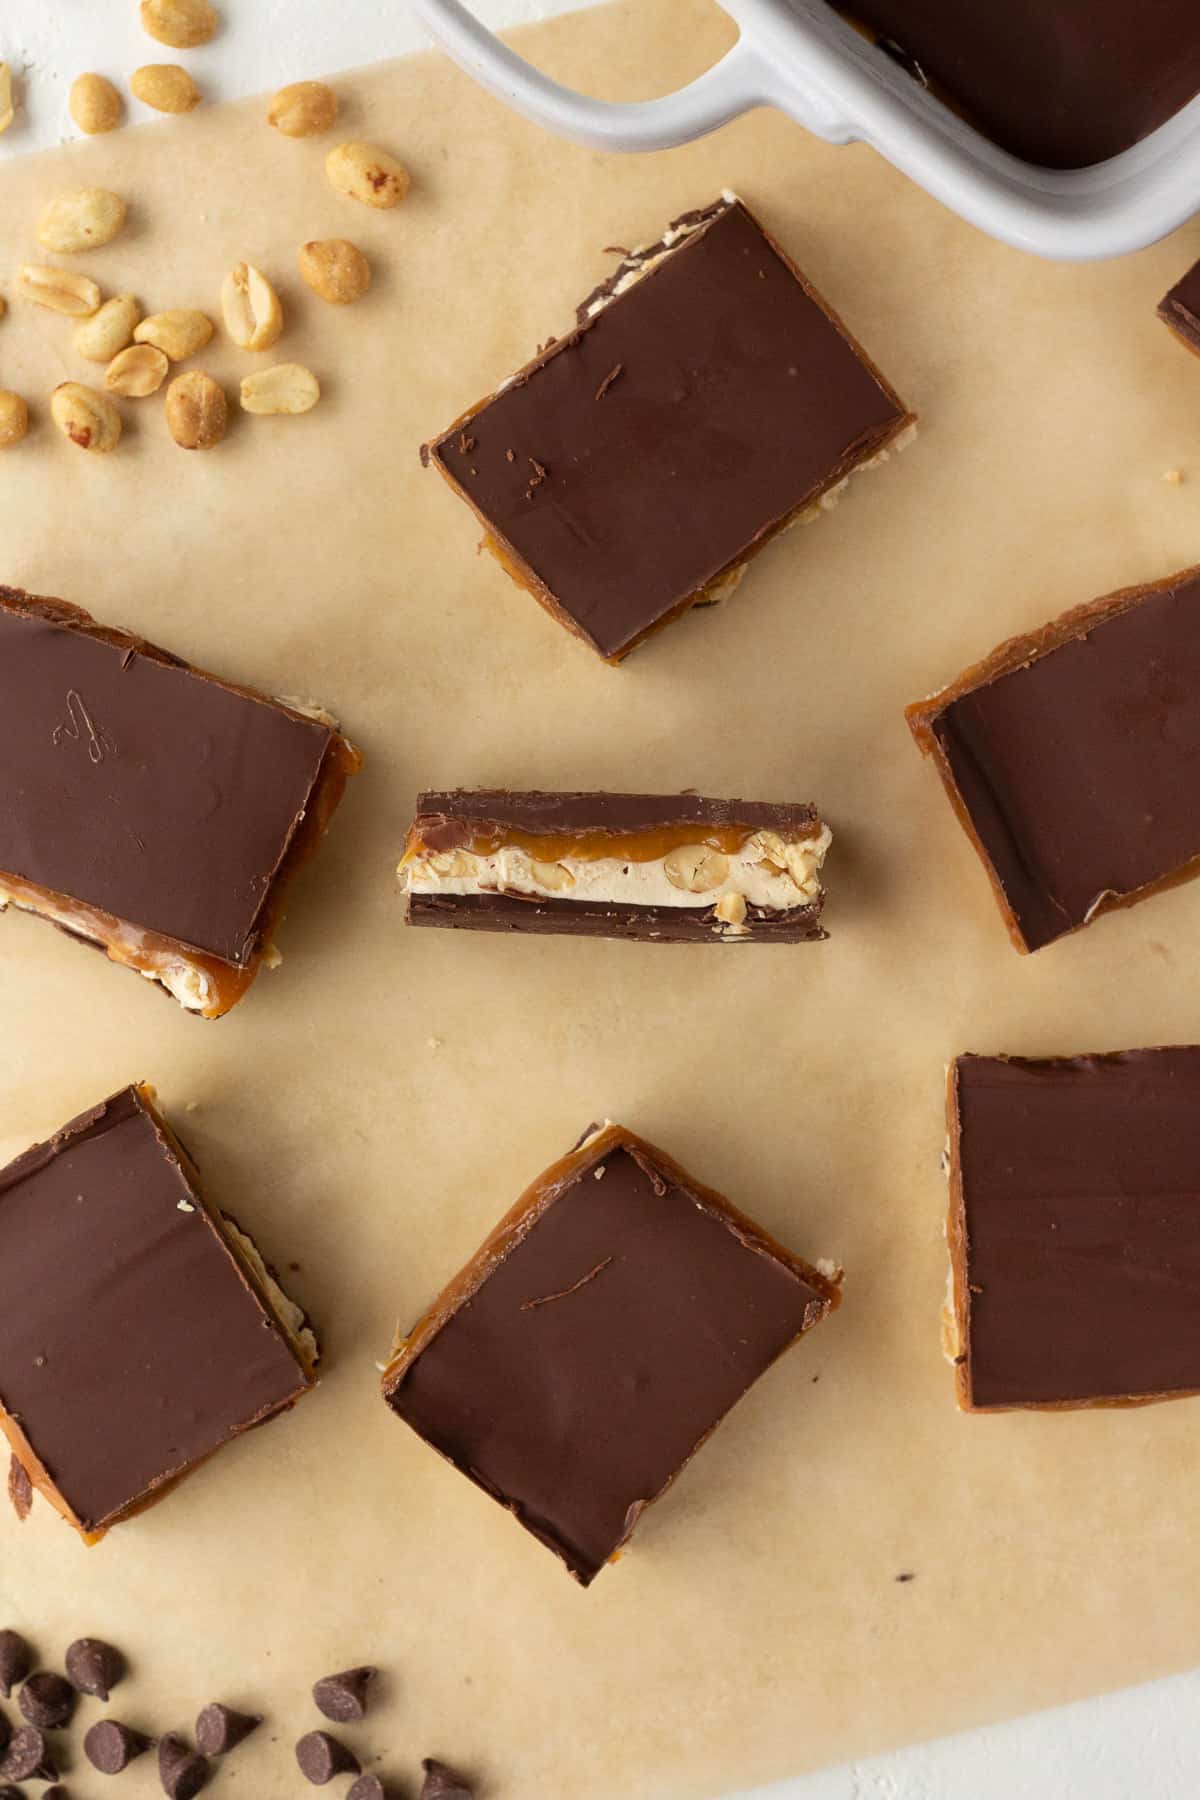
Step 3
Refrigerate the Snickers fudge for a minimum of 1 hour and cut into squares when ready to serve. Keep refrigerated for best results.
Recipe Notes
- Regular or lightly salted peanuts will also work if you are watching your sodium intake.
- Save time by purchasing caramel bits instead of individually-wrapped caramels.
- Make your own marshmallow cream by cooking 2 cups of mini marshmallows, 2 tbsp of butter and 2 tbsp of light corn syrup in a medium saucepan over medium-low heat. Cook and stir until free of lumps.
- Store any uneaten fudge in the fridge for up to 5 days or the freezer for up to 6 months.
- For another yummy Snickers-themed recipe, check out this Snickers fruit salad.
How to Serve
Of course this dessert is amazing on its own, but you can also pair it with any of the following with delicious results.
- Over a scoop or two of ice cream. I like it over vanilla best.
- They go great with Apple Pie or Apple Pie Monkey Bread
- This one isn’t for the faint of heart, but my boys love it. A Snickers Fudge sandwich made with Peanut Butter Cookies
What is Nougat (aka: the White Fluffy Part of a Snickers)
There are a few varieties of nougat, but the one we in the US are probably most familiar with is a blend of heated sugar or honey combined with egg whites and whipped until they are aerated and bubbly and fluffy. Most mass manufactured candy bars use an ingredient like corn syrup for the sweetener.
How to Store Leftover Fudge
Wrap frozen squares of uneaten fudge in plastic wrap. Place inside an airtight container or freezer safe bag and store in the refrigerator or freezer
How Long Does Fudge Last in Fridge
Stored properly, leftover Snicker fudge will be good in the refrigerator for up to 5 days.
How Long Can You Freeze Fudge
Fudge freezes very well if you’re looking to extend the shelf life. Wrap the individual pieces in plastic wrap then in aluminum foil and place in a freezer bag or airtight container and store in the freezer for up to 6 months for best results.
How To Store Leftover Evaporated Milk
Evaporated milk is often used in place of milk or heavy cream in many recipes. It can also be used in place of sweetened condensed milk in desserts. When you have leftover evaporated milk, you can refrigerate or freeze the excess.
Refrigerate
Most just cover the can with plastic wrap or aluminum foil and pop it in the fridge. I like to transfer it from the can to an airtight container or glass jar and refrigerate for up to a week. Open cans exposed to air can absorb odors and form bacteria, so it’s best to keep them covered.
Freeze
You can use in ice cube tray to freeze evaporated milk and store the frozen cubes in a ziplock bag for up to six months
More Delicious Desserts
Cherry Pie Bars
No-Bake Strawberry Jello Pie
Homemade Butterfinger Bars
Caramel Apple Cupcakes
Will you help add value to Pip and Ebby?
If you make this recipe and love it, stop back and give it a 5-star rating ⭐️⭐️⭐️⭐️⭐️ and leave a comment. THANK YOU!

Snickers Fudge Recipe
Ingredients
- 1 cup milk chocolate chips
- 1/4 cup creamy peanut butter
- 4 tbsp butter
- 1 cup sugar
- 1/4 cup evaporated milk
- 1 1/2 cups marshmallow creme
- 1/4 cup creamy peanut butter
- 1 tsp vanilla extract
- 1 cup salted peanuts
- 14 oz caramels or caramel bits
- 1/4 cup evaporated milk
- 1 cup milk chocolate chips
- 1/4 cup creamy peanut butter
Instructions
- Coat a 9×13 pan with cooking spray and set aside.FIRST LAYER: In a small bowl, combine chocolate chips and peanut butter. Heat in the microwave in two 30-second intervals, stirring after each interval. Stir until creamy and pour in an even layer into the bottom of the prepared pan. Place pan in freezer.
- SECOND LAYER: In a medium saucepan, melt the butter over medium heat. Stir in the sugar and evaporated milk and bring to a boil. Cook, stirring constantly, for 3 minutes. Remove from heat and immediately stir in marshmallow crème, peanut butter and vanilla. Add peanuts and stir until incorporated. Pour mixture over the chocolate layer from the freezer and spread evenly. Place back in freezer.
- THIRD LAYER: Add the caramels and evaporated milk to a small saucepan. Cook over medium-low heat, stirring constantly, until caramel is melted and smooth. Remove pan from freezer and pour caramel over the second layer. Place back in freezer.
- FOURTH LAYER: In a small bowl, combine chocolate chips and peanut. Heat in the microwave in two 30-second intervals, stirring after each interval. Stir until creamy and pour in an even layer onto the top.
- Refrigerate for a minimum of 1 hour and cut into squares when ready to serve. Keep refrigerated.
Notes
- Regular or lightly salted peanuts will also work if you are watching your sodium intake.
- Save time by purchasing caramel bits instead of individually-wrapped caramels.
- Make your own marshmallow cream by cooking 2 cups of mini marshmallows, 2 tbsp of butter and 2 tbsp of light corn syrup in a medium saucepan over medium-low heat. Cook and stir until free of lumps.
- Store any uneaten fudge in the fridge for up to 5 days or the freezer for up to 6 months.
Hi Kat! If you want to omit the peanut butter, just melt the chocolate chips solo or add a little butter instead. Let me know how it turns out!
Megan
Can you omit the peanut butter & do you need something else to replace it?
Thanks
Is there a substitute for marshmallow cream? It's hard to come by in Australia. Thanks. Love your work!
I made this as part of my Christmas gifting/dessert taking this year… and it was a HUGE hit! I personally thought it was delicious, as did my family and all those who I gave pieces to as gifts. I definitely agree with the parchment paper—I placed parchment paper in a 9 x 13 pan and greased it; the fudge was super easy to cut and lift out from there.
Thanks for this recipe; I think it's definitely going to be a Christmas staple for me from here on out 🙂
I've been making this for years. In response to the poster who asked how to serve/cut this, I've found that the best way is to put parchment or waxed paper in the bottom of the pan. When the fudge is complete and chilled, lift the paper out to lie flat on the counter and cut fudge with a knife run under hot water and wiped dry. It helps greatly!
Hi Kay! It is best to use a 9×13 pan. I hope this helps!
Megan
What type of pan/dish and size do you use? Maybe I missed it above?
Oh my! I don't think I would have enough willpower to stop eating it. Looks and sounds amazing.
These sound irresistible! Who doesn't love chocolate and peanut butter and caramel? Can't wait to try them–thanks.
Hi April! I'm sure that would work great, as long as the caramel is firm enough to hold together. Let me know how it goes!
Megan
Krystle Annie: I found that sticking the pan in the freezer for a bit helps. Cut the fudge into squares when it is hard (but not completely frozen) and it will come out with all layers completely intact. Hope this helps!
Megan
I'm living overseas and not able to find individually wrapped caramels or caramel bits. Would I be able to use the method of boiling a can of sweetened condensed milk to make the caramel layer or do you think that may not set up as well? Thanks so much!
I'm making this right now. I'm waiting for the caramel to cool. It looks amazing. It is fairly easy to make, albeit time consuming. While I started making the nougat, I realized that I didn't have any marshmallow creme, so I made some from scratch. I also added extra peanuts and I'm going to put some finely chopped peanuts on top. Since it is Christmas, I will probably add some Christmas colored sprinkles to make it look festive. Thank you for the recipe! Oh, do you have any tips on serving this? Mostly just getting it out of the pan with all the layers intact.
My kids would love these. I featured them on my Friday Five over @Feed Your Soul – http://chefpeterskitchen.blogspot.com/2012/12/friday-five-getting-ready-for-football.html
Hi Torri! I have used the caramel bits but it seems every time I have mentioned them people get frustrated about not being able to find them. It's worth mentioning the option, though. Thank you!
Megan
Oh my goodness! This looks beyond delicious:) think this will be a perfect birthday dessert for my burst friend. Thanks for sharing.
Take care
Connie
Looks heavenly! Have you tried the caramel bits for melting? You don't have to unwrap the caramel pieces 1 by 1! melts really nice and tastes the same. the bags give you the portion equiv. to unwrapped candies!
Thought I'd share!
Wow, I would gladly come take this out of your freezer! This will be a must make! Can't wait! I will need to drink the green veggie drinks also!
DeDe@DesignedDecor
My husband loves all things Snickers! He will devour this!
what uneaten fudge! hahahaha