
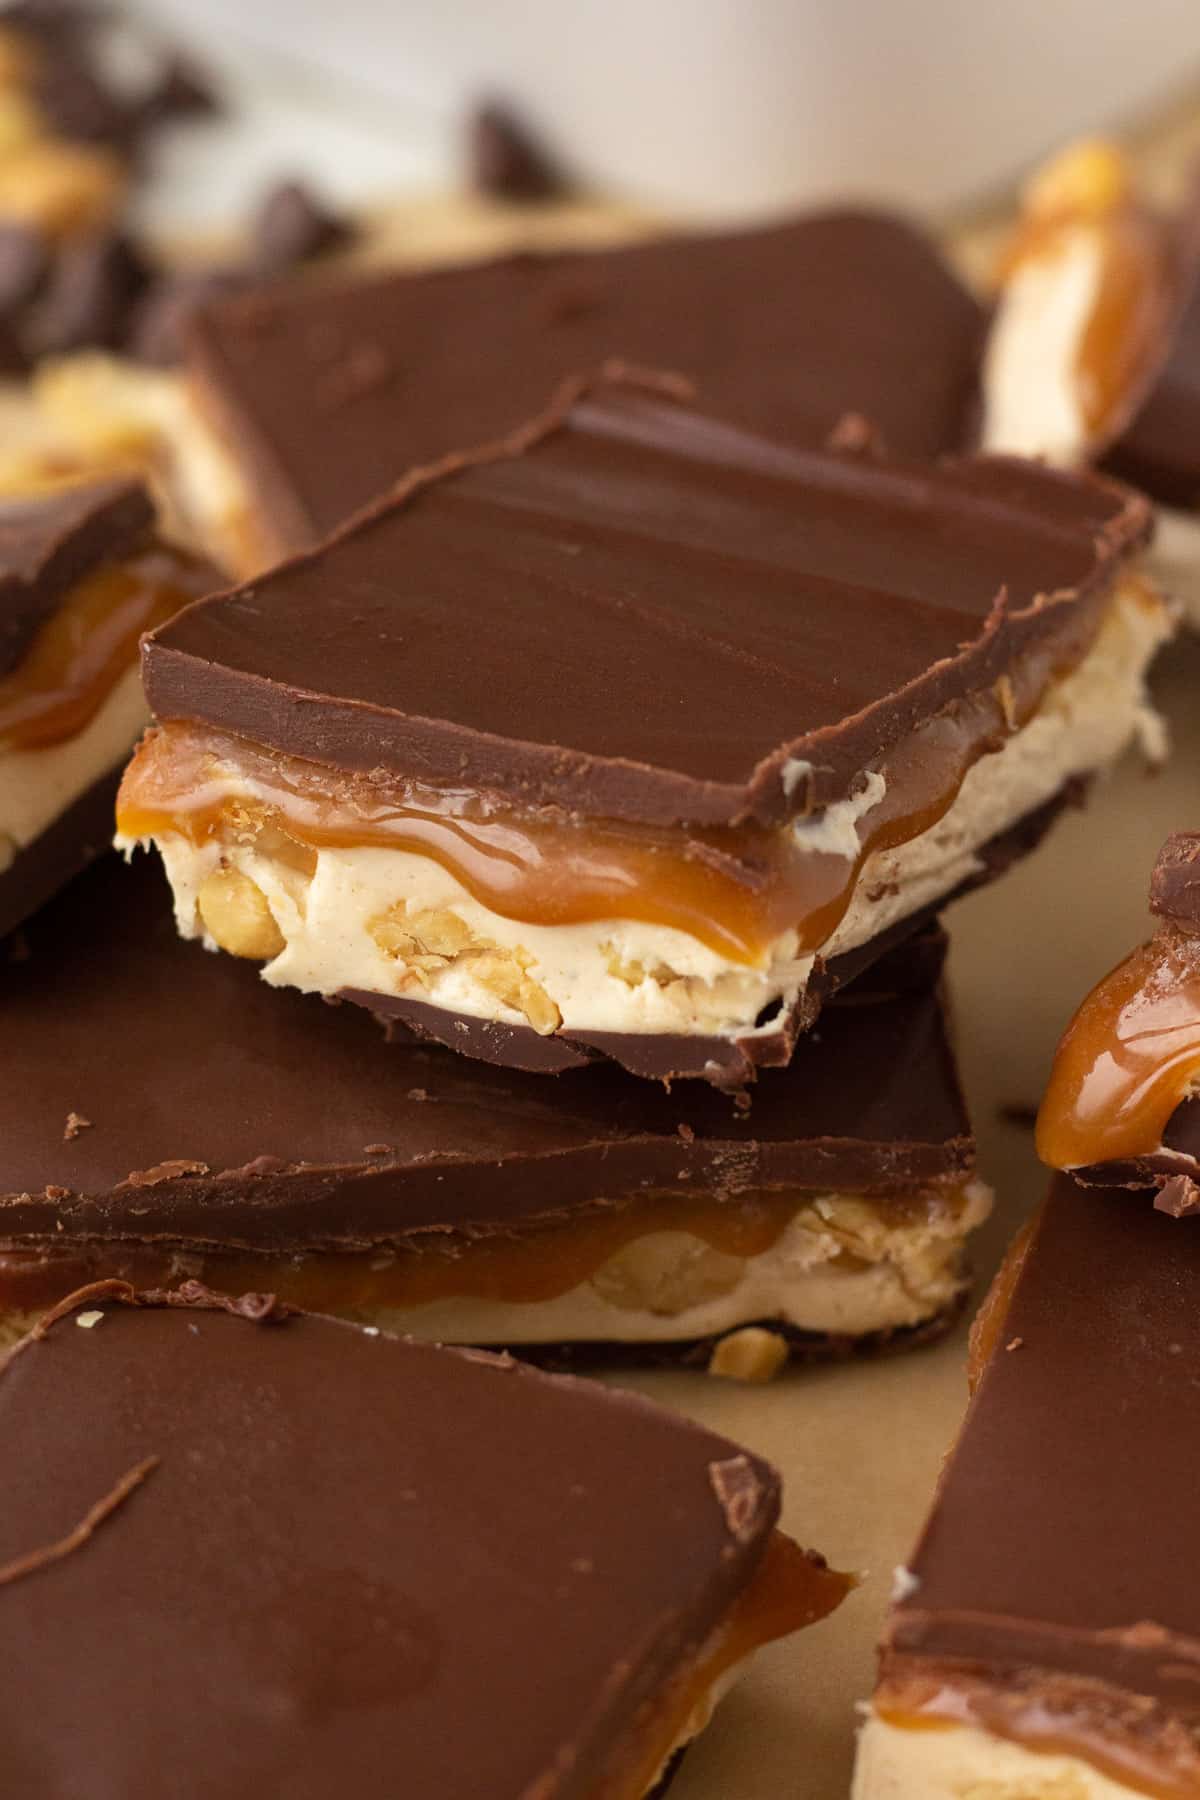
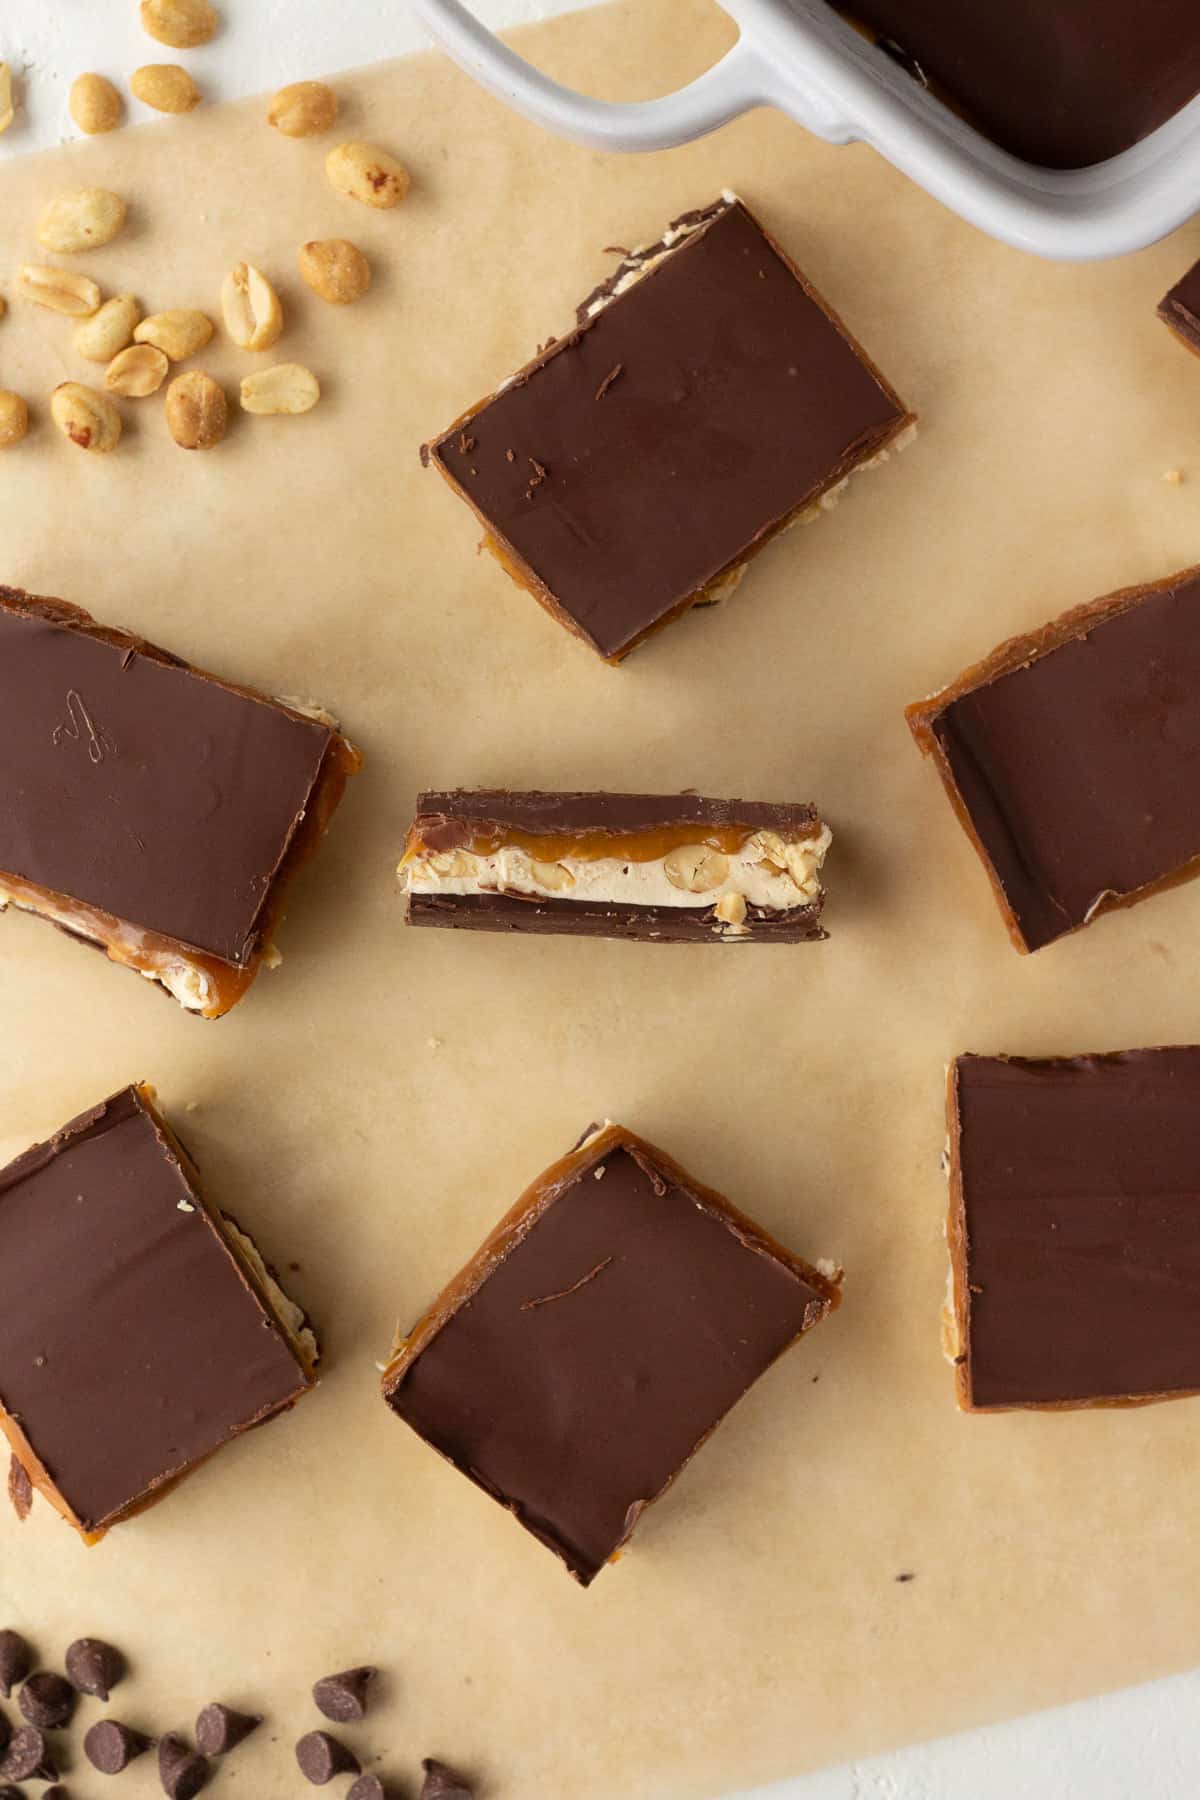
Skip the candy aisle and make a giant pan of America’s favorite candy bar – fudge style! This homemade Snickers Fudge tastes even better than the original! I have made this recipe hundreds of times and it never fails! Fair warning though: once you start eating this decadent dessert, you won’t be able to stop.
Original recipe: December 2012 | Updated: November 2021 and September 2024
Why This Recipe Works
Once upon a time I wanted fudge, but I also wanted a Snickers bar. Then it hit me: I’m a food creator! That’s kind of like a wizard in fairy tales, right? So I created these amazing Snickers Fudge bars with just a little kitchen magic.
This sweet and salty delight is the most delicious marriage imaginable. It’s better than fudge. Better than a Snickers bar. But fair warning: this may be the most dangerous recipe I have ever made and comes with a test of will.
Once you pick it up, you can’t put it down. You will need to dig very deep inside of yourself. It is so addicting that I put every batch I make in the freezer to slow myself down a little.
If you love this classic American candy bar as much as I do, you are going to want to make a batch of this satisfying Snickers Fudge pronto. It is a great sweet treat for holiday gatherings and also acts as the perfect, and delicious, homemade gift.
- Better than Snickers candy bars, better than regular fudge recipes.
- It’s the most delicious marriage you could ever imagine.
- Perhaps the most dangerous recipe I could possibly have in my house. SO irresistible.
- I’ve made this fudge a hundred times and it never ever fails.
- Great for holiday season baking trays, parties, or literally any time of year.
Ingredients for Snickers Candy Bar Fudge
This easy recipe uses simple ingredients to create a deliriously delicious dessert no one can resist.
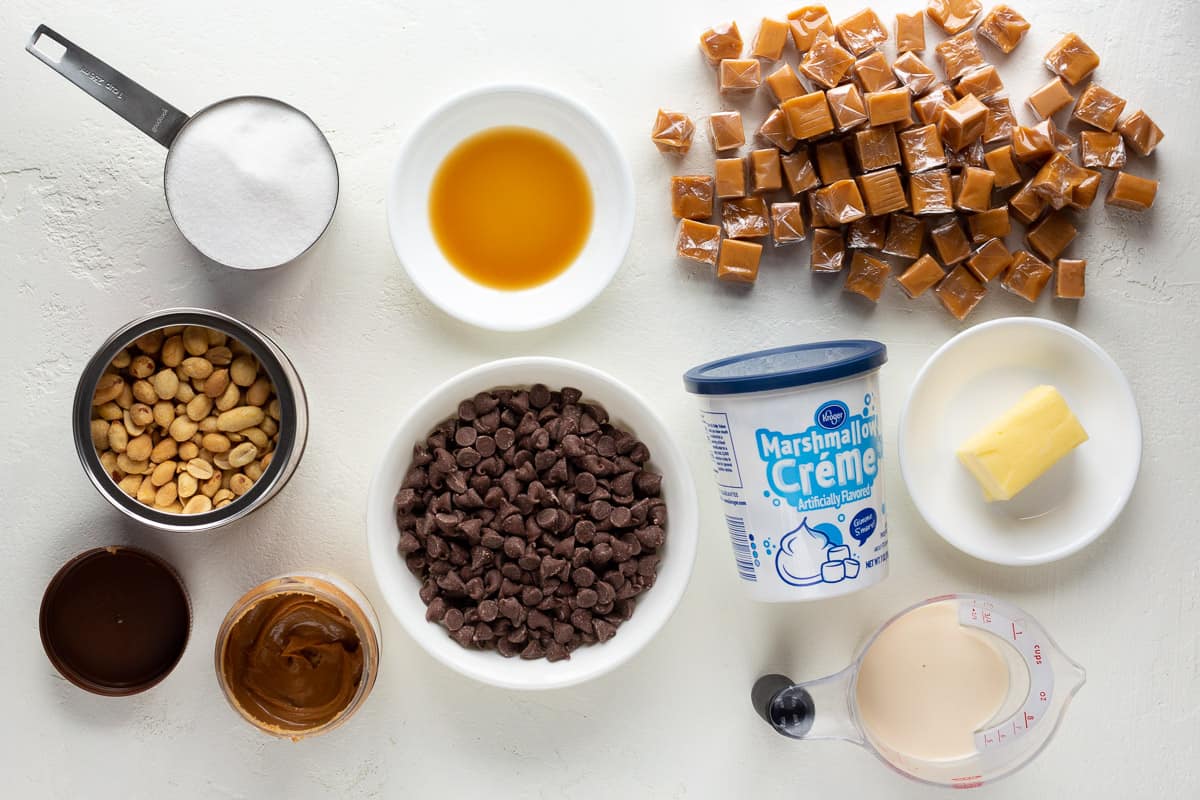
Chocolate chips – Milk chocolate chips melt well and taste like a Snickers bar. Dark chocolate or semi-sweet chocolate chips work great, too.
Peanut butter – Use creamy peanut butter or omit the peanuts and use chunky peanut butter.
Butter – Salted or unsalted butter works.
Granulated sugar
Evaporated milk – See the section below for storing leftover evaporated milk.
Vanilla extract – Make sure your extracts are fresh and in-date for the best flavors.
Salted peanuts – Lightly salted will also work.
Marshmallow creme – Make your own marshmallow creme by cooking 2 cups of mini marshmallows, 2 tbsp of butter and 2 tbsp of light corn syrup in a medium saucepan over medium-low heat. Cook and stir until free of lumps.
Caramels – Save time by purchasing caramel bits instead of individually-wrapped caramels.
How to Make Homemade Snickers Fudge
This may look like a lot of instructions, but layered recipes usually do. This snickers fudge recipe actually comes together simply and in surprisingly little time. The hardest part is waiting for the final product to set completely before eating.
Step 1
Coat a 9×13 baking pan with cooking spray and set aside.
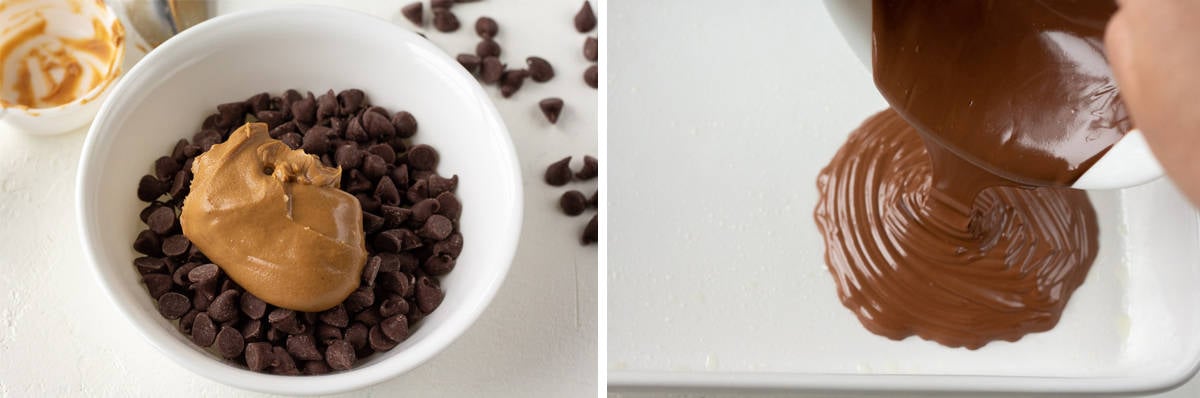
First Layer
Step 1
In a small, microwave safe bowl, combine the chocolate chips and peanut butter. Heat in the microwave in two 30-second intervals, stirring after each interval.
Step 2
Stir until creamy and pour the chocolate mixture in an even layer into the bottom of the prepared pan.
Step 3
Place the pan in the freezer to set.
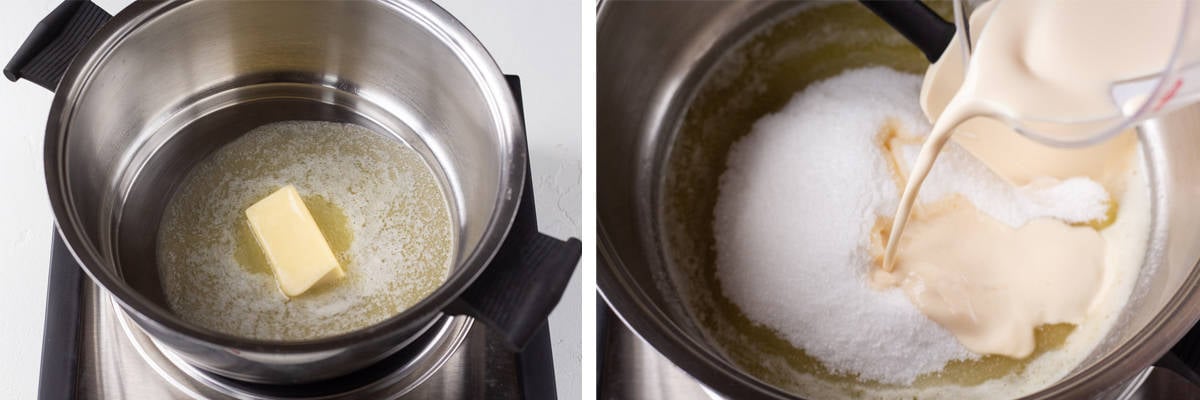
Second Layer
Step 1
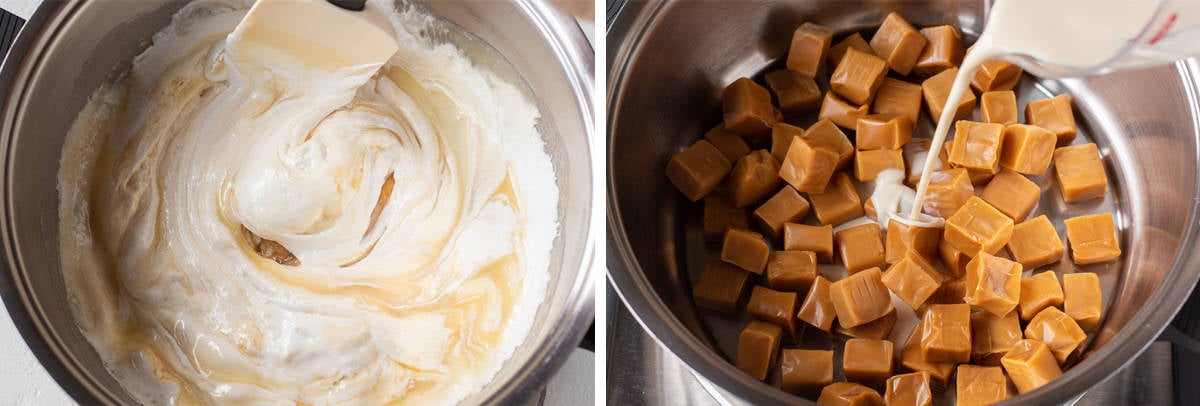
In a medium saucepan, melt the butter over medium heat.
Step 2
Stir in the sugar and evaporated milk and bring to a boil. Cook, stirring constantly, for 3 minutes.
Step 3
Remove from heat and immediately stir in marshmallow crème, peanut butter and vanilla. Add peanuts and stir until incorporated.
Step 4
Pour mixture over the chocolate layer from the freezer and spread evenly. Place back in the freezer.
Stir and bring to a boil. Boil for 3 minutes, stirring constantly. Remove from the heat and add:
- Marshmallow creme
- 1/4 cup creamy peanut butter
- Vanilla extract
Stir until combined. Add the salted peanuts.
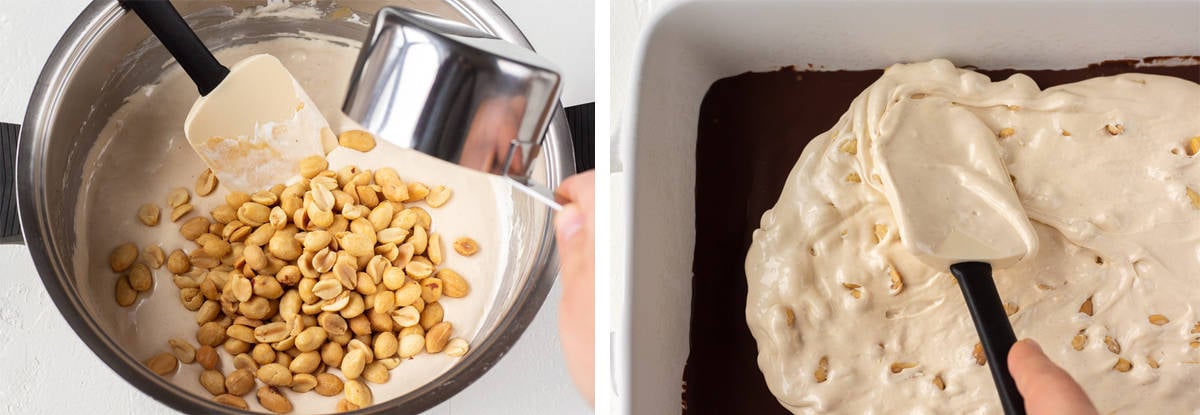
Stir until combined. Remove the pan from the freezer and pour the mixture in an even layer over the chocolate layer. Place back in the freezer.
Third Layer
Step 1
Add the caramels and evaporated milk to a small saucepan.
Step 2
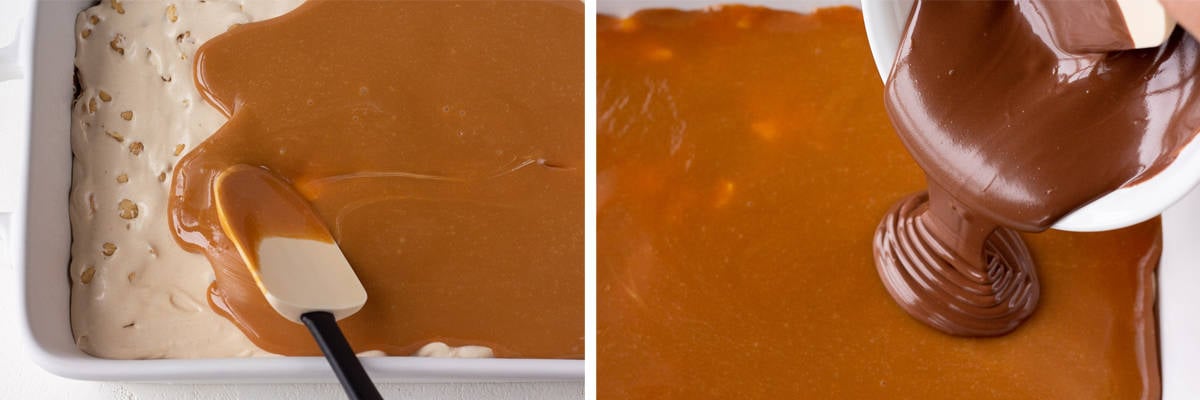
Cook over medium-low heat, stirring constantly, until caramel is melted and smooth.
Step 3
Remove your pan from the freezer and pour the caramel layer over the second layer. Place the pan back in the freezer.
Fourth Layer
*This final layer is a repeat of the first layer.
Step 1
In a small bowl, combine chocolate chips and the remainder of the peanut butter.
Step 2
Heat in the microwave in two 30-second intervals, stirring after each interval.
Stir until creamy and pour in an even layer onto the top.
Step 3
Refrigerate the Snickers fudge for a minimum of 1 hour and cut into squares when ready to serve. Keep refrigerated for best results.
Recipe Notes
- Regular or lightly salted peanuts will also work if you are watching your sodium intake.
- Save time by purchasing caramel bits instead of individually-wrapped caramels.
- Make your own marshmallow cream by cooking 2 cups of mini marshmallows, 2 tbsp of butter and 2 tbsp of light corn syrup in a medium saucepan over medium-low heat. Cook and stir until free of lumps.
- Store any uneaten fudge in the fridge for up to 5 days or the freezer for up to 6 months.
- For another yummy Snickers-themed recipe, check out this Snickers fruit salad.
How to Serve
Of course this dessert is amazing on its own, but you can also pair it with any of the following with delicious results.
- Over a scoop or two of ice cream. I like it over vanilla best.
- They go great with Apple Pie or Apple Pie Monkey Bread
- This one isn’t for the faint of heart, but my boys love it. A Snickers Fudge sandwich made with Peanut Butter Cookies
What is Nougat (aka: the White Fluffy Part of a Snickers)
There are a few varieties of nougat, but the one we in the US are probably most familiar with is a blend of heated sugar or honey combined with egg whites and whipped until they are aerated and bubbly and fluffy. Most mass manufactured candy bars use an ingredient like corn syrup for the sweetener.
How to Store Leftover Fudge
Wrap frozen squares of uneaten fudge in plastic wrap. Place inside an airtight container or freezer safe bag and store in the refrigerator or freezer
How Long Does Fudge Last in Fridge
Stored properly, leftover Snicker fudge will be good in the refrigerator for up to 5 days.
How Long Can You Freeze Fudge
Fudge freezes very well if you’re looking to extend the shelf life. Wrap the individual pieces in plastic wrap then in aluminum foil and place in a freezer bag or airtight container and store in the freezer for up to 6 months for best results.
How To Store Leftover Evaporated Milk
Evaporated milk is often used in place of milk or heavy cream in many recipes. It can also be used in place of sweetened condensed milk in desserts. When you have leftover evaporated milk, you can refrigerate or freeze the excess.
Refrigerate
Most just cover the can with plastic wrap or aluminum foil and pop it in the fridge. I like to transfer it from the can to an airtight container or glass jar and refrigerate for up to a week. Open cans exposed to air can absorb odors and form bacteria, so it’s best to keep them covered.
Freeze
You can use in ice cube tray to freeze evaporated milk and store the frozen cubes in a ziplock bag for up to six months
More Delicious Desserts
Cherry Pie Bars
No-Bake Strawberry Jello Pie
Homemade Butterfinger Bars
Caramel Apple Cupcakes
Will you help add value to Pip and Ebby?
If you make this recipe and love it, stop back and give it a 5-star rating ⭐️⭐️⭐️⭐️⭐️ and leave a comment. THANK YOU!

Snickers Fudge Recipe
Ingredients
- 1 cup milk chocolate chips
- 1/4 cup creamy peanut butter
- 4 tbsp butter
- 1 cup sugar
- 1/4 cup evaporated milk
- 1 1/2 cups marshmallow creme
- 1/4 cup creamy peanut butter
- 1 tsp vanilla extract
- 1 cup salted peanuts
- 14 oz caramels or caramel bits
- 1/4 cup evaporated milk
- 1 cup milk chocolate chips
- 1/4 cup creamy peanut butter
Instructions
- Coat a 9×13 pan with cooking spray and set aside.FIRST LAYER: In a small bowl, combine chocolate chips and peanut butter. Heat in the microwave in two 30-second intervals, stirring after each interval. Stir until creamy and pour in an even layer into the bottom of the prepared pan. Place pan in freezer.
- SECOND LAYER: In a medium saucepan, melt the butter over medium heat. Stir in the sugar and evaporated milk and bring to a boil. Cook, stirring constantly, for 3 minutes. Remove from heat and immediately stir in marshmallow crème, peanut butter and vanilla. Add peanuts and stir until incorporated. Pour mixture over the chocolate layer from the freezer and spread evenly. Place back in freezer.
- THIRD LAYER: Add the caramels and evaporated milk to a small saucepan. Cook over medium-low heat, stirring constantly, until caramel is melted and smooth. Remove pan from freezer and pour caramel over the second layer. Place back in freezer.
- FOURTH LAYER: In a small bowl, combine chocolate chips and peanut. Heat in the microwave in two 30-second intervals, stirring after each interval. Stir until creamy and pour in an even layer onto the top.
- Refrigerate for a minimum of 1 hour and cut into squares when ready to serve. Keep refrigerated.
Notes
- Regular or lightly salted peanuts will also work if you are watching your sodium intake.
- Save time by purchasing caramel bits instead of individually-wrapped caramels.
- Make your own marshmallow cream by cooking 2 cups of mini marshmallows, 2 tbsp of butter and 2 tbsp of light corn syrup in a medium saucepan over medium-low heat. Cook and stir until free of lumps.
- Store any uneaten fudge in the fridge for up to 5 days or the freezer for up to 6 months.
Yum!!!!
I made these last Christmas and they are delicious. I found I had to keep them in the freezer. Otherwise they are too gooey.
I made these and used crunchy peanut butter instead of regular and used salted pretzels instead of the peanuts and omg they were yummy…
I made this today. It taste WONDERFUL! Thanks so much for this recipe. Taking this to share with my family for Christmas tomorrow – if I don't eat it all before then 🙂
These were so easy and fun to make! Next time I'll either use parchment paper on the bottom of the pan (for easier cutting), or use a muffin pan for individual serving sizes. Can't wait to serve these at our Christmas party tonight!
This looks heavenly. Marshmallow cream was made for the gods. Anything with marshmallow cream is delicious.
I made these yesturday and they are fantastic! However, instead of using a regular pan, I used a muffin tin pan so each piece is portioned and I'm not tempted to take more than I need! Works perfectly! Great recipe and thank you for sharing!
Could you omit the peanut butter to go for more of a plain snickers taste? Don't get me wrong I looooove anything with PB in it, but I looooove snickers just the way they are 🙂
You make this look so easy and doable. Yum!
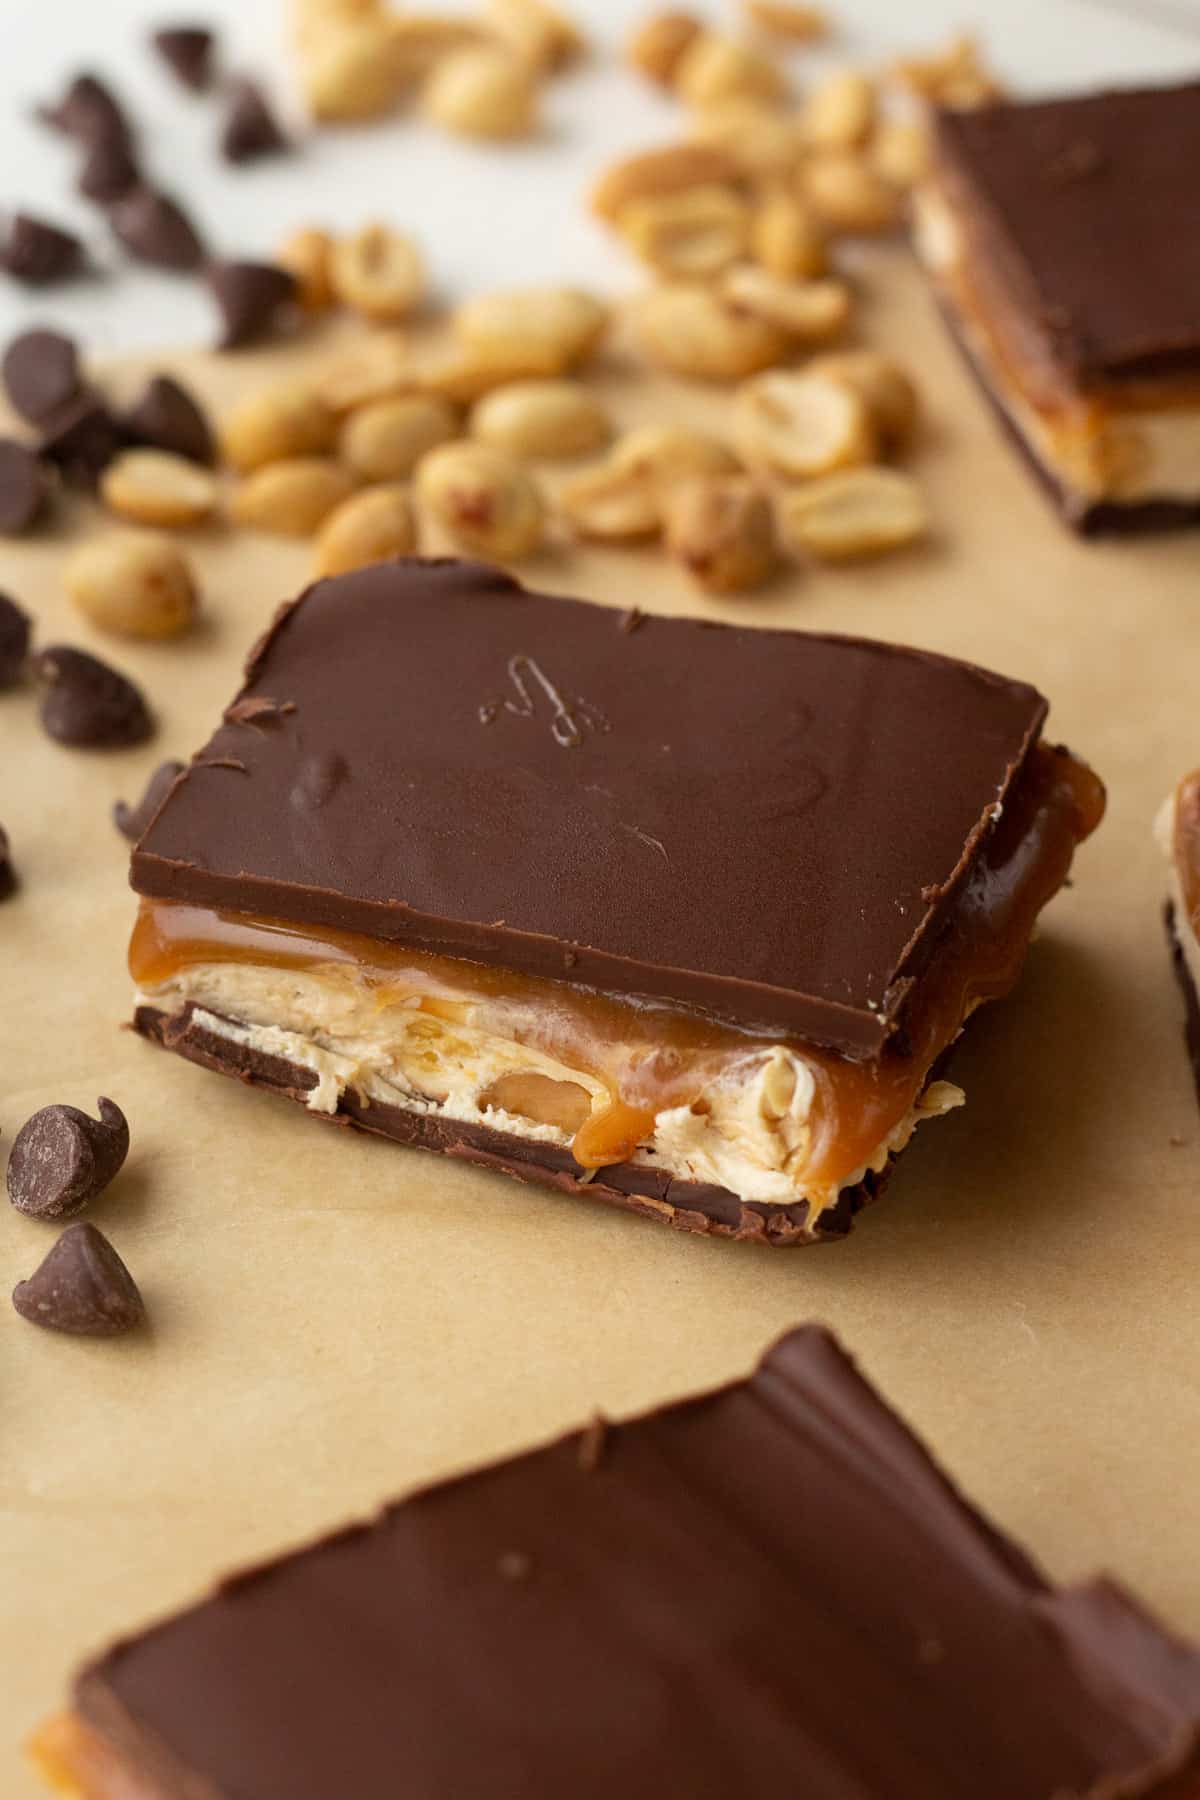
I just want to say how amazingly delicious your photos look! I absolutely love the shot of the caramel oozing off the side of the bars! If I can find all the ingredients in my house I'm going to go and make them right away
I've made these 3 times now. The first time they where amazing! But, the last two times my nugget is not creamy and smooth like the first time I made them. It has a crystallized texture, almost like the sugar is melted, but it is. Do you know what I am doing wrong? Thanks!
I made these last night for my boyfriend, and he loved them! It was easier than it looked too!
I ended up with some leftover marshmallow creme/peanut mixture and caramels and was thinking that I might try to make them into little individual candy balls covered in chocolate. I think it'll turn out good =]
Hi Ivana! I've had a few people from different countries mention that they don't have access to marshmallow creme. If you have access to marshmallows, melt a cup or so with a little bit of butter over low heat until melted/smooth. This will be a great replacement! I hope this helps!
Megan
Hey guys! I just have a quick question. Can I exchange marshmallow creme with something else? We don't have that in Serbia. I was thinking maybe cool the mixture, and then add whipped creme or something similar. Thanks!
I made these and took them into work, to mitigate the volume I consumed, they barely lasted till lunch. Only feedback is that they are hard to remove from dish, be sure to butter or grease the first chocolate layer.
I made this, and it was delicious!!!!
My son is allergic to peanuts. Has anyone tried this with cashews and cashew nut butter (it's like peanut butter but made of cashews instead)? Cashew nut butter smells and tastes a lot like peanut butter.
Awesome fudge!
I've made this twice now and it is a huge hit!!!!
Can you use condensed milk instead of evaporate milk in recipe?