
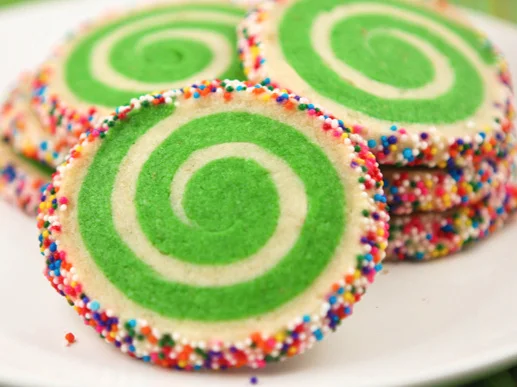
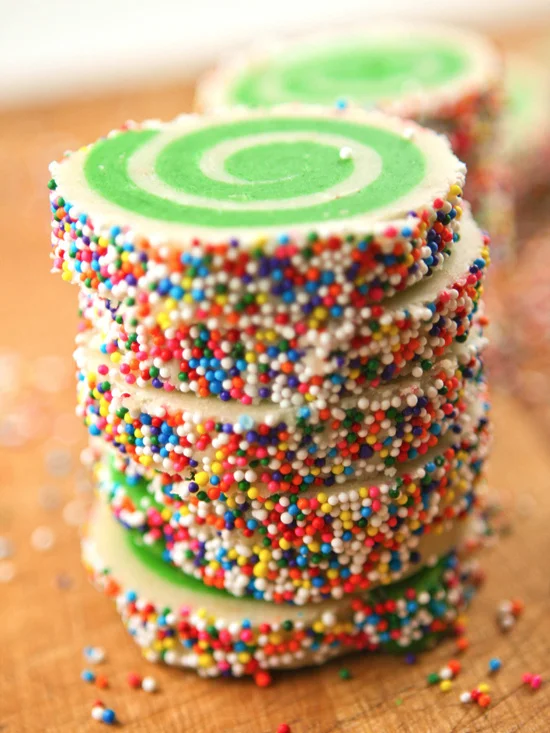
Say goodbye to boring and hello to sprinkles and color! These Spiral Cookies are fun! Red for Christmas, pink for a girl party or blue for pool-side snacks. They’ll make any occasion brighter and more fun!

Original post: December 2011 | Updated: December 2020
I first made these colorful spiral cookies from Sprinkle Bakes back in the wee early years of my blog. Not only are these spiral cookies pretty, but they are also deliciously tasty.
And you can imagine how much kids enjoy them! I heard someone say once after I made them, “Ooo, look! A Grinch cookie!” The green swirls do strangely remind me of the Grinch’s long, swirling fingers.
How To Make Sprinkled Spiral Cookies
These cookies are versatile because they are great year round and easy to adapt with fun colors. They promise to be a hit!
Prep The Dough
STEP 1
Combine the flour, baking powder, salt and sugars in a food processor and process to mix. Add butter and process until the mixture has a cornmeal consistency. Add the vanilla and process until mixture just forms a ball.
STEP 2
Divide the dough in half and return one half to the food processor. Add almond extract, gel food coloring and 2 Tbsp flour to the food processor until just incorporated.
STEP 3
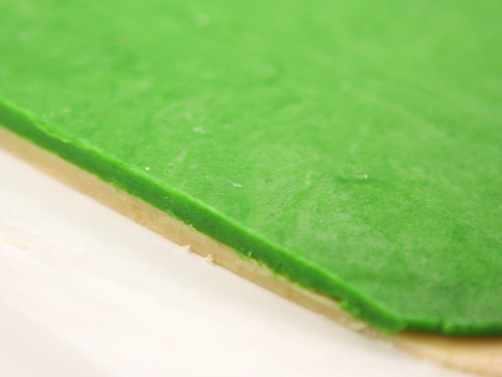
Roll out each half of the dough between sheets of wax paper into an 8×11-inch(ish) rectangle, with a 1/4-inch thickness. Leaving the wax paper on the dough, stack on a baking sheet and refrigerate until firm, at least 2 hours.
Assemble The Cookies
STEP 4
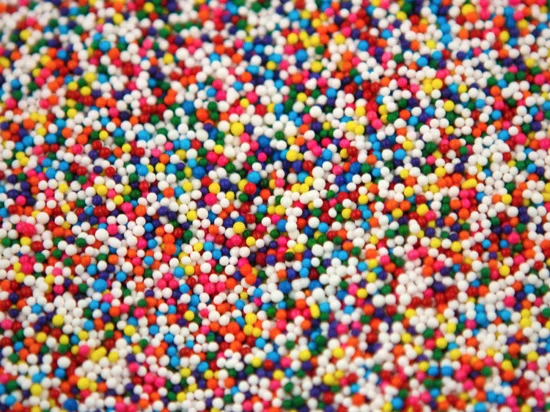
Pour 1 cup of multi-colored sprinkles in a shallow dish.
Remove the dough from the refrigerator and peel off the top pieces of wax paper from each half of dough. Flip the colored dough half over onto the white dough half so that dough is touching dough.
Remove the top sheet of wax paper and trim the long edges with a sharp knife so that the sides are straight and parallel with one another.
STEP 5
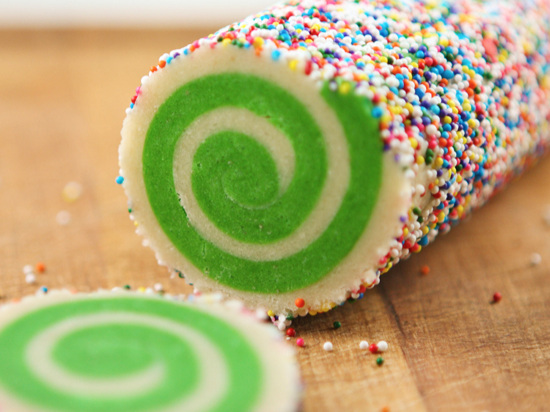
When the dough becomes just pliable, roll it into a log beginning with a long edge. Gently curl the edge with your fingertips and do your best to avoid creating air pockets.
Carefully lift the log into the sprinkle-filled dish. Gently roll it around until the outside is completely coated with color.
Wrap the dough log in plastic wrap and refrigerate until firm enough to slice, about 4 hours.
Bake The Cookies
STEP 6
Preheat your oven to 325 degrees F.
Slice the cookie log into 1/4-inch-thick discs and bake on parchment-lined baking sheets for 15 to 17 minutes, or until the cookies are no longer shiny. Move the cookies to a wire rack to cool completely.
Recipe Notes
- If you have any scraps of dough leftover, just roll them out in worm like strips, bake them and enjoy a treat! They won’t need to bake as long so keep an eye on them.
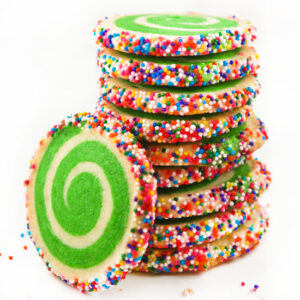
- The green swirl is fun for Christmas, but any color would be just as fun. Bright yellow for a spring-time cookie? Orange for a Halloween cookie? A swirl of colors for a birthday cookie?
- Use a piece of 8.5×11 paper as a guide when rolling out and measuring the dough rectangle.

To Sprinkle or Not To Sprinkle
If you’re not usually a sprinkles kinda person – just wait! These cookies need the sprinkles for two reasons.
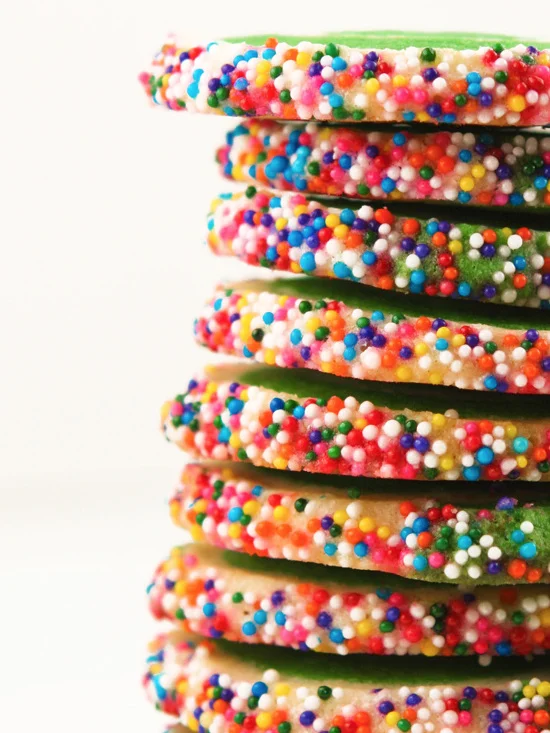
- You will enjoy the crunch it gives to each bite of your cookie because they are a soft sugar cookie on their own.
- The extra pretty look it gives these cookies (and only these if that’s what works for you) make them more festive, and are worth picking up a bottle and rolling these cookies into them!
Gel vs Liquid Food Coloring
This recipe calls for you to use gel food coloring. Could you use liquid food coloring? Sure. But here’s a few reasons to switch over to gel.
- It is thicker, it has a viscous texture.
- Gel food coloring is concentrated and helps achieve a more vibrant color.
- It does cost a little more but you won’t use as much and achieve a more true color that you were hoping to attain.
- Gel food coloring will stain your fingers, so you might want to wear plastic gloves.
Storing Spiral Cookies
You made these tasty show-stopping cookies so be sure after they have completely cooled to place them in a air-tight container or a ziploc bag. You can enjoy them over the next few days if you can keep your hands off them!
Best Dessert Recipes
- No bake strawberry pie is a great dessert for gatherings of any kind. It is super easy to prepare and it is packed with delicious strawberry flavor!
- Gingerbread Poke Cake = the marriage of Gingerbread Cookies and cake! This cake is beyond delicious and a total crowd pleaser.
- Creamy banana cheesecake is the perfect way to use up ripe bananas. So delectable and satisfying! Top it off with caramel sauce for good measure!
- This carrot cake recipe made without nuts is the way to go! It is moist, flavorful, perfectly spiced and topped with yummy cream cheese frosting!
- Snack bites take less than 10 minutes to make and you probably have all of the ingredients sitting in your pantry. Kids adore them! Great after school or anytime snack with no preservatives or unknown ingredients.
- Almond Cookies are melt-in-your-mouth delicious and super easy to make! They are topped with an almond glaze and a touch of orange zest that will leave you wanting more (and more and more)!
- Monkey bread with cream cheese hiding inside! Stuffing the dough with gooey-ness makes a delicious treat. Prepare to WOW your guests!
Will you help add value to Pip and Ebby?
If you make this recipe and love it, stop back and give it a 5-star rating ⭐️⭐️⭐️⭐️⭐️ and leave a comment. THANK YOU!
Sprinkled Spiral Cookies Recipe
Ingredients
- 2 cups all-purpose flour
- 1/2 tsp baking powder
- 1/4 tsp salt
- 2/3 cup powdered sugar
- 1/4 cup granulated sugar
- 2 1/2 sticks unsalted butter cubed
- 1 tsp vanilla extract
- 1/2 tsp almond extract
- 1 tube gel food coloring any color
- 2 tbsp all-purpose flour
- 1 cup multi-colored nonpareil sprinkles
Instructions
- Combine the 2 cups of flour, baking powder, salt and sugars in a food processor and process to mix. Add butter and process until the mixture has a cornmeal consistency. Add the vanilla and process until mixture just forms a ball.
- Divide the dough in half and return one half to the food processor. Add the almond extract, food coloring and 2 Tbsp flour and mix until just incorporated.
- Roll out each portion of dough between sheets of waxed paper into an 8×11-inch rectangle, with ¼-inch thickness. Stack the dough, leaving in the wax paper, onto a baking sheet and refrigerate until firm, at least 1 hour.
- Pour the sprinkles into a shallow dish. Remove the dough from fridge and peel off the top pieces of wax paper from each dough half. Lift one and flip it over onto the other half so that the doughs are touching. Remove the top sheet of wax paper and trim the long edges with a sharp knife so that the sides are straight.
- When the dough becomes just pliable, roll the dough beginning with a long end into a log. Gently curl the edge with fingertips and try to avoid creating pockets of air. Carefully lift log into the dish with the decors and roll until outside is completely coated. Wrap the log in plastic wrap and refrigerate until firm enough to slice, about 2 hours.
- Preheat your oven to 325 degrees F.Slice the cookie log into 1/4-inch-thick discs and bake on parchment-lined baking sheets for 15 to 17 minutes, or until the cookies are no longer shiny. Transfer cookies to a wire rack to cool completely.
Notes
- If you have any scraps of dough leftover, just roll them out in worm like strips, bake them and enjoy a treat! They won’t need to bake as long so keep an eye on them.
- The green swirl is fun for Christmas, but any color would be just as fun. Bright yellow for a spring-time cookie? Orange for a Halloween cookie? A swirl of colors for a birthday cookie?
- Use a piece of 8.5×11 paper as a guide when rolling out and measuring the dough rectangle.
SO HARD TO DO! DONT BOTHER DOING IT!
what is the measurement for 2 1/2 sticks of butter?
I just made these again (first time was last Christmas) Instead of using my tiny food processor I just mixed the dough with my hands and it worked out just fine. I also find that they slice much easier if you periodically dip the knife in hot water so that it is much warmer than the cold dough. Thank you for sharing! We really like green swirls with mint flavoring.
How many cookies does this batch make? I'd like to make them as favors for a baby shower using each color of the rainbow (so each guest would get 6 different colored cookies). I need to make 50 cookies of each color. Is it a forgiving recipe if I double the recipe? Thanks for your advice.
Solid recipe, tastes great, works as advertised although next time I'd make a few changes for the refrigeration time. The dough is really soft, but my 4 yr old daughter helped me mix and color using our cuisinart and it worked fine. We followed the instructions exactly, but the parts I think I'll change next time, are the first refrigeration (before rolling in candies), and now that I have some experience with the "feel" of the dough, how long to wait before adding them. This recipe has its deceptively hard components. Expect some practice to get the spiral to look like the one in the photo. The hardest part believe it or not, is adding the candies. Use high quality ingredients, and you'll get a nice result. I used 2 drops of Americolor gel for the color. DO NOT use food coloring you find in the market. The cookie feels a bit soft to the touch even after the 15 or 16 minutes, but it stiffens up as it cools. Don't go too much over the time, because a brownish tinge ruins the look. My thanks to the author, for a challenging but fun project. I will definitely make this again.
Made these today and they are so fun 🙂 Mine definitely don't look as pretty as yours though. I had a hard time cutting through the dough log without it sticking to the knife (this was after refrigerating for well over 4 hours) and it also flattened a bit on the bottom side as I cut; however, when they baked they seemed to spread into a nicer circle shape…but I guess I put them too close together because ended up with ovals from them touching, lol. I wish they were a little sweeter, but they are still a great keeper. Thanks!
I'm an English baker and translated the 'stick of butter' weight to be 283g (about 10oz) the dough was ridiculously sticky…have I wrong amount of butter? They are in fridge setting ready for rolling together at mo but I had to add more dry ingredients to even get them rollable. Dread to think how they will turn out!! 🙂
Just made these for a Christmas party. They turned out perfect and they are DELICIOUS! I hope I don't eat them all before tonight!
Thanks!
hi. I have a question. 🙂 when you wrote 2 1/2 sticks of butter , you are talking about the sticks that are equal as 1/2 cup??
I made these the day I saw them and they came out perfectly! I made mine pink for summer to go with pink lemonade for a fun party! I hope everybody has the same awesome experience I did! One thing was that the white dough kept cracking when I would roll it up, but fortunately it didn't make any difference(:
Hi Morgan! Regular food coloring will work just fine. I just happen to like the more solid coloring so I can avoid any excess runny-ness.
Megan
Would regular food coloring work as well, or must it be gel?
These cookies look awesome! I am going to make them for Valentine's Day!
I followed the recipe for these and was absolutely ecstatic with how they turned out. So beautiful and so delicious. I was amazed that mine came out looking like the picture. I will make these again!
Ashley, oh no! I'm so sorry to hear about this! I'm not sure where you went wrong, but I'd say try them again. I have made these a handful of times and every time they have turned out perfectly. Let me know how it goes!
Megan
I was so excited about making these cookies for a surprise birthday party. However, the "dough" came out a sticky mess and looked more like cake batter. It's been sitting in my fridge for over 2 hours and is hopelessly stuck to the wax paper. I'm gonna have to throw it all away… I followed the recipe exactly. It sort of resembled a ball of dough that was slightly crumbly, but when I added the vanilla it destroyed it. When it wasn't working I thought more flour might help. I never thought to add an egg… but I'm afraid to try it again because I don't want to waste all those ingredients a second time. What did I do wrong… ?
just made these they came out PERFECT. so cute and soo tasty. i coated them very lightly in an egg/water combo before adding the sprinkles to let them stick better
Your oven doesn't take 4 hours to preheat? 🙂 Thanks for noting that for me!
Megan
These are beautiful!! The directions made me laugh though, where it says "Preheat your oven to 325" and then directly after says to put the dough in the fridge for 4 hours!! My oven definitely doesn't take 4 hours to heat to 325! 😛
love the bright colours – so cute and ideal for a kids party. I so need to make these for the next mummies and toddlers get together !
Happy New Year