
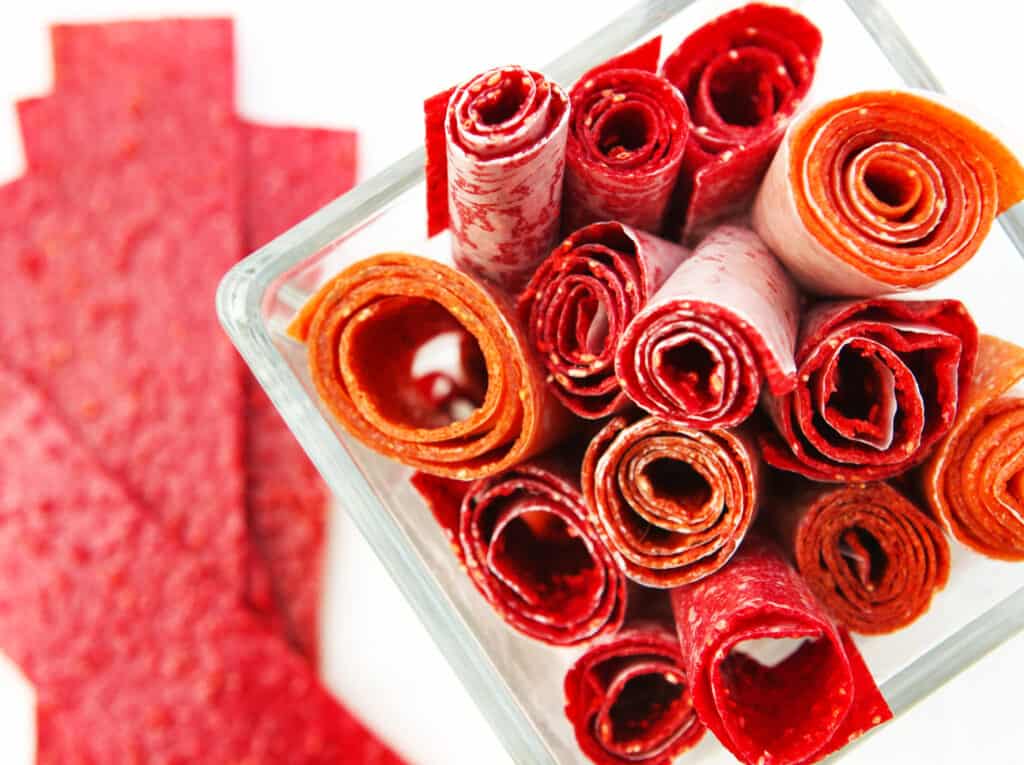
Make homemade fruit roll ups to eliminate artificial and unknown ingredients. This is the ultimate snack food for kids and also a great lunch box gem!
Original post: September 2013 | Recipe updated: October 2020
One of the fun treats I LOVE making this time of year is homemade fruit roll ups. MOMS! I’m telling you! Ditch the preservatives, sugar and artificial junk! Make these for your kids.
I have to tell you up front – they are super easy to make! BUT when you commit to making them you will need a solid chunk of time in the vicinity of your oven since they require a decent amount of baking time.
As long as you are able to monitor your oven, it will do ALL of the work for you.
My boys are now 13 and 10 years old and they still adore these rollups. I adore these rollups. They’re absolutely delish.
WATCH THIS VIDEO TUTORIAL ON HOW TO CUT UP A MANGO
HOW TO MAKE FRUIT ROLL UPS
No more buying fruit leather rolled for your kids – learn to make it yourself. All you will need is pureed fruit!

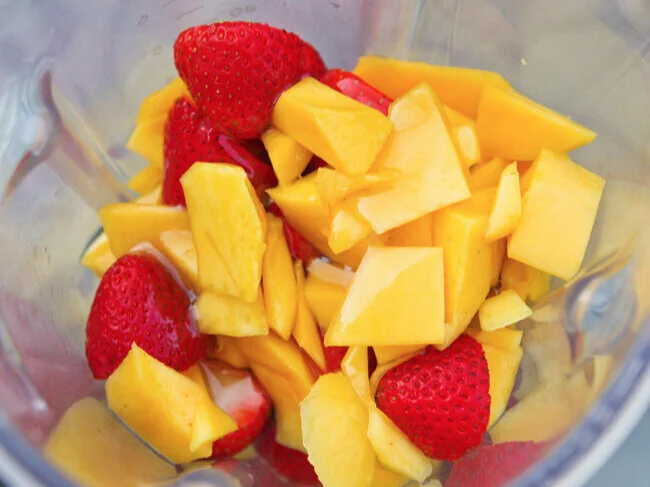
STEP 1 – SELECT FLAVORS
Start out with approximately 4 cups of any kind of chopped fresh fruit mixture. The sweeter the fruit, the less you will be inclined to add sugar and the tastier the roll-ups will be.
Some good options for fruit that add natural sweetness: mangoes, strawberries, raspberries, peaches, pineapple, blueberries, apples, blackberries, pears and grapes.
STEP 2 – PREPARE THE BAKING PANS
Line 2 to 3 small, rimmed baking sheets or 9×13 pans with either parchment paper or plastic wrap. Ensure the parchment/plastic wrap is as smooth as possible in the pan and that there is a little bit of overhang on all sides of the pan. *If using parchment, spray generously with cooking spray.
WHY I USE PLASTIC WRAP
I prefer plastic wrap because it does not melt at such a low temp; it also does not require cooking spray. The dried fruit comes out of the oven grease-free which allows it to adhere to the wax paper nicely in the end. It will peel right off the dried fruit nicely.
If you are using plastic wrap, here’s a little trick: wrap a small dish towel or cloth around your pointer finger while pressing down into the corners and edges of the pan so it doesn’t stick to you.
STEP 3 – MAKE THE FRUIT LEATHER
Preheat oven temperature to 170 degrees F.
Place ingredients into a food processor or blender.
Pureé until smooth. Do a taste test! Check if it needs more flavor or sweetness. Pureé again until thoroughly mixed.
Optional add-ins: add a touch of honey, agave nectar, vanilla extract, almond extract, orange extract, lemon juice, lime juice, orange juice, apple juice or maple syrup.
Pour the mixture into the prepared baking pans until you have reached a thickness of about an eighth of an inch thick. Spread with an offset spatula or just a plain ol’ regular spatula until it is smooth and even. The more even it is, the smoother the baking process will go.

Bake in the preheated oven for 4 to 8 hours. Starting at the 4-hour mark, check your pans every 30 minutes. You should be able to lightly touch the dried fruit and not come away with a gooey finger.
If it still is still sticky, place the pan back into the oven until the fruit is firm and totally dry. Once the fruit is no longer sticky to the touch, remove from the oven and allow to cool completely.
Place wax paper onto cutting boards or a flat work surface.
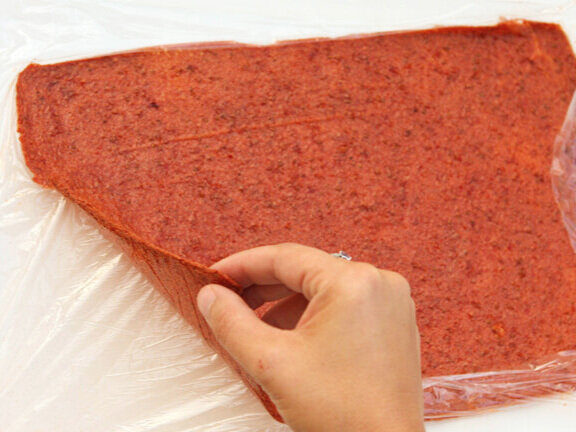
Starting at a corner, carefully peel the fruit away from the wrap/parchment and place it onto the prepped wax paper.
Pat down on the dried fruit evenly and firmly so that it adheres to the wax paper.
Trim the edges of the rectangles with a scissors.
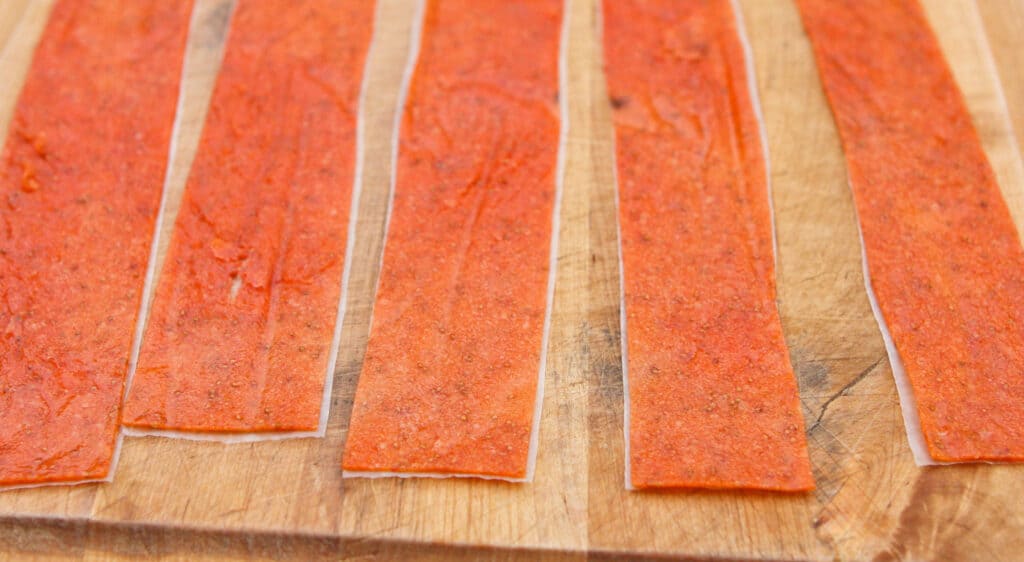
Cut the dried fruit into 1- to 1.5-inch strips.
Roll those cute little strips right up into cute little rolls. Feed to hungry little mouths. Or your own.

HOW TO STORE HOMEMADE FRUIT ROLL UPS
Store in an air-tight container for up to 2 weeks.
BASIC ROLL-UP RECIPE COMBINATIONS
Homemade Strawberry Fruit Roll Ups with Mango (makes ~16-20 roll-ups)
- 2 cups chopped mango
- 2 cups chopped strawberries
- Drizzle of honey
Tomato Peach Strawberry Grape Fruit Roll Ups (makes ~24 roll-ups)
- 2 large tomatoes
- 1 large peach
- About 1 cup grapes
- 1 cup strawberries
- 1/4 cup honey
Raspberry Strawberry Fruit Roll Ups (makes ~16-20 roll-ups)
- 2 cups raspberries
- 2 cups strawberries
- 1 tablespoon fresh lemon juice

RECIPE NOTES
- Most batches will produce 2 pans of roll-ups, but some will produce more.
- Silicone baking mats will work great for this recipe, too.
- Frozen fruit will work! Be sure to thaw the fruit first for the best consistency.
- If you are seeking creativity for your kids to get their veggies, try adding some veggie power! Many veggies will alter the flavor of the finished product, so I recommend adding vegetables in small amounts.
- The only vegetable that I’ve been able to use without limitation is the good ol’ tomato. You get the vitamin A, antioxidants and sweetness. Spinach is another powerhouse option that doesn’t overpower, but should be used moderately when thrown in.
HEALTHY FOODS FOR PICKY KIDS
We’ve put together a list of delicious foods that our kids don’t see as healthy but allow them to enjoy eating their fruits and/or vegetables in a snack or breakfast item.
- Healthy Breakfast Cookies aren’t just for breakfast and they are deceptively delicious. Kids will never know how healthy they are!
- Healthy Breakfast Muffins – Enjoy breakfast the healthy way! Whip up a batch of these muffins as a perfect on-the-go meal or a snack to stay on track with healthy eating.
- Packed with protein and honey to satisfy your sweet tooth, these Peanut Butter Honey Wraps are the perfect snack or lunch for kids! Easy to put together in a lunch or for an afternoon snack.
- Healthy Snack Bites take less than TEN minutes to make and you probably have all of the ingredients in your pantry. Great after-school or anytime snack with no preservatives or added sugar!
- Instant Pot Applesauce – Make your next batch of applesauce in your Instant Pot for an added touch of delicious flavor! This recipe requires only a handful of ingredients and takes just a few minutes to make.

Homemade Fruit Roll Ups
Ingredients
- 4 cups fresh fruit chopped (any mixture of raspberries, blueberries, blackberries, strawberries, peaches, pears, apples, pineapple, mango)
- 1/2 cup fresh vegetables chopped (spinach, tomatoes, carrots, zucchini)
- 1/4 cup honey or other natural sweeteners if desired (honey, agave nectar, maple syrup, vanilla extract, almond extract, orange extract, lemon juice, lime juice, orange juice, apple juice)
Instructions
- Preheat oven to 170 degrees F. Line 2 small, rimmed baking sheets or 9×13 pans with plastic wrap and set aside. Place all ingredients into a blender or food processor and pureé until smooth. Pour into prepared pans and smooth out with a spatula so that the mixture is a uniform 1/8th of an inch thick.
- Bake in preheated oven for 4 to 8 hours, or until fruit is thoroughly dried. Remove from oven and let cool. Remove from plastic wrap and place firmly on pieces of plastic wrap on a flat work surface. Using a scissors, trim the edges and cut into 1- to 1.5-inch strips. Roll strips up and store in a sealed container for up to 2 weeks.
Notes
- Most batches will produce 2 pans of roll-ups, but some will produce more.
- Silicone baking mats will work great for this recipe, too.
- Frozen fruit will work! Be sure to thaw the fruit first for the best consistency.
- If you are seeking creativity for your kids to get their veggies, try adding some veggie power! Many veggies will alter the flavor of the finished product, so I recommend adding vegetables in small amounts.
- The only vegetable that I’ve been able to use without limitation is the good ol’ tomato. You get the vitamin A, antioxidants and sweetness. Spinach is another powerhouse option that doesn’t overpower, but should be used moderately when thrown in.
i feel like 4 – 8 hours is to much
When I prepared this recipe, each time I felt it came out a bit different timing but you can definitely figure it out what’s best for you in your oven. There’s many variables beyond the oven and altitude and exact ingredients you use so it’s not a specific answer but let me know what you felt was a good time!
Can these tasty treats be frozen to preserve longer?
I haven’t tried it but I don’t see why not. I would think you just need to bring them to room temperature once they are out of the freezer to enjoy.
Do these need to be refrigerated after cooking?
Hi Suzanne – I didn’t, we stored them in an air-tight container for up to 2 weeks.
Can I use frozen berries?
Yes, Sara, definitely! Be sure they’re totally thawed first, but they’ll work great!
Megan
I love this idea! I'm excited to try it once fruit season starts!
That WAS easy… and you can't beat no fancy equipment! I'm thinking about trying some with pears that I have today. Thanks so much!
I have to remember to make these!
I am wondering if the plastic wrap will melt or in any way harm the fruit as it cooks?
According to her post – "I personally prefer using plastic wrap. It does not melt in such a low temp and it does not require cooking spray. ". Though I know when I use super cheap plastic wrap even in the microwave it can melt so you may just not want to skimp on it and get the better plastic wrap.
I am TOTALLY going to be brave and try making these!! You make it look too easy!
Just saw these on FB. Love the idea! Can't wait to make them for my children. I sometimes buy individual fruit leather strips that are good for them and made only of fruit, but at around 70 cents each, these seem a lot more economical! And, btw … your bright, cheery pics are fabulous!