

I didn’t call this the World’s Best Chili Recipe after one good batch. Readers have been making and loving it for more than a decade, leaving more than 1,000 comments and 200 five-star reviews.
It has gone viral repeatedly, become one of the most popular recipes in Pip and Ebby history and even inspired people to search for “Pip and Ebby chili” by name.
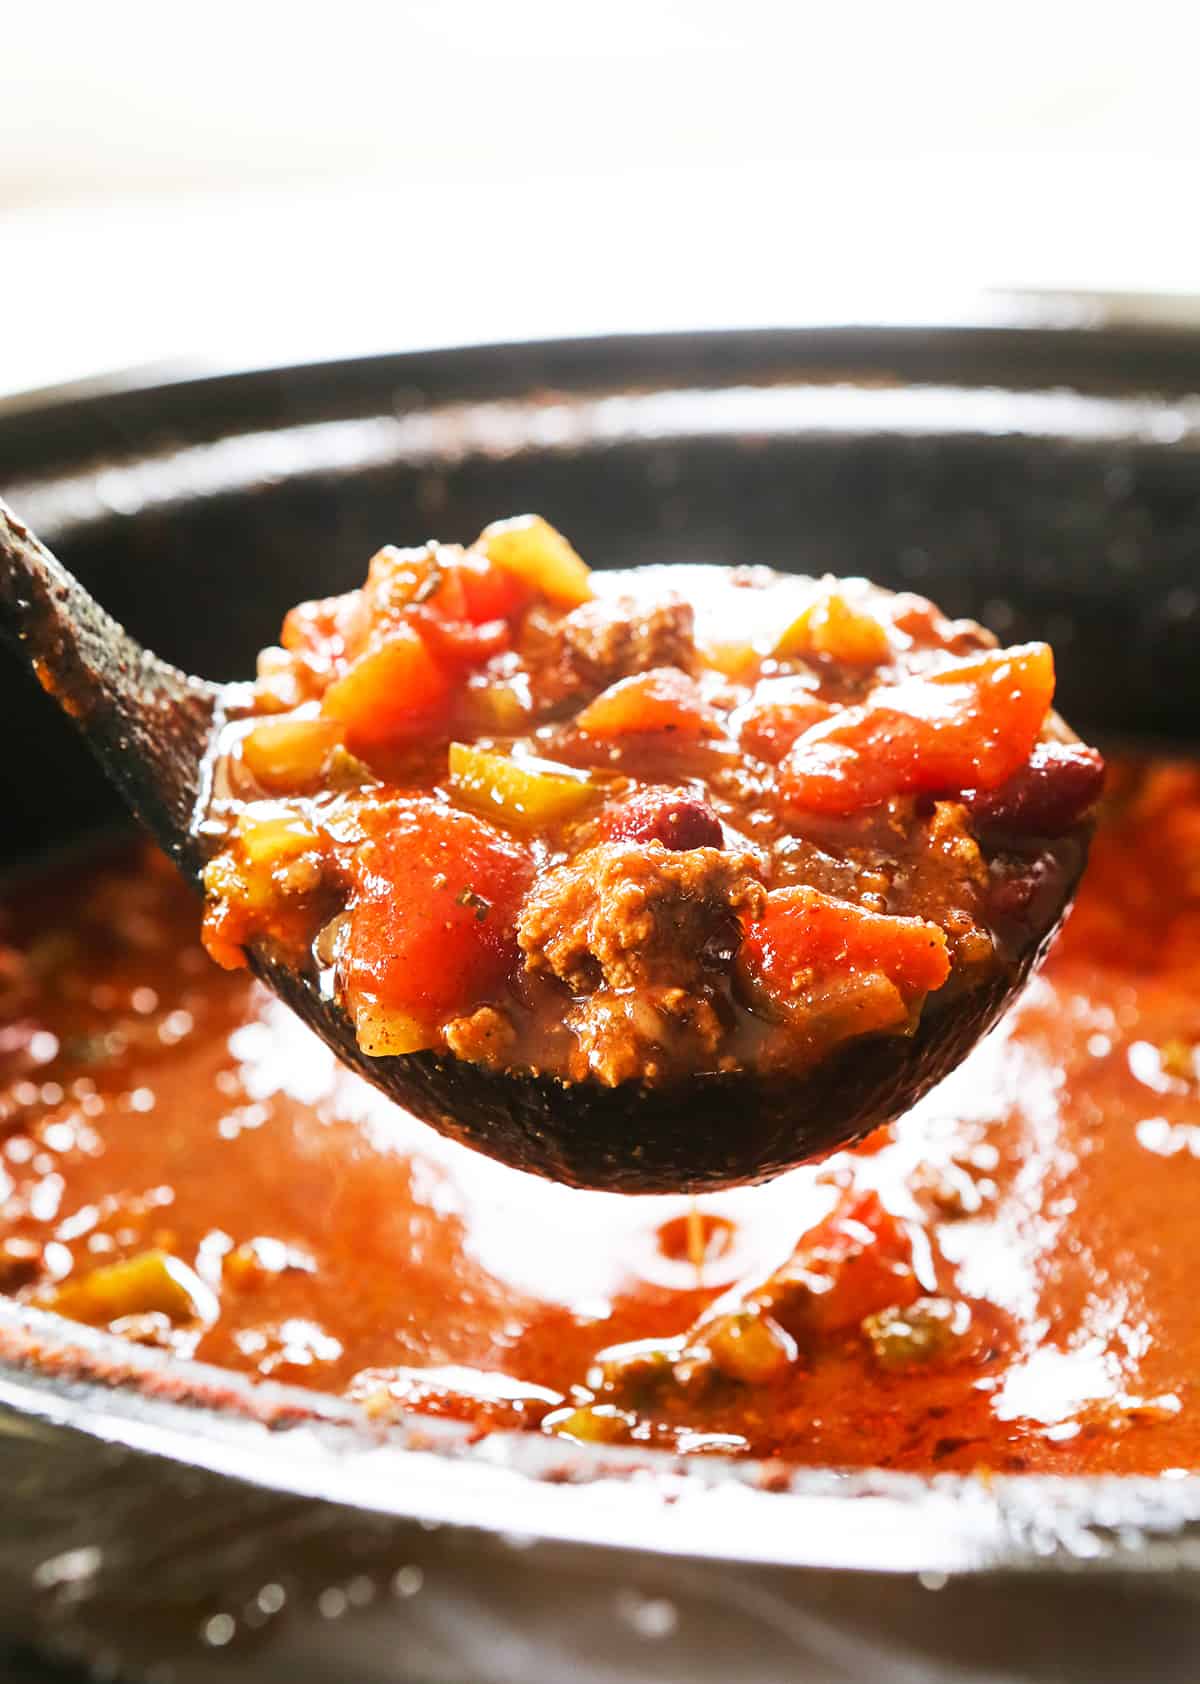
What keeps people coming back is the flavor and the distinctive consistency. This chili is hearty, bold and satisfying, but it isn’t so thick you could eat it with a fork.
It has all the meat, beans and texture you want from classic chili in a rich, spoonable base that’s almost like the perfect marriage of chili and soup. It feeds a crowd, tastes even better the next day and remains the best chili I’ve ever eaten.
⭐⭐⭐⭐⭐ What Readers Are Saying
“I will NEVER make another chilli recipe in my life again!! This is so good! I absolutely do not enjoy cooking and all the prep so the first time I made this I told myself I would never again do it. It was so good that it was worth the chopping up of a few veggies and measuring of a bunch of spices. I make it at least 2-3 times every fall/winter now!” – Ashley
“This IS THE BEST Chili! This recipe has been on rotation in my home for a while now. Everyone raves about how it IS the BEST chili they be ever had! Thank you for sharing this with us!” – Sara
Why This Chili Recipe Works
There’s a reason readers have returned to this recipe for more than a decade. It’s reliable, deeply flavorful and equally at home at a casual family dinner or a big game-day gathering.
- Layers of flavor – Browning the beef and sautéing the vegetables before adding the seasonings creates a richer flavor than simply combining everything in one pot.
- Hearty without being overly thick – The meat, beans and vegetables give it plenty of substance, while the tomato-rich base keeps it spoonable and perfect for soaking up with cornbread or chips.
- Feeds a crowd – One batch makes a generous amount, making it a great choice for game day, parties, family gatherings or planned leftovers.
- Two easy cooking methods – Let it cook low and slow in the slow cooker, or use the included stovetop method when you need it sooner.
- Easy to customize – Use ground beef, turkey or venison, adjust the cayenne and jalapeños to control the heat and add your favorite chili toppings.
It’s cozy, dependable and even better the next day. It’s the kind of homemade chili recipe people make once and return to for years.
For an extra-cozy game-day or family dinner, serve it with my mac and cheese. The two make an especially crowd-pleasing combination.
Chili Ingredient Notes
Ground beef
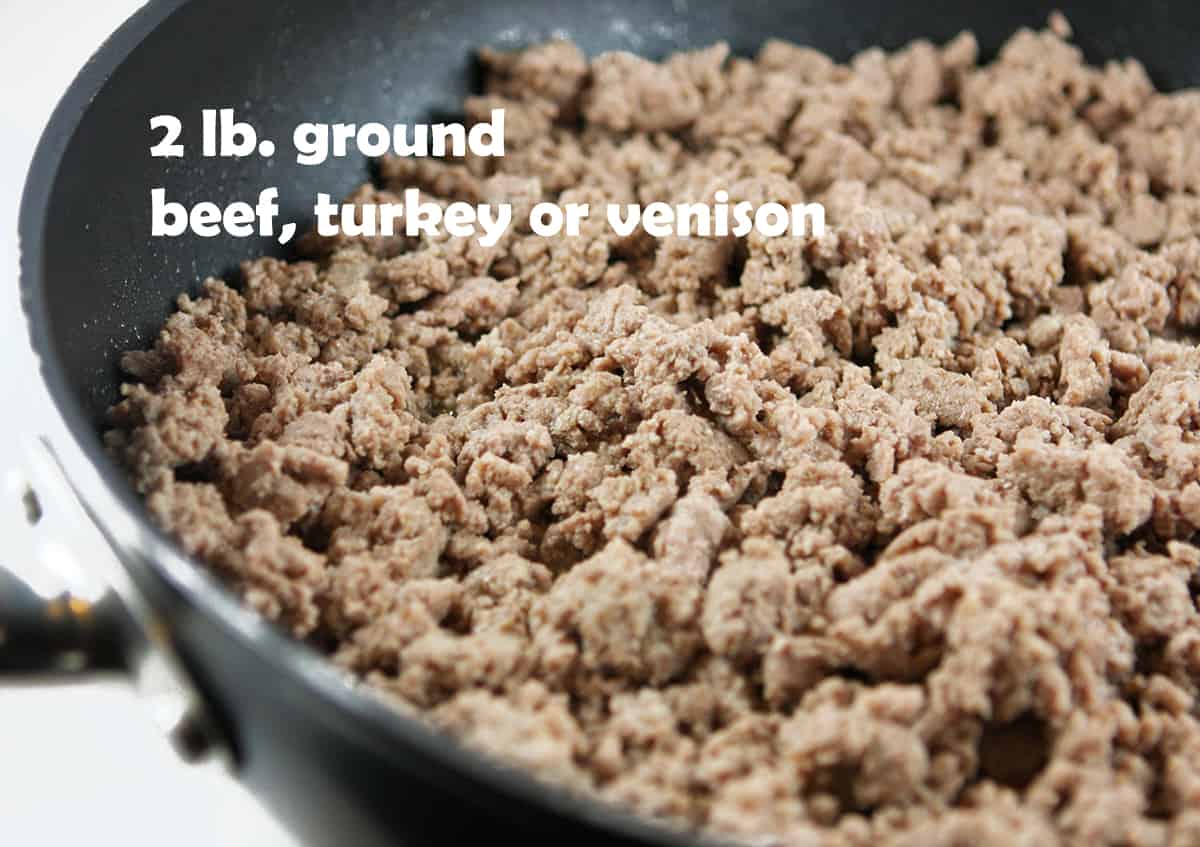
Lean ground beef adds hearty flavor without making the chili greasy. Ground turkey or venison also work well, although the flavor will be slightly different. For an even richer chili, replace 1 pound of the beef with ground sausage.
Bell pepper
The original recipe uses green bell pepper, which adds a savory flavor and balances the tomatoes. Red, yellow or orange bell peppers can be substituted, but they will make the chili slightly sweeter.
Jalapeño peppers
Fresh jalapeños add flavor and subtle heat without making the finished chili overwhelmingly spicy. The heat can vary from pepper to pepper, so remove the seeds and membranes for less heat or omit the jalapeños and cayenne for a mild chili.
This is one of the ingredients I credit with making the recipe so memorable, and readers have reported using this chili to win cook-offs!
Tomato juice
Tomato juice creates this recipe’s distinctive rich, spoonable consistency. For thicker chili, reduce the amount slightly, keeping in mind that the chili will continue to thicken as it simmers and cools.
Beans
Kidney and pinto beans provide a satisfying combination of textures. Black beans can be substituted for either variety, or the beans can be omitted for a no-bean chili.
Seasonings
Chili powder, cumin, oregano and cayenne build the savory chili flavor, while a small amount of sugar balances the acidity of the tomatoes. Adjust the cayenne to make the chili milder or spicier.
Equipment You’ll Need
Large Dutch oven or stockpot
For the stovetop method, use a large Dutch oven or heavy-bottomed stockpot with enough room to hold the entire batch. You can brown the beef, sauté the vegetables and simmer the chili in the same pot.
Large skillet
If using a slow cooker, brown the ground beef and sauté the vegetables in a large skillet before transferring everything to the slow cooker.
8-quart slow cooker
This recipe makes a large batch, so use an 8-quart slow cooker to give the ingredients plenty of room to simmer without overfilling the insert.
How To Make Slow Cooker Chili
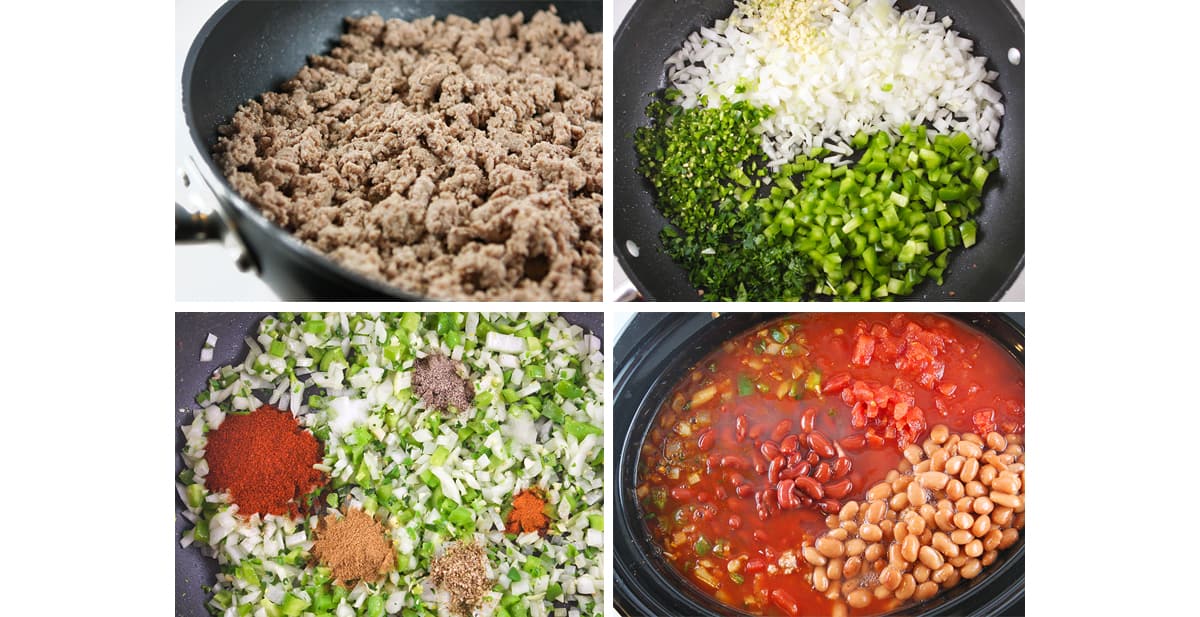
- Brown the ground beef
Cook the ground beef in a large skillet over medium-high heat, breaking it into crumbles, until no longer pink and lightly browned.
Transfer the beef to an 8-quart slow cooker. Drain the excess grease from the skillet, but do not clean it.
- Sauté the vegetables
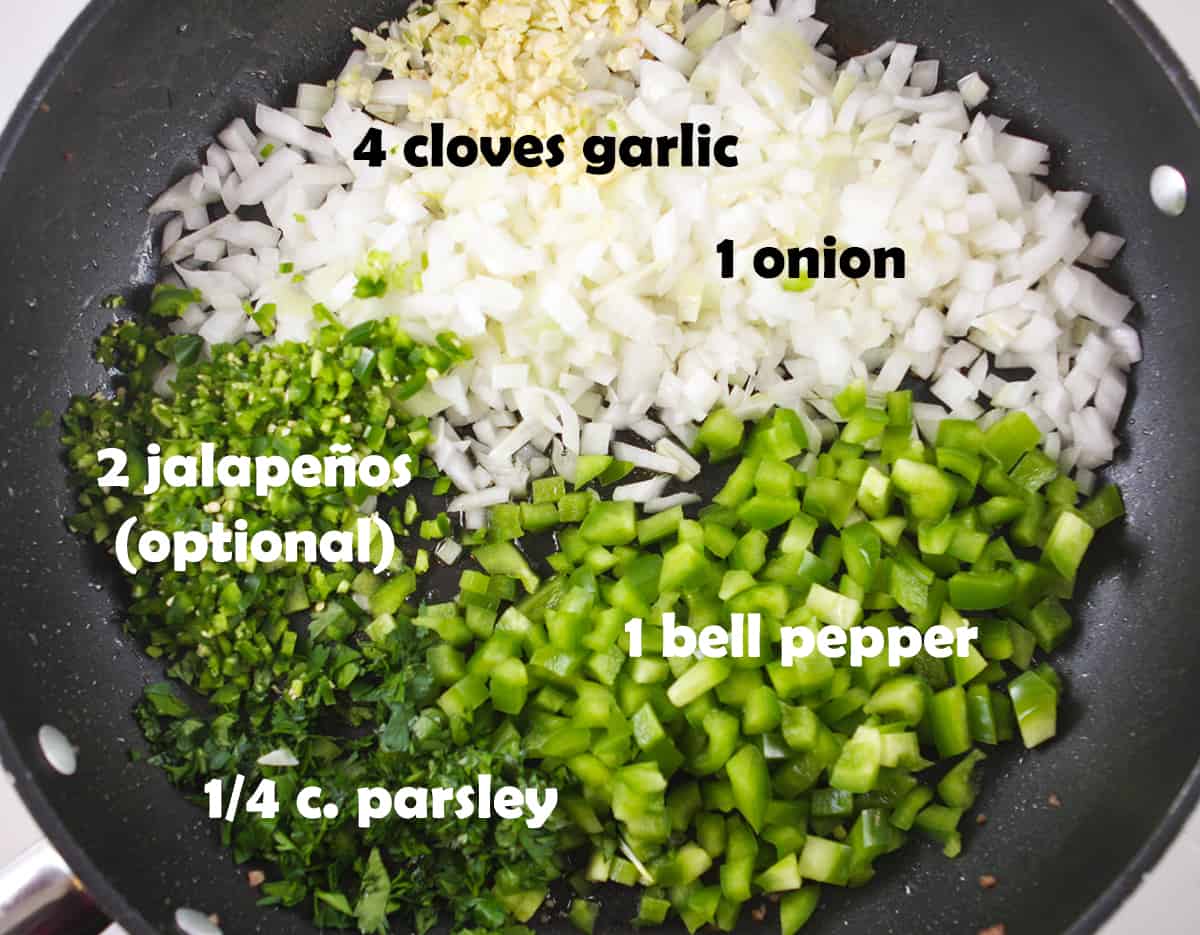
Add the olive oil to the same skillet and reduce the heat to medium. Add the onion, green bell pepper, garlic, parsley and jalapeños, if using.
Cook for about 5 minutes, stirring occasionally, until the vegetables are softened and fragrant.
- Add the seasonings
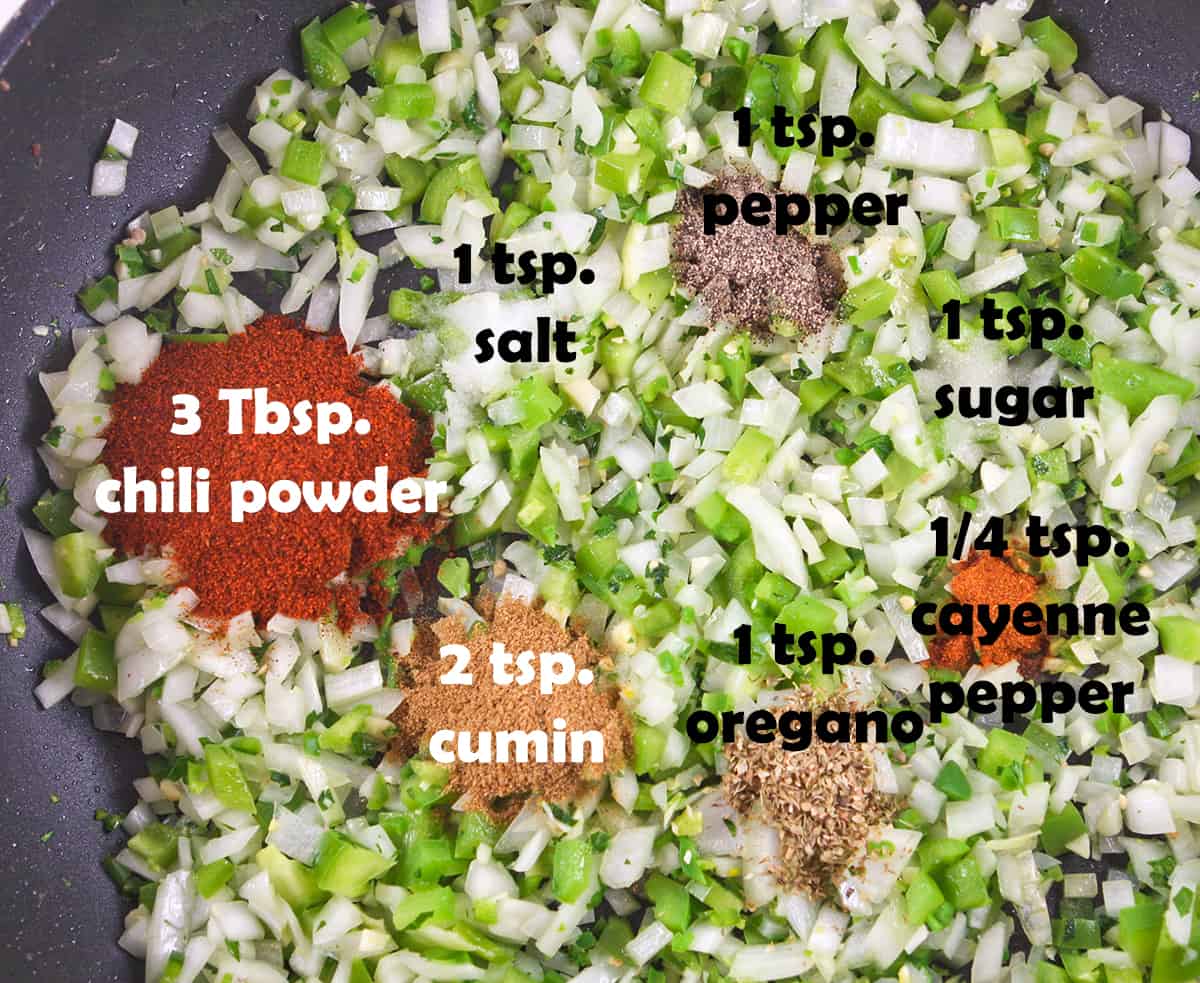
Remove the skillet from the heat. Add the chili powder, cumin, sugar, oregano, salt, black pepper and cayenne pepper.
Stir until the vegetables are evenly coated with the seasonings.
- Combine the ingredients
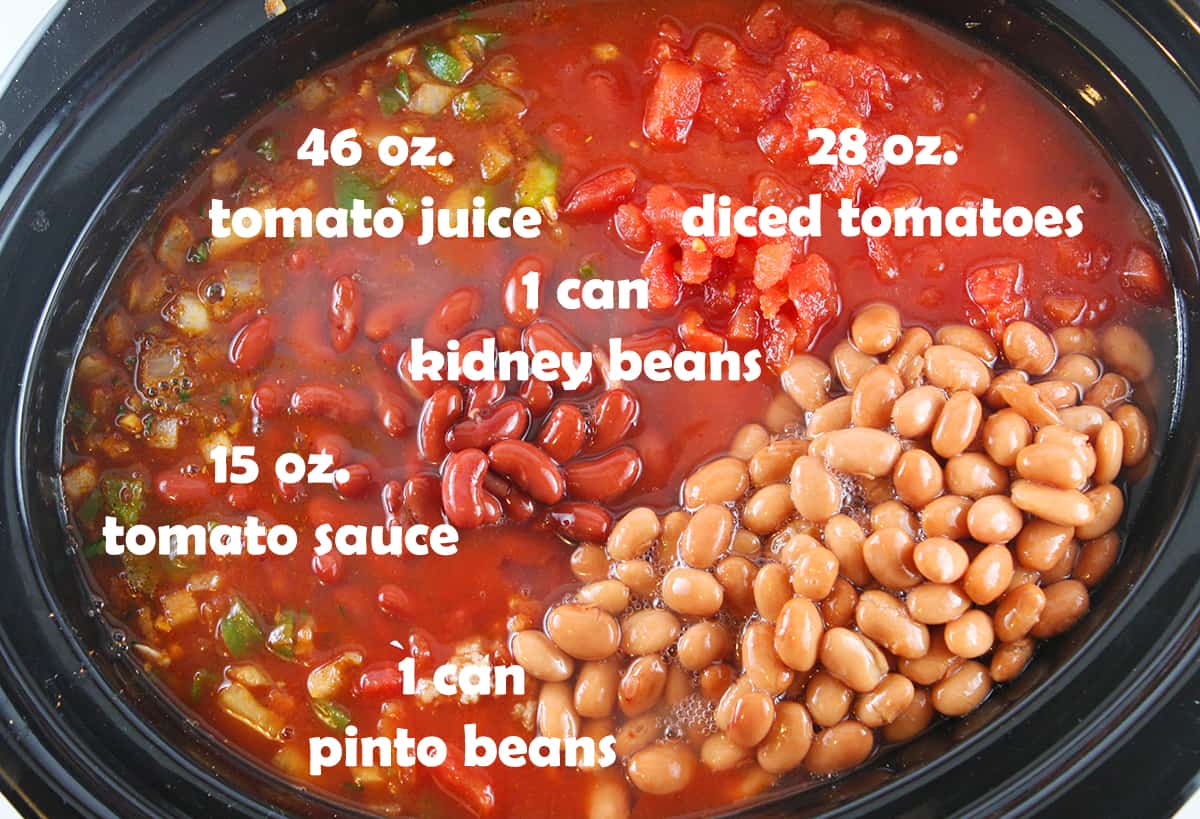
Transfer the seasoned vegetables to the slow cooker with the beef. Add the tomato juice, diced tomatoes, tomato sauce, kidney beans and pinto beans. Stir until well combined.
- Slow cook the chili
Cover and cook on low for 7 to 8 hours. Allowing the chili to cook for the full amount of time gives the flavors a chance to deepen and blend. - Serve
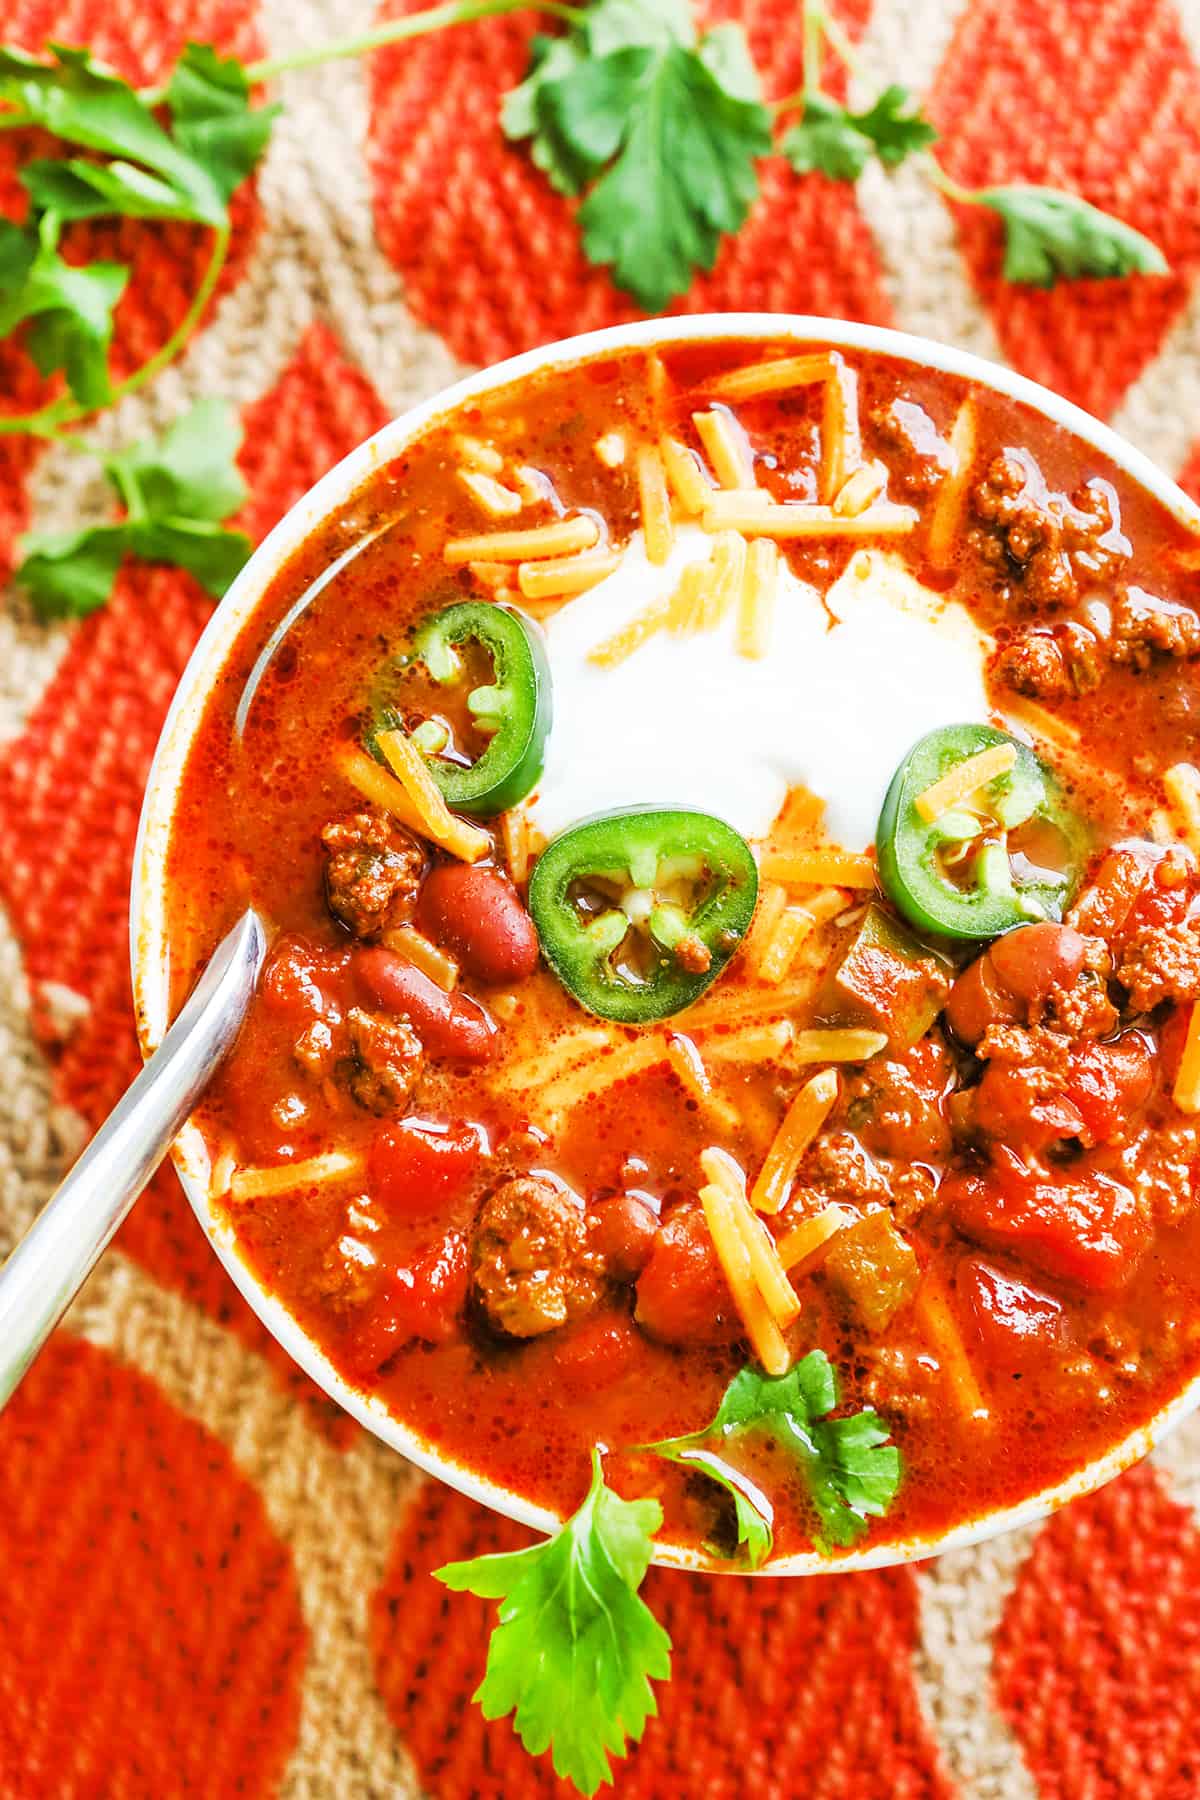
Stir the chili well and taste, adjusting the salt or seasonings if needed. Ladle into bowls and serve warm with shredded cheddar cheese, sour cream and your favorite chili toppings.
Stovetop Option
To make this chili on the stovetop, use a large Dutch oven or heavy-bottomed stockpot instead of a skillet and slow cooker.
Brown the beef, transfer it to a bowl and drain the excess grease. Sauté the vegetables and add the seasonings as directed, then return the beef to the pot. Stir in the tomato juice, diced tomatoes, tomato sauce, kidney beans and pinto beans.
Bring the chili to a boil, then reduce the heat to medium-low. Simmer uncovered for 2 hours, stirring occasionally.
Key Tips for the Best Chili
- Keep the flavorful browned bits – After cooking the beef, drain the excess grease but don’t clean the pot. The browned bits left behind add flavor as the vegetables cook.
- Add the seasonings before the liquids – Stirring the spices into the warm vegetables helps release their flavor before the tomato juice and other ingredients are added.
- Give it the full cooking time – The 2-hour stovetop simmer or 7- to 8-hour slow-cooker time allows the flavors to deepen and blend. Avoid shortening the cooking time if possible.
- Taste before serving – Once the chili has finished cooking, taste and adjust the salt, cayenne or chili powder as needed. Seasoning brands and preferred heat levels can vary.
- Make it ahead when you can – The flavors become even richer after resting overnight, making this an excellent chili to prepare a day before serving.
Chili Variations
- Make it milder – Remove the seeds and membranes from the jalapeños, or omit both the jalapeños and cayenne.
- Add more heat – Increase the cayenne or serve sliced jalapeños and hot sauce on the side.
- Change the meat – Substitute ground turkey or venison for the beef, or replace 1 pound of beef with ground sausage for richer flavor.
- Make it without beans – Omit the kidney and pinto beans and reduce the tomato juice slightly to account for the lost volume.
Best Chili Toppings
Set out a variety of toppings so everyone can customize their own bowl. My favorite chili toppings include:
- Shredded cheddar cheese – Melts into the warm chili and adds rich, savory flavor.
- Sour cream – Adds a cool, creamy contrast and helps balance the heat.
- Green onions or diced red onion – Provide fresh flavor and a little crunch.
- Sliced jalapeños – Perfect for anyone who wants extra heat.
- Avocado – Adds a creamy texture that pairs especially well with the bold chili.
- Fresh cilantro – Brightens the rich tomato-based flavors.
- Crushed tortilla chips or corn chips – Add a salty, satisfying crunch.
- Lime wedges – A squeeze of lime adds a fresh, tangy finish.
For game day or a casual gathering, turn it into a chili toppings bar and let everyone build their own bowl.
What To Serve With Chili
Cornbread is the classic side for chili, but dinner rolls, garlic bread, corn chips and a crisp salad are also delicious options. Here are a few of my favorite pairings:
- Homemade Cornbread – The classic cozy pairing and perfect for soaking up the rich, spoonable base.
- Dinner Rolls – Soft, buttery rolls make this crowd-friendly meal even more satisfying.
- Garlic Bread – A great choice when you want something crisp, buttery and especially good for dipping.
- Chopped Salad – A fresh, crunchy salad provides a refreshing contrast to the warm, hearty chili.
For more ideas, see my complete guide to what to serve with chili.
How To Store and Reheat Chili
Let the chili cool, then divide it among shallow, airtight containers. Store it in the refrigerator for 3 to 4 days or freeze it for up to 3 months.
Thaw frozen chili overnight in the refrigerator. Reheat it in a saucepan over medium-low heat, stirring occasionally, or microwave individual servings until heated through. If the chili has thickened in storage, stir in a splash of tomato juice, broth or water until it reaches your preferred consistency.
This chili is especially good for meal prep because the flavors become even richer after a night in the refrigerator.
Chili FAQ
For thicker chili, replace the diced tomatoes with an equal amount of crushed tomatoes or begin with 36 to 40 ounces of tomato juice, adding more if needed. You can also simmer the chili uncovered near the end of cooking. Remember that it will continue to thicken as it cools and rests.
Store cooled chili in shallow, airtight containers in the refrigerator for 3 to 4 days. Because this recipe makes a large batch, divide it among several containers so it cools more quickly. This aligns with current USDA food-safety guidance.
Yes. Let the chili cool, then transfer it to airtight containers or freezer bags, leaving a little room for expansion. Freeze for up to 3 months for best quality. Thaw overnight in the refrigerator before reheating.
Yes. Omit the kidney and pinto beans for a no-bean chili. The finished batch will yield less and have a slightly thinner consistency, so you may also want to reduce the tomato juice.
Turn leftover chili into chili mac, chili dogs, nachos, loaded fries or stuffed baked potatoes. Find even more inspiration in my leftover chili recipes.
Leftover chili also makes amazing chili dogs! Check out my favorite things to serve with chili dogs to turn them into an easy dinner.
The Story Behind This Chili
This recipe has been part of Pip and Ebby for more than a decade, and its popularity still amazes me. It was one of the first recipes on my site to reach a huge audience, and its success helped support some special family experiences over the years.
Despite the thousands of recipes I’ve cooked and tested since then, this is still the chili my family makes. I don’t keep it here simply because it became popular. I keep making it because it remains my favorite.
More Chili Recipes
If you’re looking for another cozy bowl, try one of these reader-favorite chili recipes:
- White Chicken Chili – A creamy, comforting alternative made with tender chicken and white beans.
- Quick and Easy Chili – A faster option for nights when you don’t have two hours to let chili simmer.
- Chili Mac – The ultimate comfort-food combination of hearty chili and tender pasta.
- Hot Dog Chili – A thick, flavorful chili made especially for hot dogs, burgers and game-day meals.
- No Bean Chili – A thick, hearty option for anyone who prefers chili without beans.
More Ground Beef Recipes You’ll Love
Have more ground beef to use? These cozy, family-friendly dinners are reader favorites:
- Classic Meatloaf – A tender, flavorful meatloaf made with crackers and topped with a sweet, savory glaze.
- Hamburger Wild Rice Casserole – A hearty Minnesota-style casserole made with ground beef, wild rice and creamy sauce.
- Ground Beef Casserole with Egg Noodles – An easy, comforting dinner filled with beef, tender noodles and plenty of cheesy goodness.
- Instant Pot Sloppy Joes – A quick, saucy ground beef dinner that’s perfect for busy weeknights or feeding a crowd.

World’s Best Chili Recipe
Ingredients
- 2 pounds ground beef
- 4 tbsp olive oil
- 1 yellow onion chopped
- 1 green bell pepper chopped
- 4 cloves garlic minced
- 1/4 cup flat-leaf Italian parsley finely chopped
- 2 jalapeño peppers finely chopped (optional)
- 3 tbsp chili powder
- 2 tsp cumin
- 1 tsp sugar
- 1 tsp oregano
- 1 tsp salt
- 1 tsp pepper
- 1/4 tsp cayenne pepper
- 46 oz tomato juice
- 28 oz diced tomatoes
- 15 oz tomato sauce
- 16 oz kidney beans drained and rinsed
- 16 oz pinto beans drained and rinsed
- Shredded cheese and sour cream for topping
Instructions
- Brown the ground beef.Cook the ground beef in a large skillet over medium-high heat, breaking it into crumbles, until no longer pink and lightly browned. Transfer the beef to an 8-quart slow cooker. Drain the excess grease from the skillet, but do not clean it.2 pounds ground beef
- Sauté the vegetables.Add the olive oil to the same skillet and reduce the heat to medium. Add the onion, green bell pepper, garlic, parsley and jalapeños, if using. Cook for about 5 minutes, stirring occasionally, until softened and fragrant.4 tbsp olive oil, 1 yellow onion, 1 green bell pepper, 4 cloves garlic, 1/4 cup flat-leaf Italian parsley, 2 jalapeño peppers
- Add the seasonings.Remove the skillet from the heat. Add the chili powder, cumin, sugar, oregano, salt, black pepper and cayenne pepper. Stir until the vegetables are evenly coated.3 tbsp chili powder, 2 tsp cumin, 1 tsp sugar, 1 tsp oregano, 1 tsp salt, 1 tsp pepper, 1/4 tsp cayenne pepper
- Combine the ingredients.Transfer the seasoned vegetables to the slow cooker with the beef. Add the tomato juice, diced tomatoes, tomato sauce, kidney beans and pinto beans. Stir until well combined.46 oz tomato juice, 28 oz diced tomatoes, 15 oz tomato sauce, 16 oz kidney beans, 16 oz pinto beans
- Slow cook the chili.Cover and cook on low for 7 to 8 hours.
- Serve.Stir well and taste, adjusting the salt or seasonings if needed. Ladle into bowls and serve warm with shredded cheddar cheese, sour cream and your favorite toppings.Shredded cheese and sour cream
Video
Notes
Stovetop Option
To make this chili on the stovetop, use a large Dutch oven or heavy-bottomed stockpot instead of a skillet and slow cooker. Brown the beef, transfer it to a bowl and drain the excess grease. Sauté the vegetables and add the seasonings as directed, then return the beef to the pot. Stir in the tomato juice, tomatoes, tomato sauce and beans. Bring to a boil, reduce the heat to medium-low and simmer uncovered for 2 hours, stirring occasionally.- Consistency: This chili intentionally has a rich, spoonable consistency. For thicker chili, replace the diced tomatoes with an equal amount of crushed tomatoes or begin with 36 to 40 ounces of tomato juice, adding more as needed.
- Heat level: Remove the jalapeño seeds and membranes for less heat, or omit both the jalapeños and cayenne for a mild version.
- Make ahead: The flavor becomes even richer after the chili rests overnight.
- Storage: Refrigerate cooled chili in shallow, airtight containers for 3 to 4 days.
- Freezing: Freeze in airtight containers or freezer bags for up to 3 months. Thaw overnight in the refrigerator before reheating.
- Reheating: Warm gently on the stovetop or microwave individual portions until heated through. Add a splash of tomato juice, broth or water if the chili has thickened in storage.For the deepest flavor, drain the excess grease after browning the beef but don’t clean the pot. The flavorful browned bits left behind will season the vegetables and the entire batch of chili.
Nutrition

Megan Porta is a comfort food recipe creator who specializes in easy family meals and Instant Pot desserts, and the founder of Pip and Ebby. She has been cooking for three decades and developing recipes for over fifteen years, helping home cooks make reliable, cozy recipes for real life.
This chilli really is sensational. I live in Australia and the
only version we get comes from a packet!! This leaves
all of those for dead. My family love it and I love the fact
that I can put it in the skow cooker and walk away.
Highly recommend this recipe. Thank you.
MAR: I use an EXTRA large skillet for this chili. It's ~12 inches. You can also use a large saucepan and that will work just great! Hope this helps!
Megan
What size skillet do you use I'm worried the amount won't fit
Looks fantastic! I'm currently compiling a list of different chili recipes to try this fall … definitely going to be using yours! I'm glad you use two whole jalapeños – we love heat in my house. Thanks for posting!
Hi Erin! If you are using stovetop, simmer for two hours and then serve! Hopefully this helps!
Megan
Do I have to let it sit on the stove for an hour? Or can I just finish boiling then eat it?
Hi Holly! You can do it all without a lid! Hope this helps. Have a wonderful evening!
Megan
Hey there! I'm cooking up a pot of this chili for tonight. Going the stovetop route, would you leave it uncovered or throw a lid on after bringing to a boil?
Made this tonight. It's great. I used half the amount of tomato juice because it seemed like it would be soupy. Is it really 46 oz.
made this today. couldn't seem to find pinto beans for some reason so i substituted black beans. also wasnt sure about the tomato juice situation as people from different countries seem to refer to different things here especially if they're tinned – i ended up just using a thinish passata which seems to be working pretty well, though i need to reduce down for another four hours or so at least. smells very good so clearly you got the spice combo right! thanks 🙂
Hi Daphne! Yes, just one can of each type of bean. I hope it turns out great for you!
Megan
Hi, I'm gonna be making this soon and was wondering. ….. do I need only 1 can of each type of bean?
Awesome! Loved the pictures with ingredients in large print, so easy to see on my laptop while cooking. I used a can of V-8 instead of tomato juice because that is what I had. Delicious! thank you for redefining chili and making it slow cooker friendly too.
I made this chili, I loved it. It took me a long time to put everything together but it was so worth it. Yummy
Let me know how it turns out, Rachel! I hope you love it! 🙂
Megan
Making this right now! Only had 1 lb of ground beef so I added a red pepper to bulk it up. Also used 16oz of water instead of 48oz tomato juice, basically because my pot didn't hold anything more! It's cooking as we speak!
Hi Skye! I hope you enjoy this recipe! We just made it again today and it is soooo delicious. Even with the 2 jalapenos we added, the 3 tablespoons of chili powder (just regular…not hot) did not put it over the top. It was perfect! It's not a super thick chili, but I wouldn't say it was liquidy, either…definitely somewhere in between. I really hope you like it!
Megan
This looks lovely and I am planning on making it this week – I am in the UK so just wanted to check on the amount of chilli powder – is it 3 tablespoons and is that mild chilli powder or hot chilli powder – me and hubby love spicy but the 6 and 8 year old can only handle a bit of heat. Also is it a very liquidy chilli (over here we tend to have quite thick chilli to eat with rice. Can't wait to make this x
Hi Jessica! Whether or not you take the seeds out is completely up to you. I always leave them in. Leave them for a little added kick or remove them for more of a milder chili. I hope this helps!
Megan
Hi do you take the seeds out of the jalapeño or leave seeds? Thanks!