
These easy ground beef sliders are the ultimate crowd-pleaser.. juicy, cheesy, and gone in minutes! Perfect for game day, holidays, or weeknight dinners, they come together fast with just a handful of simple ingredients. Whether you’re feeding a party or your family, these mini cheeseburgers deliver big flavor in every bite.

Original post: October 2015 | Updated: September 2023
Why This Recipe Works
- Do you know those dishes you can bring to literally any gathering knowing it will get rave reviews and get devoured quickly? This recipe is it.
- These juicy cheeseburger sliders are a total crowd favorite, every single time.
- Whether it’s game day, a holiday or a summer bbq, these cute and delish little mini cheeseburgers fit perfectly in your fingers and will feed a large crowd or a small one.
- Cheesy beef sliders are easy to prepare, taking just 15 minutes of prep time and requiring a few simple ingredients. The ingredients required to make the recipe are probably sitting right in your kitchen.
- These easy ground beef sliders are super delicious and the pan never lasts long.
- It’s such a great party food, but also will make the perfect family dinner if you’re looking for an extra fun meal for busy weeknights.
Recipe Ingredients
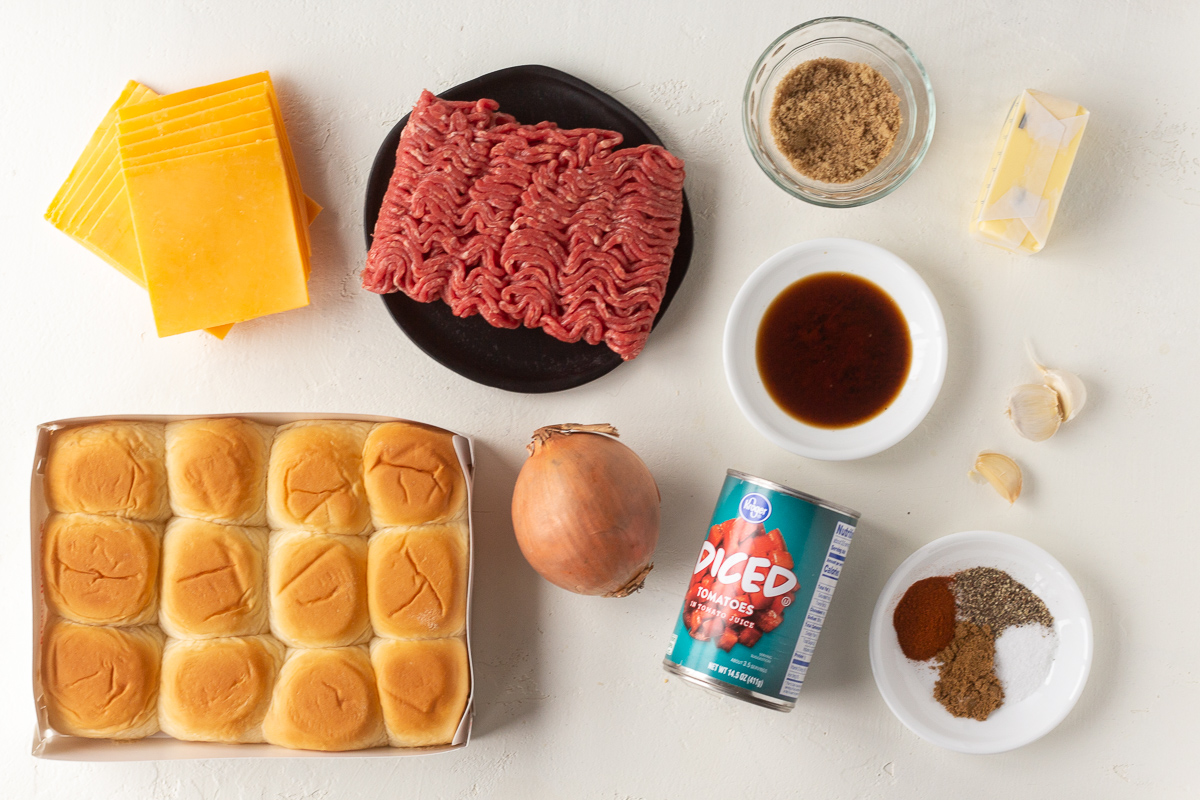
Ground beef – Beef can be replaced with lean ground beef, ground turkey or ground chicken for a leaner cheeseburger slider recipe.
Onion – Yellow onion or white onion may be used.
Garlic – Fresh minced garlic can be replaced with 1/2 teaspoon garlic powder or garlic salt if desired.
Seasonings – Keep it simple yet delicious with salt, black pepper, cumin and paprika.
Diced tomatoes – Use a seasoned variety of canned tomatoes for a yummy flavor boost!
Cheese – Consider swapping the cheddar cheese slices out with any type of melty cheese. Great options include mozzarella cheese, pepper jack, provolone, cojack or American cheese slices.
Rolls – Dinner rolls or Hawaiian sweet rolls work best in this recipe. Consider making homemade dinner rolls for an added personal touch!
Glaze – Butter, brown sugar and Worcestershire sauce create the most delicious special sauce to spread over the tops of the hawaiian buns.
How to Make Ground Beef Sliders
Step 1
Preheat oven to 350 degrees F. Coat a 9×13 baking dish with cooking spray (or line with parchment paper) and set aside. In a large skillet over medium heat, cook one pound of ground beef until no longer pink.
Add the onion, garlic, salt, pepper, cumin, paprika and diced tomatoes to the cooked beef in the skillet.
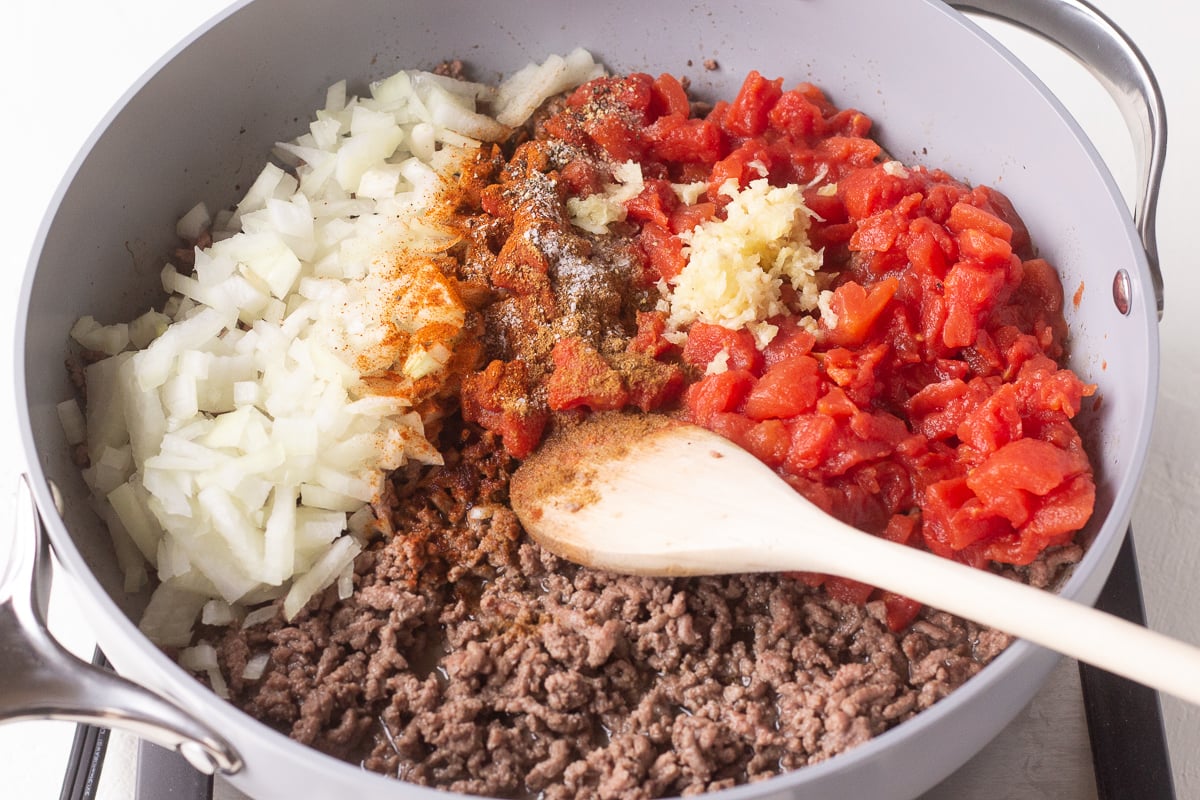
Cook for an additional 3-4 minutes, or until onion and garlic is fragrant and soft. Remove from heat.
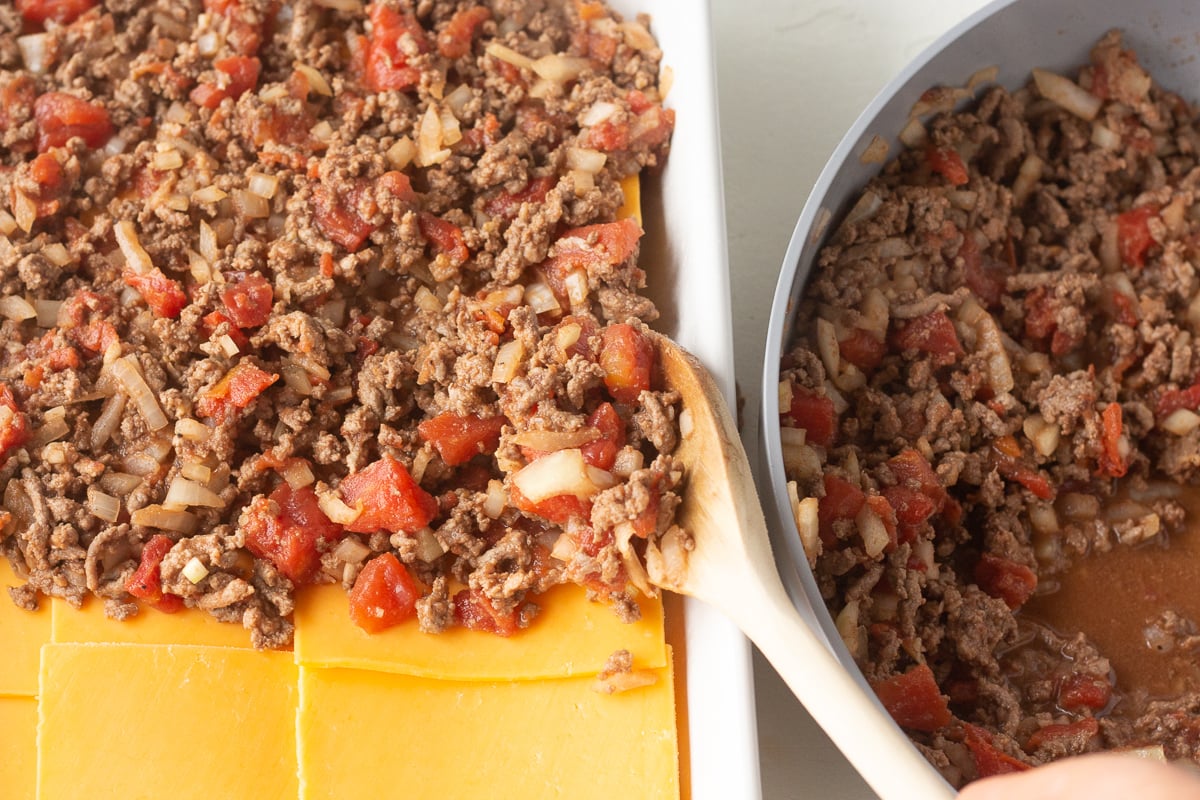
Step 2
Line the bottom of the greased baking dish with the bottom buns in a single layer. Top with the slices of cheese, the ground beef mixture and the tops of the buns.
Step 3
In a small bowl, combine the glaze ingredients: melted butter, brown sugar and Worcestershire sauce.
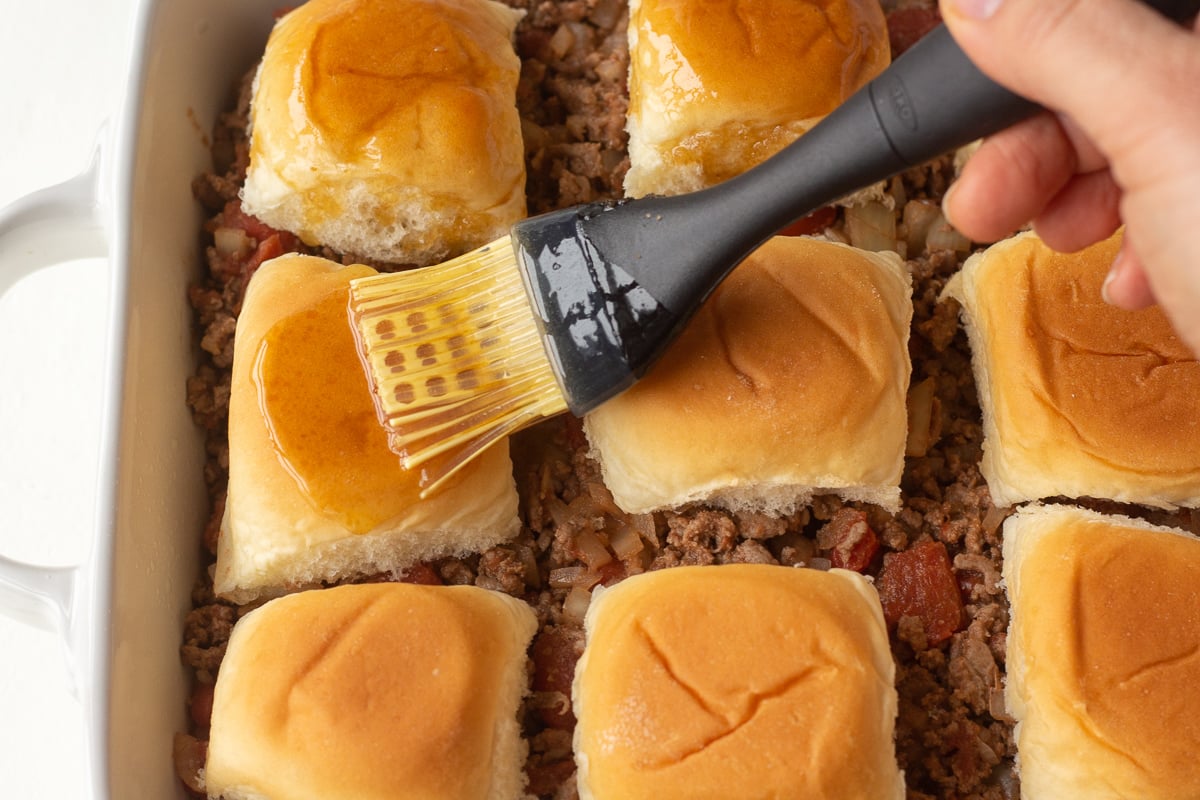
Mix well and brush evenly over the tops of the rolls. Bake in the preheated oven for 30 minutes. Serve immediately!
Store leftovers in the refrigerator covered with plastic wrap or aluminum foil for up to 5 days for best results.
Recipe Notes
- My family loved when I added a few slices of crispy bacon to the sandwiches for the last 5 minutes of baking to create delicious bacon cheeseburger sliders.
- Use a sharp or serrated knife to cut the hamburger sliders in the pan before removing them.
- Sweet Hawaiian rolls or small dinner rolls work great for this recipe.
- Store leftovers in an airtight container in the fridge for up to 4 days.
- Tuck a few pickle slices under the top buns just before serving!
- Sesame seeds sprinkled over the top of the top slider buns before baking adds extra deliciousness.
- Dill pickles make the perfect side for these loose meat sandwiches.
- Dry onion soup mix mixed into the meat mixture packs a yummy punch.
- Spread condiments onto the rolls as you desire! Mayo, mustard, ketchup (hey, no judgment) are all options!
What To Serve With Sliders at a Party
Sliders are the ultimate food for your party spread! But what do you serve alongside this tasty finger food? Read on for 23 perfect ideas about what to serve with sliders at a party, including mashed potatoes, potato salad and so much more!
How To Keep Sliders Warm for a Party
In order to keep sliders warm for a party, place them in a slow cooker on the “keep warm” setting. You can also place them in a baking pan covered with foil and place in the oven set to 200 degrees F.
How To Store Leftovers
If you have slider leftovers, place in an airtight container and store in the fridge for up to 5 days for best results. Freeze them for up to 4 months to extend the shelf life.

Slider vs Burger
The main difference between sliders and burgers is their size. Sliders are typically smaller, contain fewer ingredients. They’re like mini burgers, easier and quicker to eat (they “slide” right down), making them the perfect party food or appetizer.
Things To Make With Ground Beef
Make dinner and affordable with this delicious list of affordable dinner recipes using ground beef. Ground beef does not need to be boring! Including the following recipes and more:
How To Add Flavor to Ground Beef Recipes
Flavor in any recipe is important, but what do you do if you find yourself with a bland dish that has already been cooked? Check out this post for some tips about how to enhance the flavor in any type of food or dish!
More Slider Recipes
Will you help add value to Pip and Ebby?
If you make this recipe and love it, stop back and give it a 5-star rating ⭐️⭐️⭐️⭐️⭐️ and leave a comment. THANK YOU!

Easy Cheesy Ground Beef Sliders
Ingredients
- 1 lb ground beef
- 1 yellow onion chopped
- 3 cloves garlic minced
- Salt and pepper to taste
- 1 tsp cumin
- 1 tsp paprika
- 14.5 oz diced tomatoes
- 12 slices cheddar cheese
- 12 dinner rolls or Hawaiian sweet rolls, halved
GLAZE
- 8 tbsp butter melted
- 2 tbsp brown sugar
- 1 tbsp Worcestershire sauce
Instructions
- Preheat oven to 350 degrees F. Coat a 9×13 baking dish with cooking spray and set aside. In a large skillet, cook the ground beef over medium heat until no longer pink.
- Add the onion, garlic, salt, pepper, cumin, paprika and diced tomatoes to the skillet. Cook for an additional 3-4 minutes, or until onion and garlic is fragrant and soft. Remove from heat.
- Line the bottom of the prepared baking dish with them bottom halves of the rolls. Top with the cheddar cheese slices, the beef mixture and the tops of the rolls.
- In a small bowl, combine the glaze ingredients: melted butter, brown sugar and Worcestershire sauce. Mix well and pour evenly over the sandwiches. Bake in the preheated oven for 30 minutes. Serve immediately!
Notes
- My family loved when I added a few slices of crispy bacon to the sandwiches for the last 5 minutes of baking to create delicious bacon cheeseburger sliders.
- Use a sharp or serrated knife to cut the hamburger sliders in the pan before removing them.
- Sweet Hawaiian rolls or small dinner rolls work great for this recipe.
- Store leftovers in an airtight container in the fridge for up to 4 days.
- Tuck a few pickle slices under the top buns just before serving!
- Sesame seeds sprinkled over the top of the top slider buns before baking adds extra deliciousness.
- Dill pickles make the perfect side for these loose meat sandwiches.
- Dry onion soup mix mixed into the meat mixture packs a yummy punch.
- Spread condiments onto the rolls as you desire! Mayo, mustard, ketchup (hey, no judgment) are all options!
really good flavor but top bun gets hard 30 minutes in oven @350
I’ll turn oven temp down next time.
Throw a sheet of aluminum foil in for the first half of the baking and you can avoid this if you’re experiencing it. Thanks for sharing, Kelly!
Gorgeous and love those sliders, perfect for an afternoon meal.
I visited you via SLOW COOKER – WEEKEND POTLUCK #603
I linked up this week with = Roasted Butternut Salad Vegan Pearl Couscous and Vegan Caesar Dressing in 5 minutes
Come and join us at SeniorSalonPitStop. You will find the linkup information under BLOGGING.
I can feel the love and smell the cooking on your lovely website. Kudos to you.
The only drawback of this dish is that I would eat the whole pan by myself! 🙂